

Part 2 of the One Room Challenge reveal is finally here: a gallery wall in the upstairs hallway!
If you’ve been following along, you know that I started ORC by adding picture frame moulding to the lower third of the walls in the hallway, then shifted over to the reading nook while I worked with a designer to design our custom gallery wall.

Our upstairs hallways have always been big white walls. I’ve been hesitant to add anything because I didn’t have a plan. The hallways are open and visible to every space in the home and I wanted to be certain I had a clear vision on what I wanted there because I didn’t want to hate looking at it every day.
I knew a gallery wall would be the perfect solution to fill this large space, and after I designed the reading nook, the pieces started to click a lot easier for me. I’ll share more about how the gallery wall came together in a separate post because this post is all about the reveal!
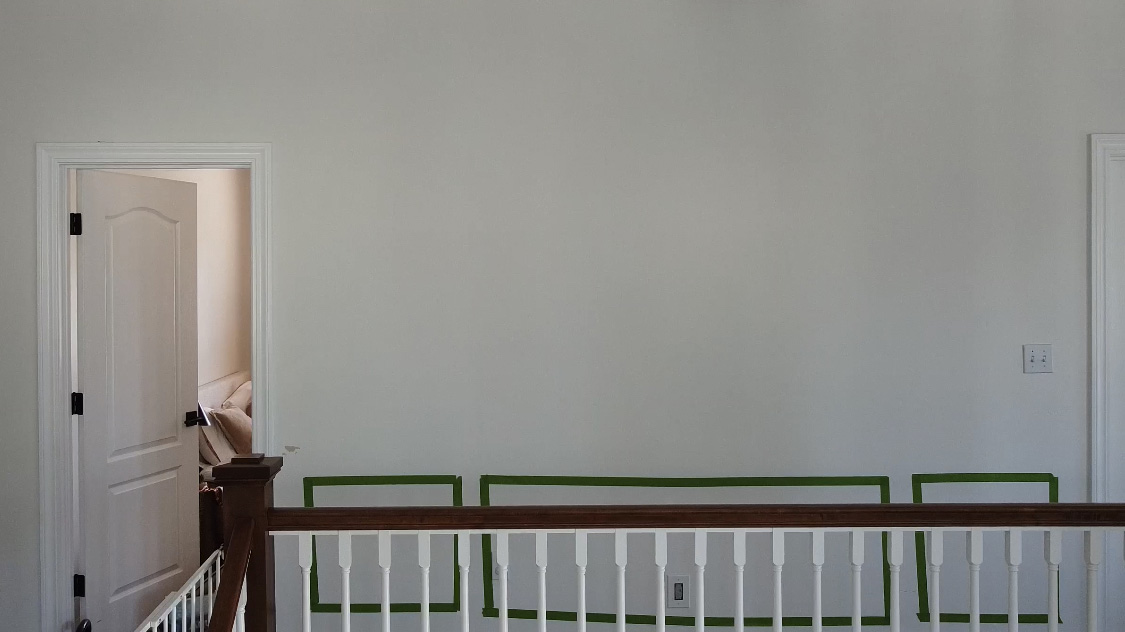
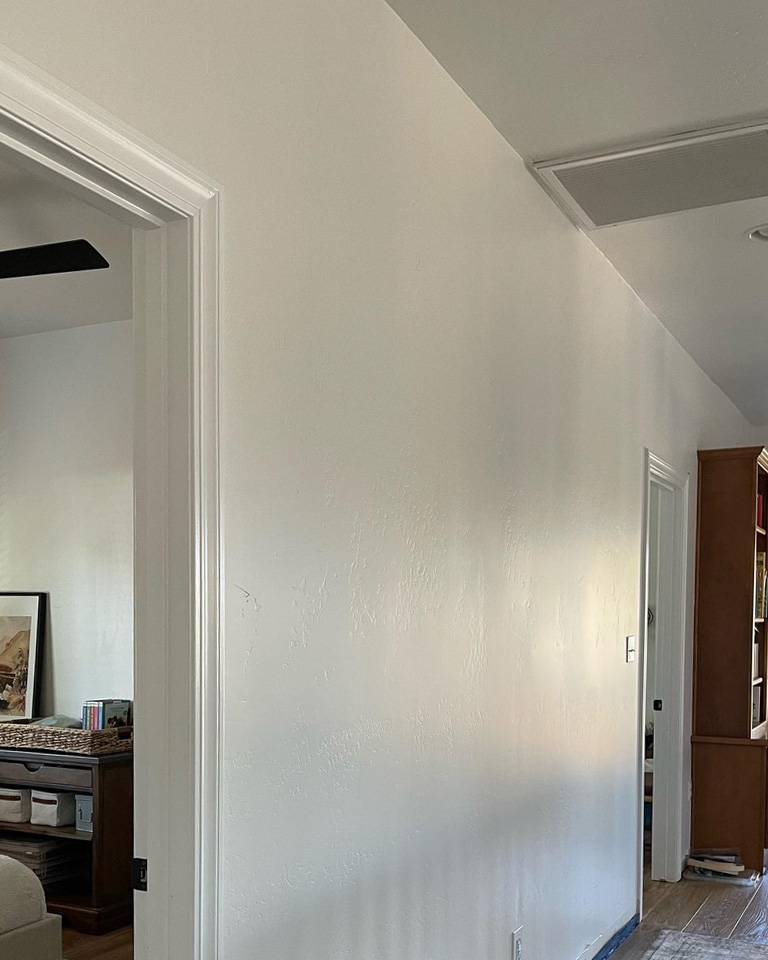
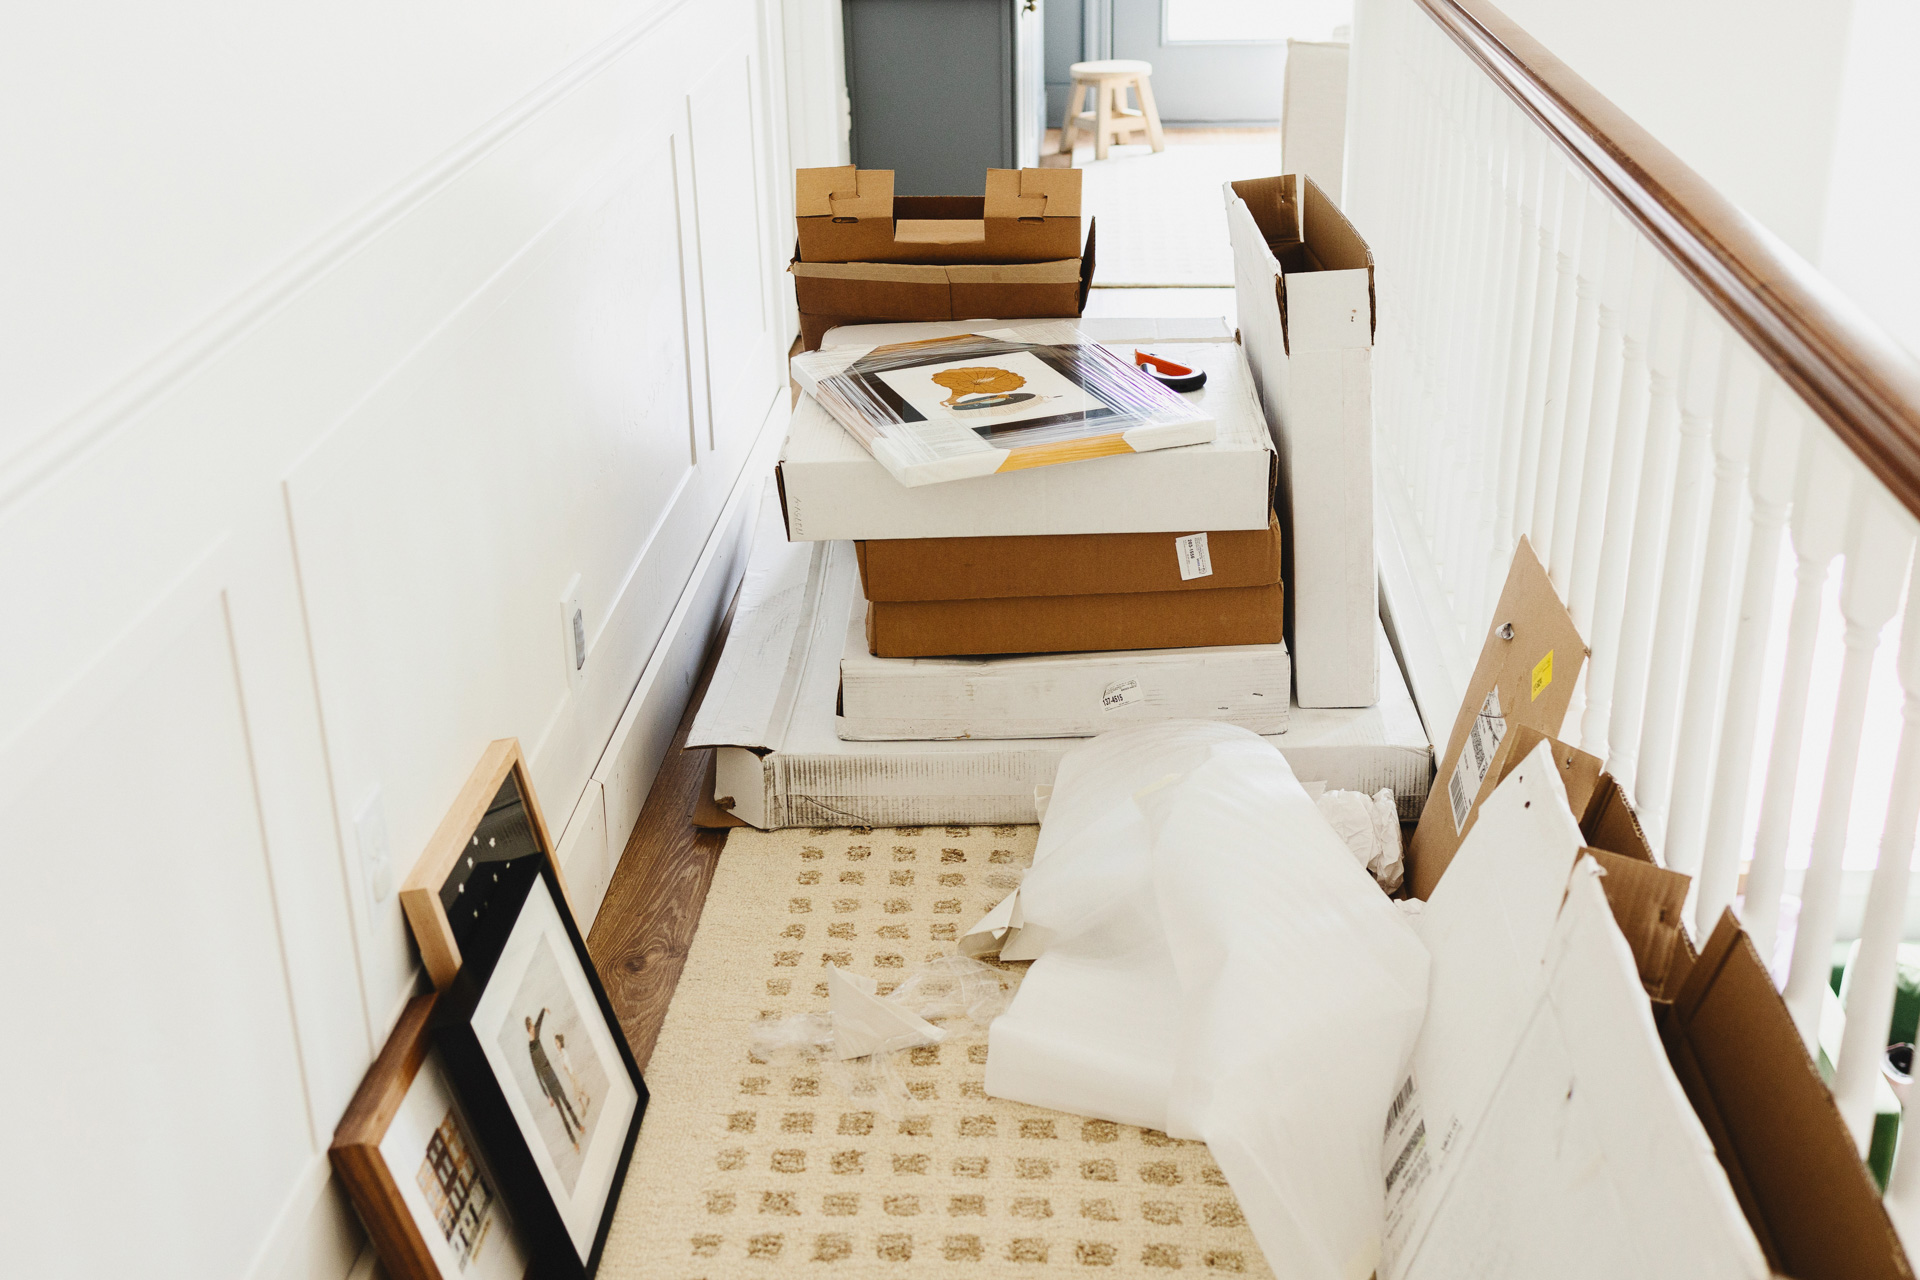
Before we get to the pretty images, let’s remember where we started. Here’s what the blank wall and hallway looked like before:
And here’s the after!
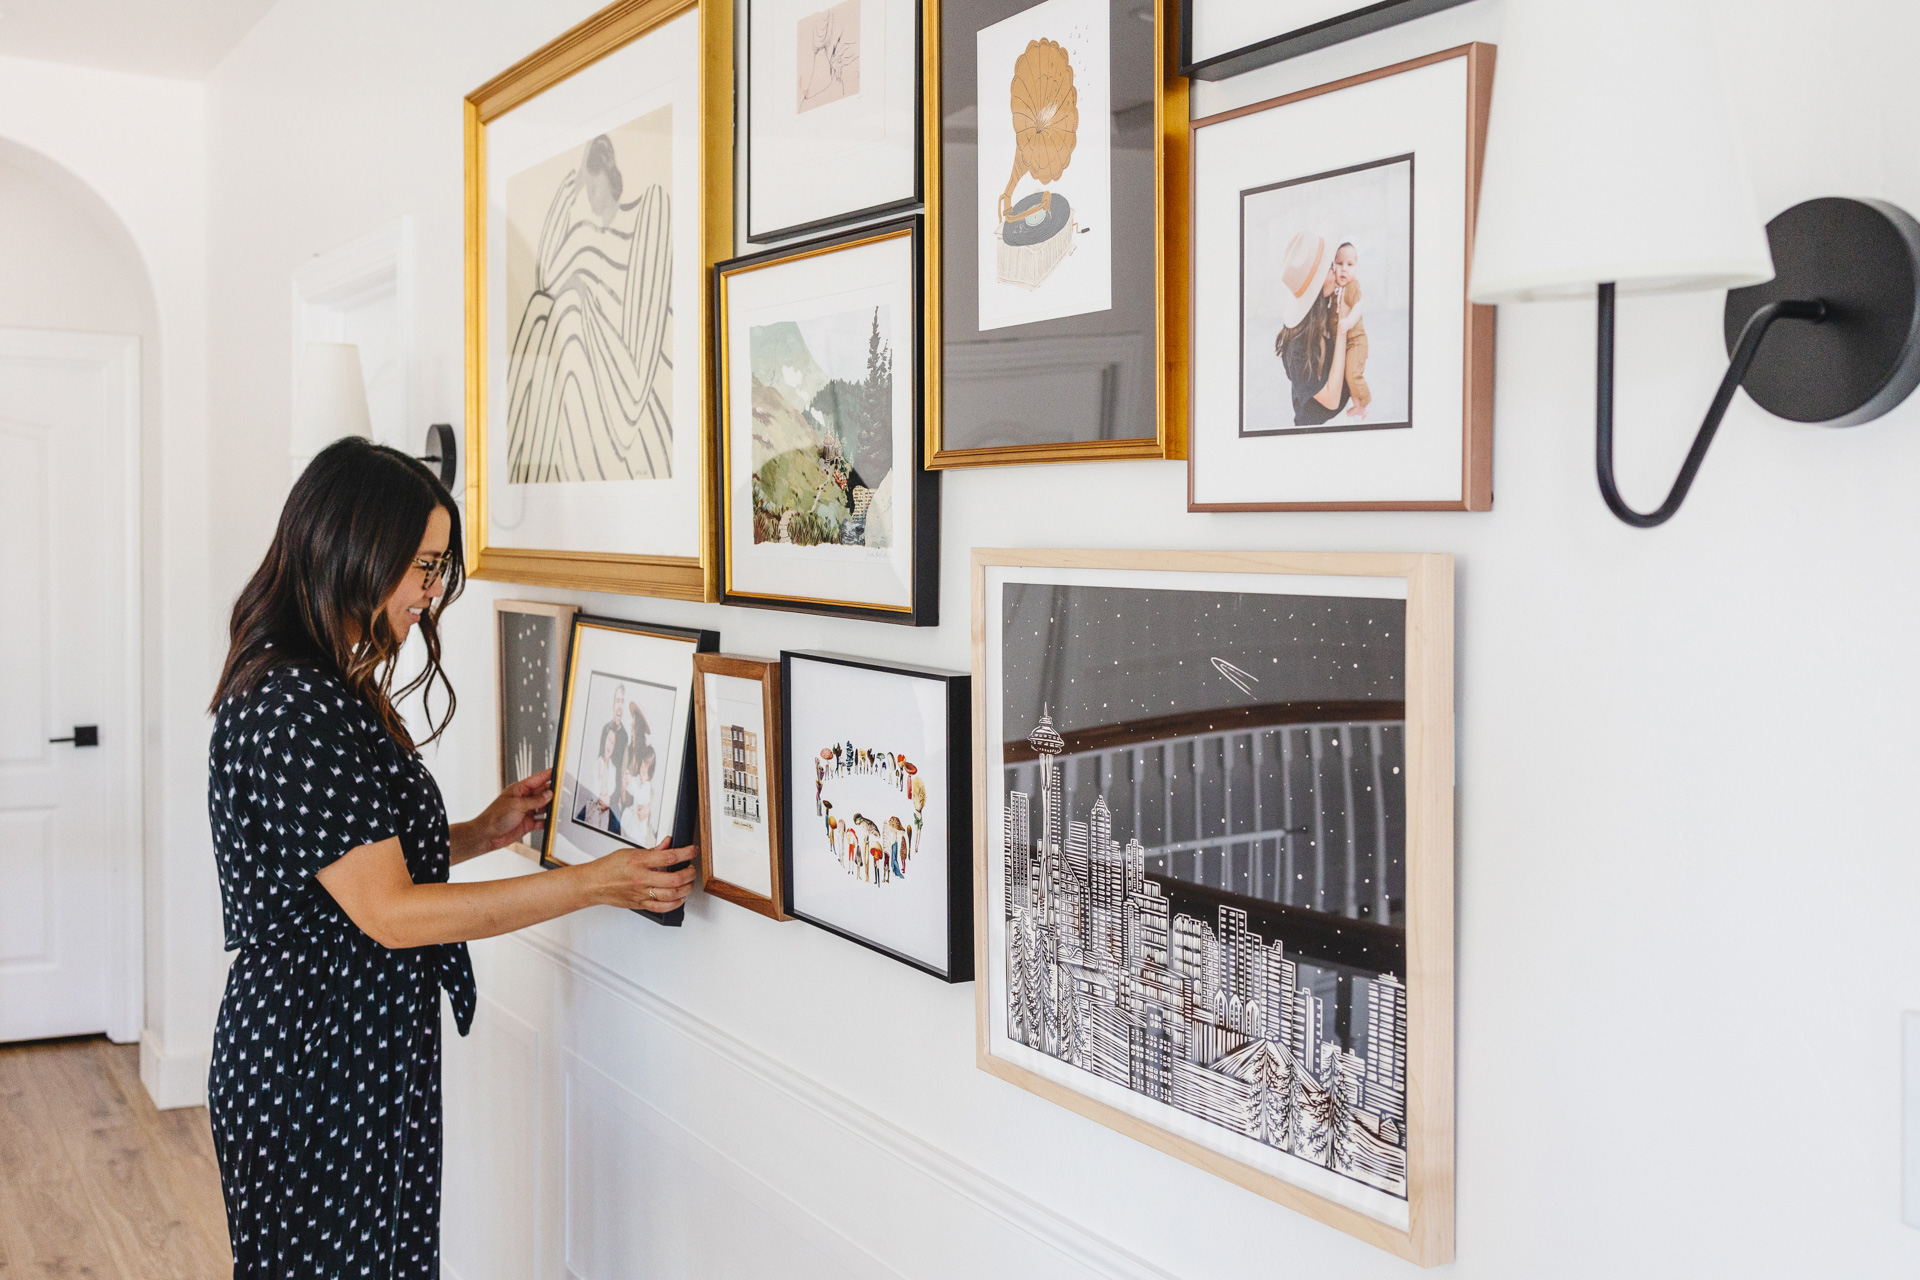
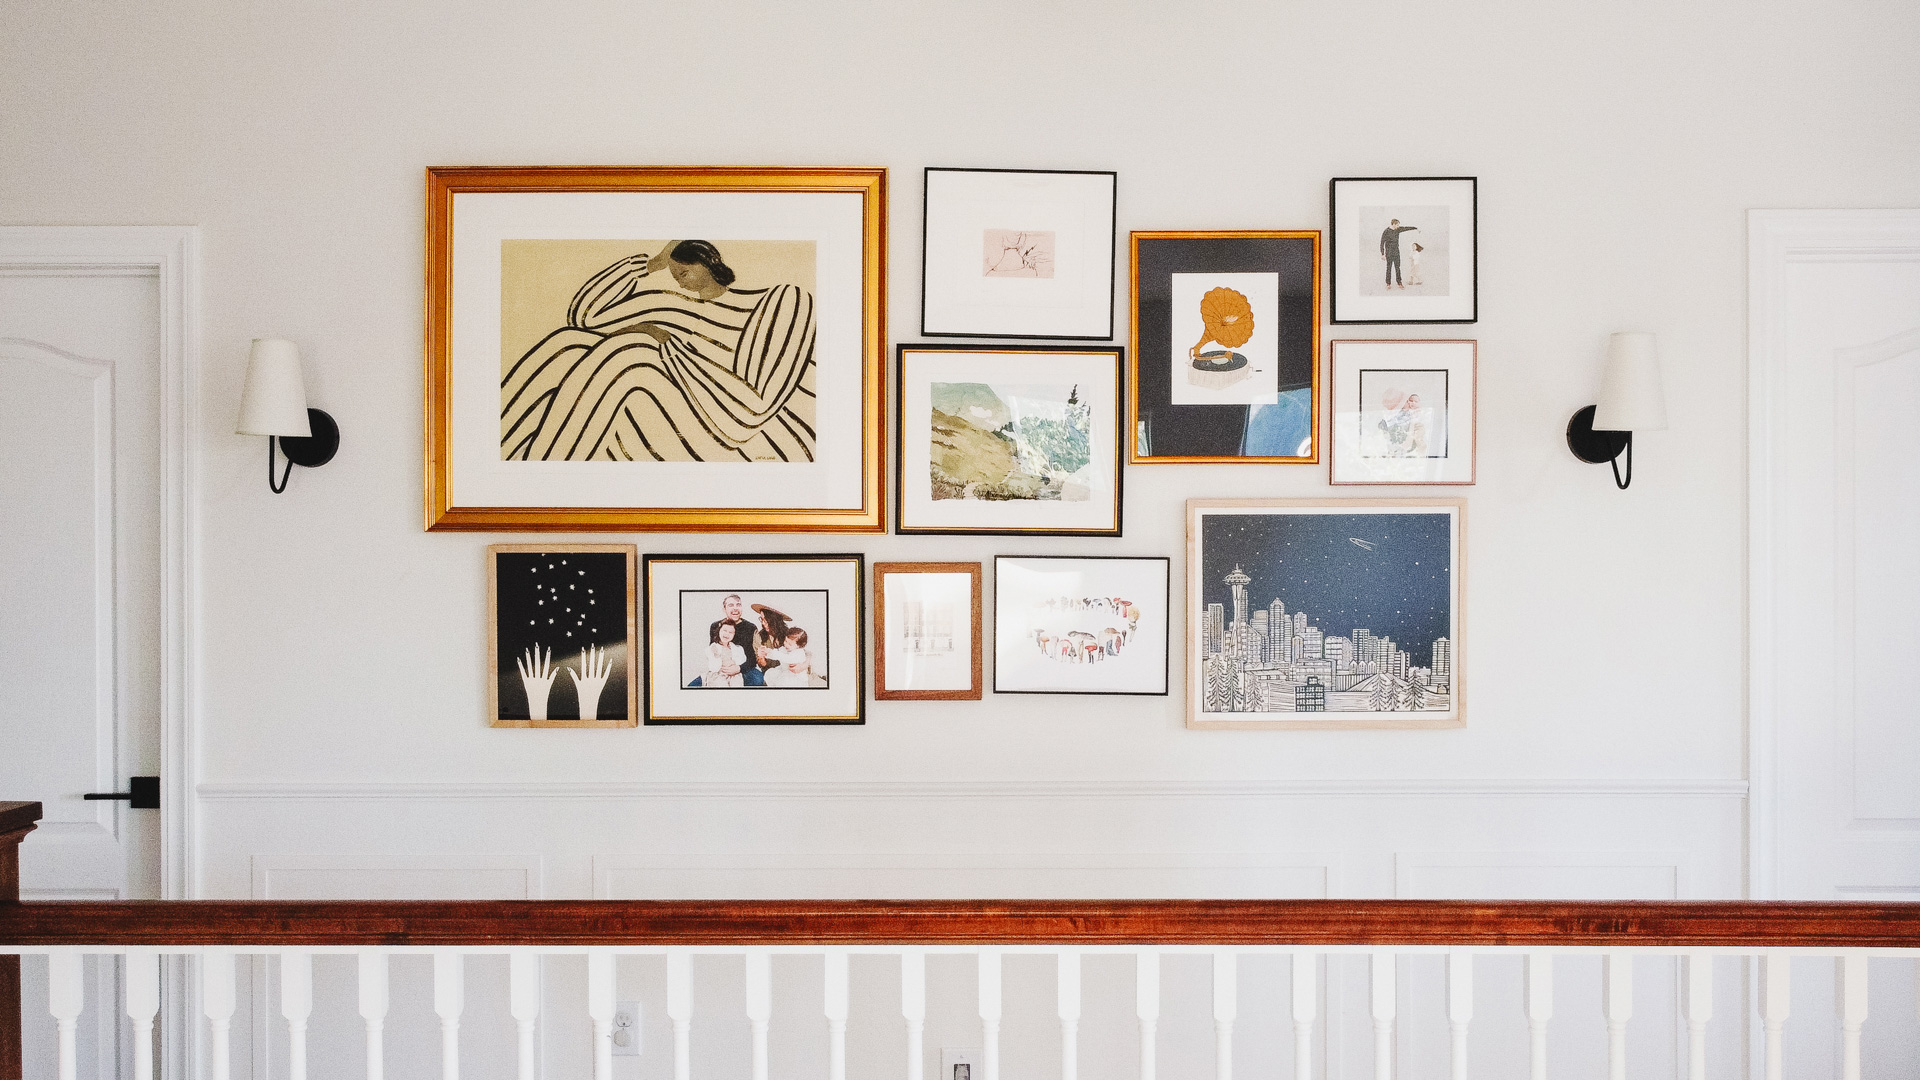
Simply Framed kindly partnered* with me for the ORC and helped me create this beautiful wall of art and family photos. I love the combo.
Working with Simply Framed was a really enjoyable process. My designer and I met online so I could show her the space I was working with and talk through my ideas on what I wanted to see.
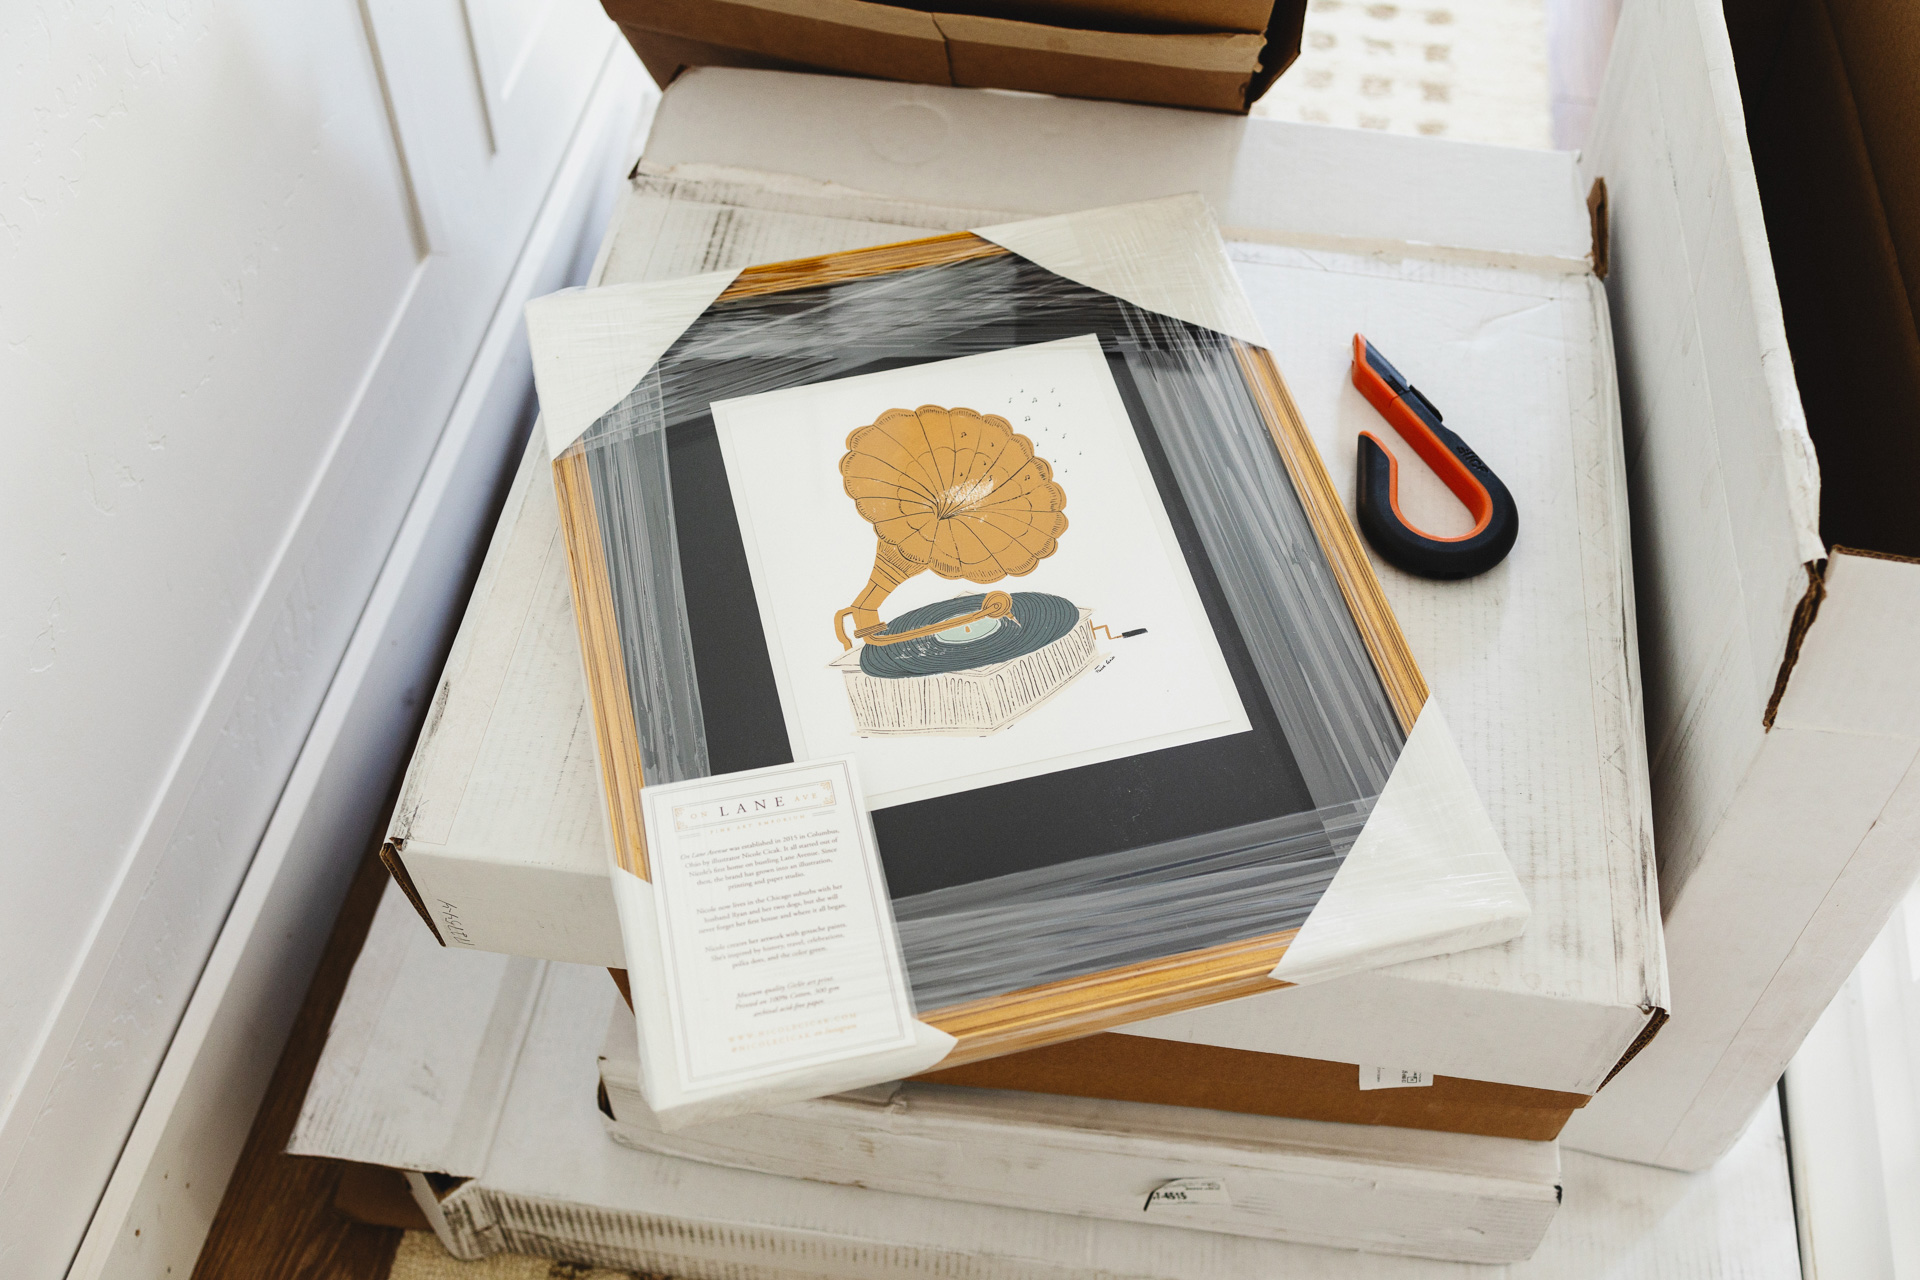
All of my frames were shipped individually and packaged so well. Each frame came with a package of hardware, too.
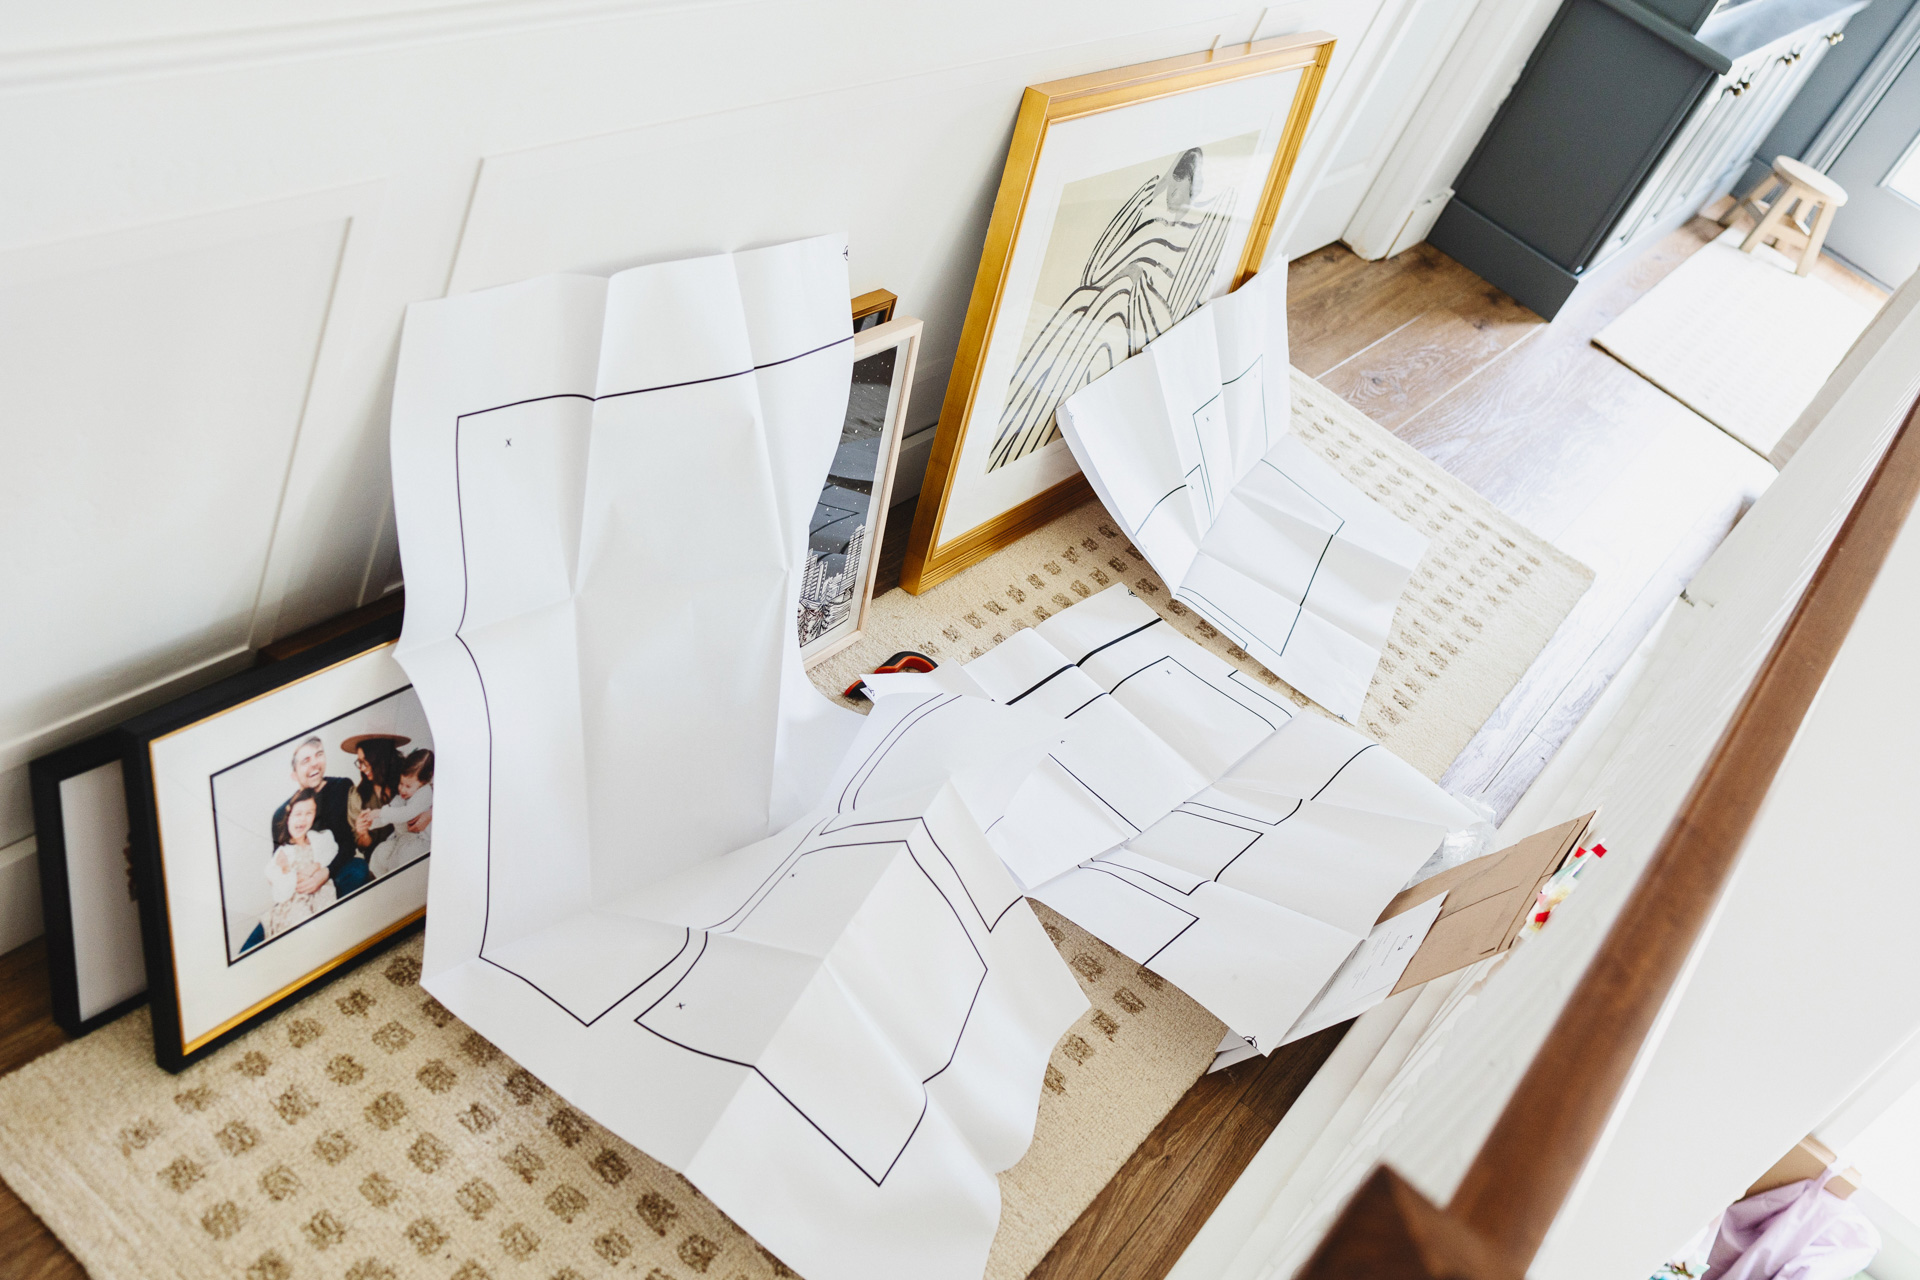
This is the template for the gallery wall that was sent to me. I hung it up, made sure it was level, and hammered the nails into the “x” spots. This made it super easy to make sure all of the spacing was correct without having to do a lot of trial and error.

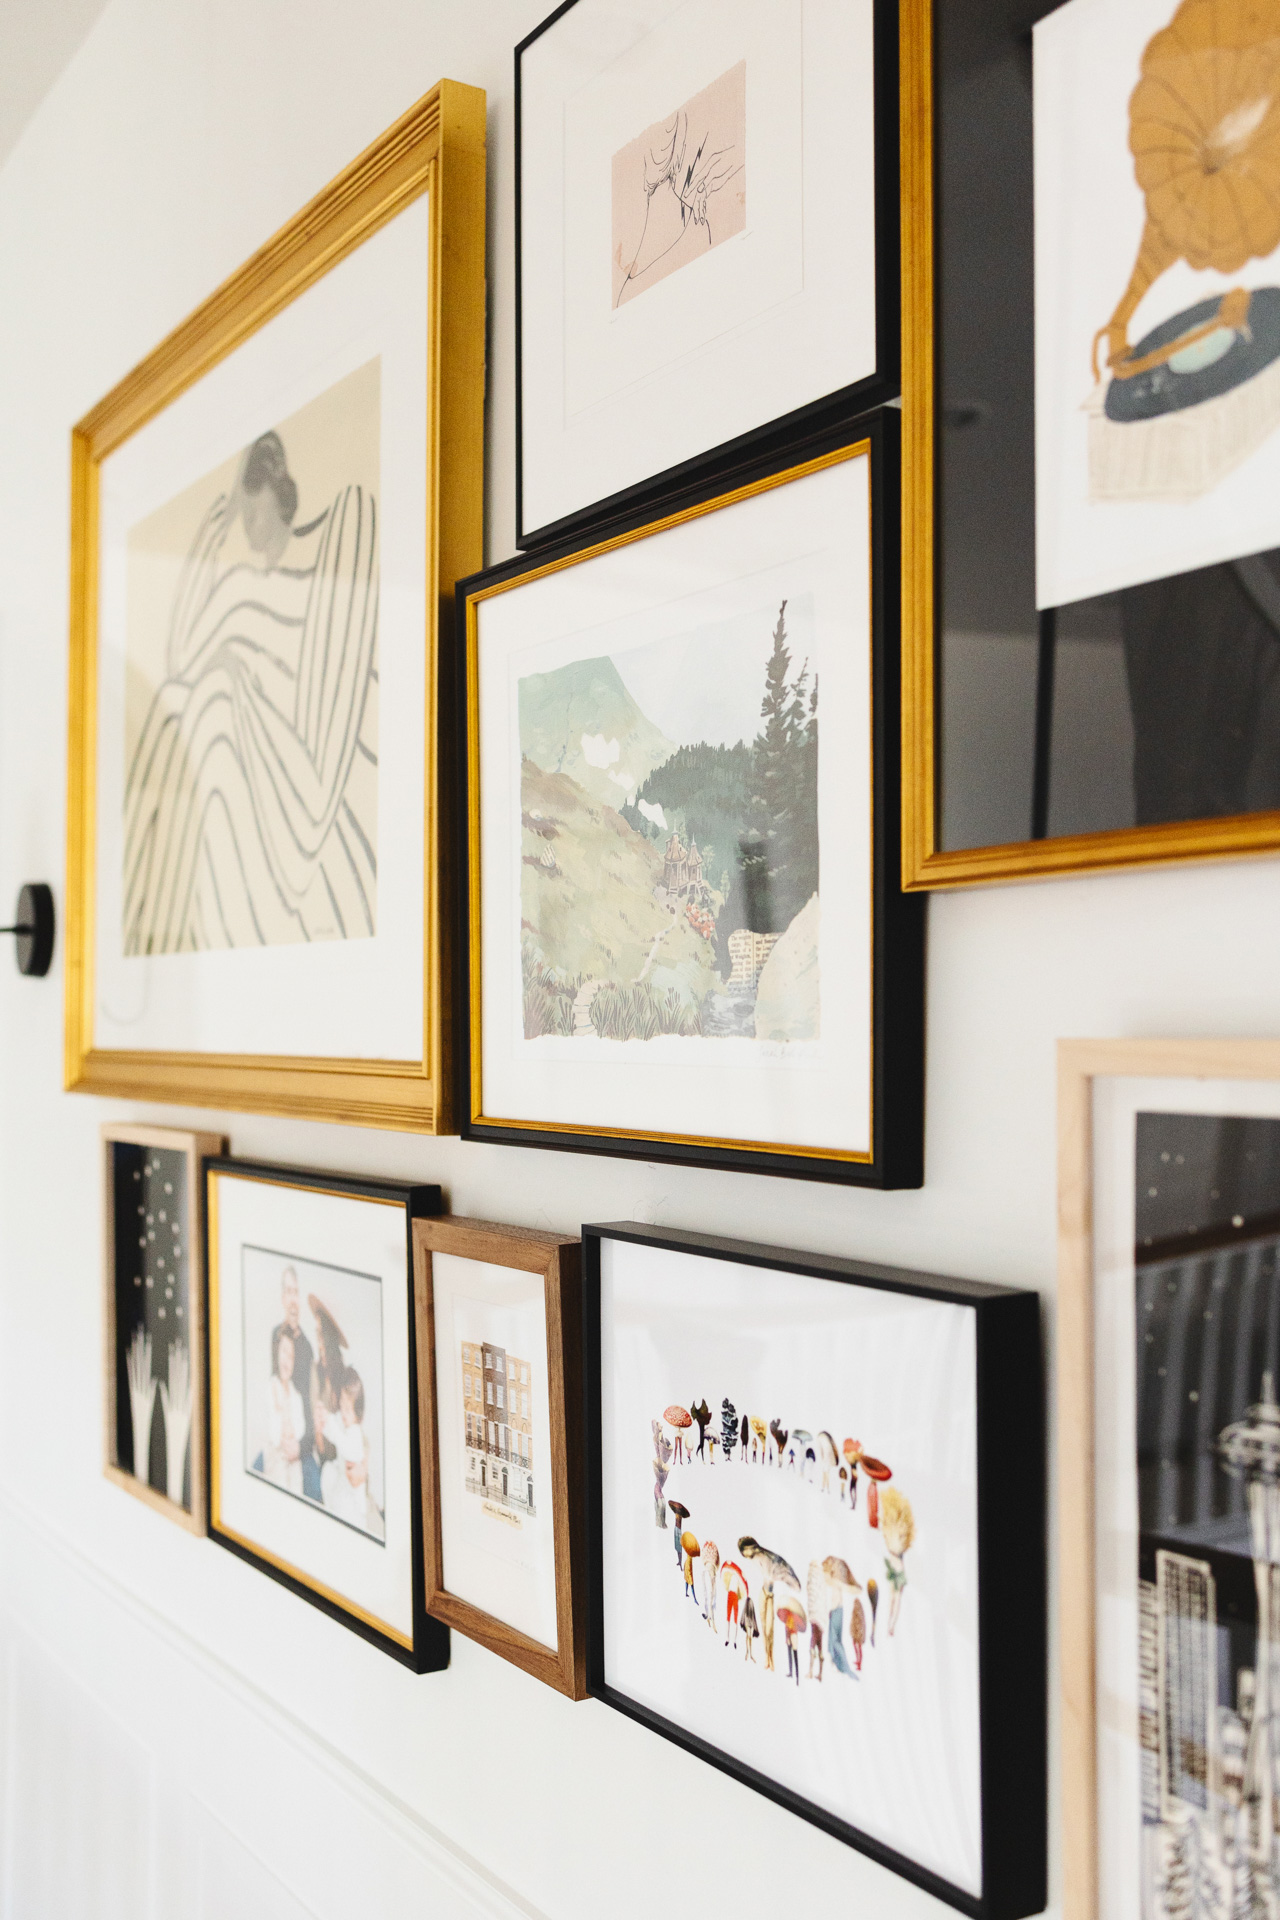
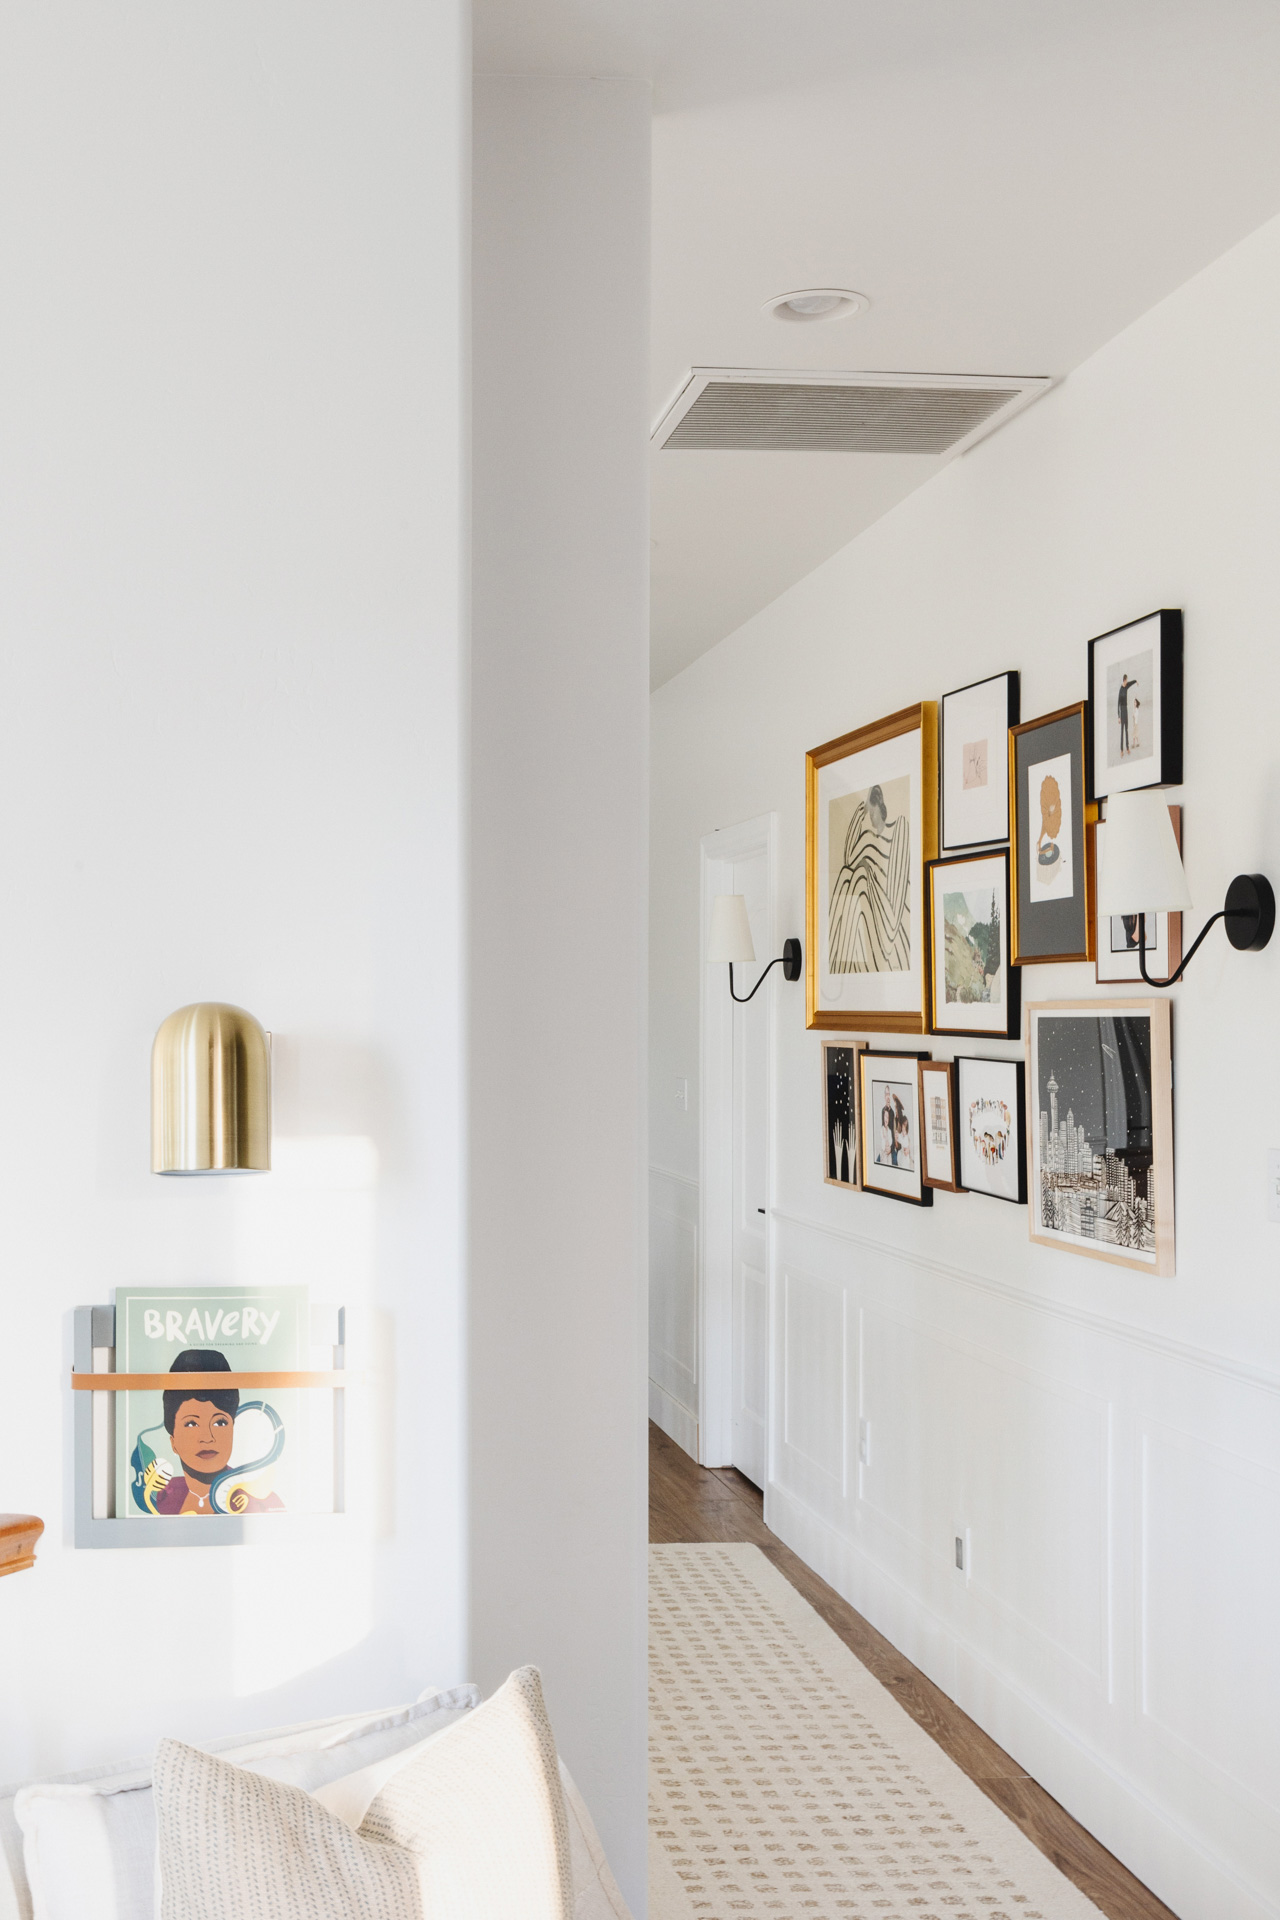
More details to come on the art selection and how I curated everything, but gosh, it just adds so much character to the hallway. And then the reading nook view at the end? The best little tucked away secret.
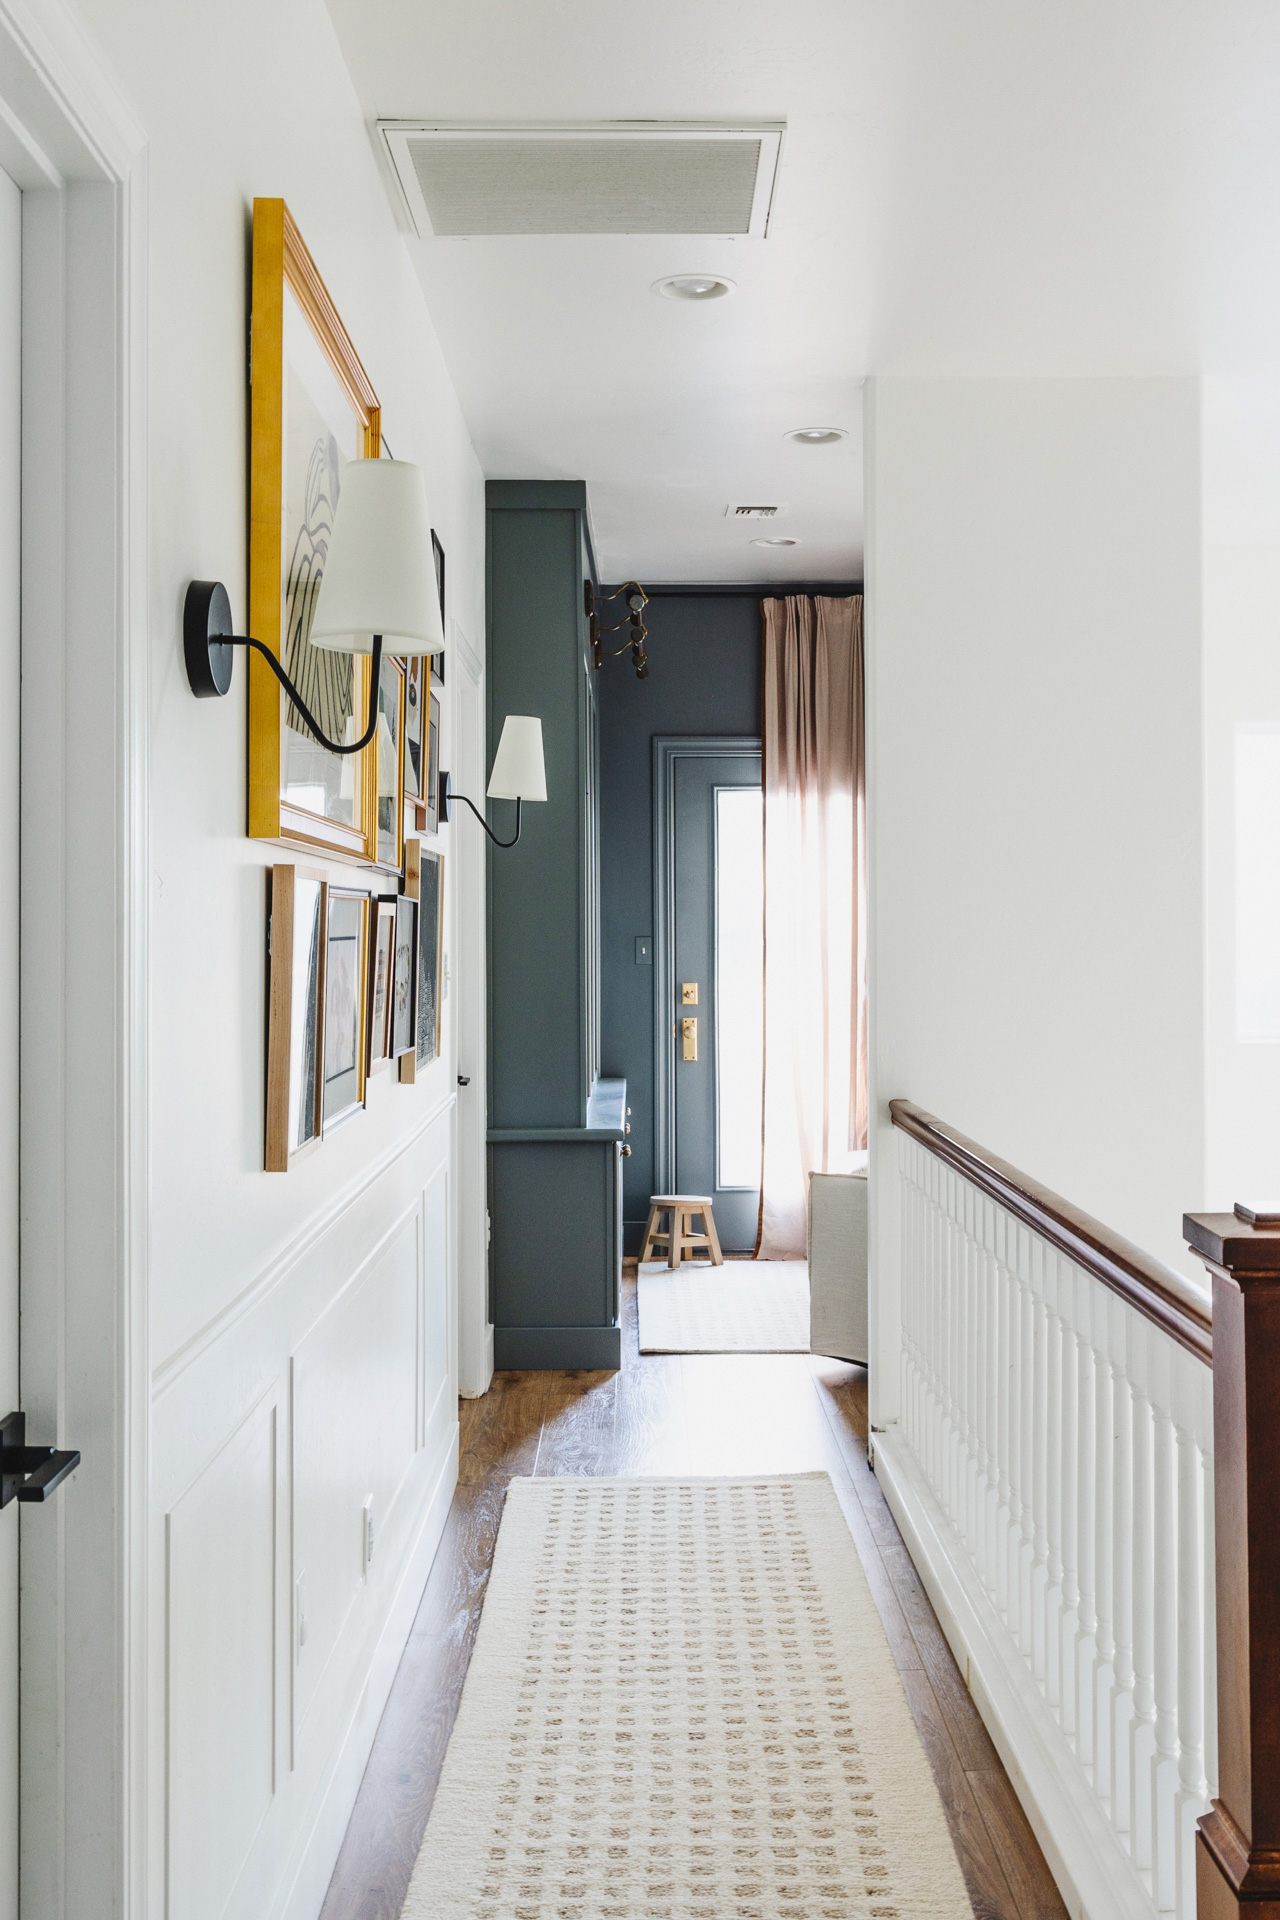
I found these sconces on Amazon, two for under $70. The shape complements the picture light sconces on the built-ins and I love the shape of the tapered shade. Keep in mind they use a e12 bulb, in case you were planning to do the magic bulb/puck light trick like me. Another story for another day. Let’s just say that they don’t currently light up. Ha!
I used the same Loloi rug in a runner length to keep the two spaces cohesive.
I never understood the layered lighting rule until I started hanging sconces/lighting for this project. And now I. get. it. It truly elevates the space and provides multiple light sources depending on your needs. I’ve had this gold sconce tucked away for a couple of years (originally purchased for the kitchen) and finally found a better place to use it. Sadly, it’s no longer available, but I’ll try to round up some similar ones for you.
One more before/after for good measure.
Catch up on previous posts here:
- Week 1: ORC Reading Nook Plans
- Week 2: Picture Frame Moulding
- Week 3: Convert a Hardwire Light to Plug-in
- Week 4+5: Paint and Picture Lights
- Week 6: Door Upgrade
Thank you to Apartment Therapy for hosting the One Room Challenge! To see all of the ORC reveals, click here.
Have I convinced you to add a gallery wall to your home yet? If you’d like to create a custom gallery wall of your own, click here to start the process and use code TIFFANYTCHENG for 10% off your order!
*Custom framing was gifted by Simply Framed. Using my referral link means I get a small commission on your order at no cost to you. It’s the same price whether you order from me or not. Thank you for supporting my blog!
Related Posts


Hi, I’m Tiffany!
I’m so glad you’re here. I hope you’ll see this space as a source of inspiration and encouragement to take the first step in making your home a place you want to be, wherever that may be.
You can expect to find approachable DIY projects and tutorials, opinions on home design, and all the fun stuff that comes up in-between.
