

It’s Week 3 of the One Room Challenge and this week’s update is this: I learned how to convert a hardwire picture light to a plug-in and did it three times!
I originally ordered these lights to be plug-in, but they did not arrive that way. The company sent me the supplies I needed to convert them and I watched a couple of YouTube videos and tutorials and gave it my best shot. Prior to this, I left the electrical work up to my husband or father-in-law (an electrician), but I can’t tell you how proud I was when I plugged the lights in and they turned on. That feeling is one of my favorite things about DIY.
Before I get too deep, I need to put a disclaimer here: I am not a certified electrician. If you choose to try this project, you do so at your own risk and I do not assume any responsibility for any mishaps that may occur. Please consult a professional if you have questions or concerns.
That said, I totally think you can do this. I’m going to link my reel here, but also outline the steps below for you.
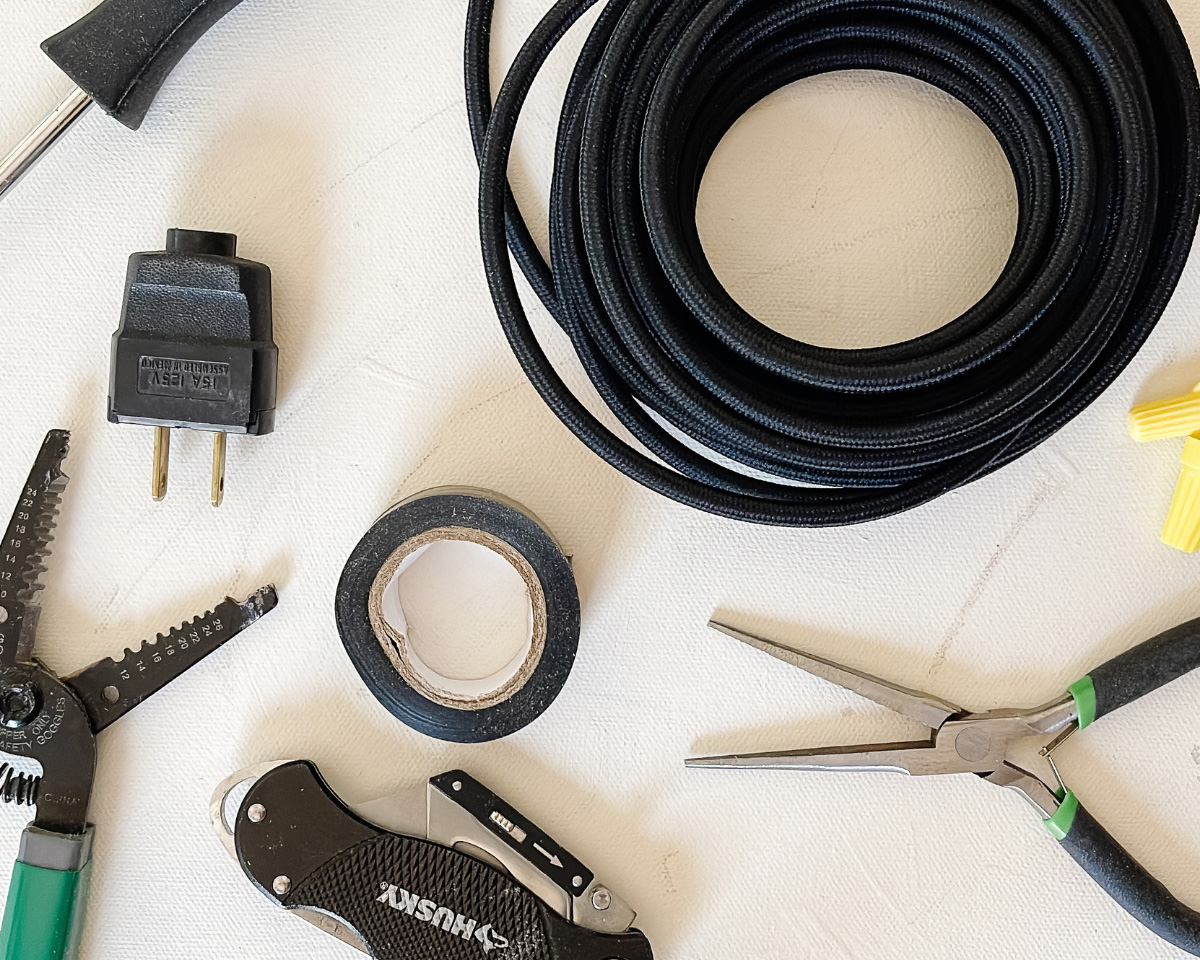
Supplies
- Light fixture (I purchased these)
- Cord
- Plug
- Utility knife
- Needle nose pliers
- Screwdriver
- Wire nuts
- Electrical tape
- Wire strippers (pliers)
- Smart power strip (optional)
View this post on Instagram
Steps
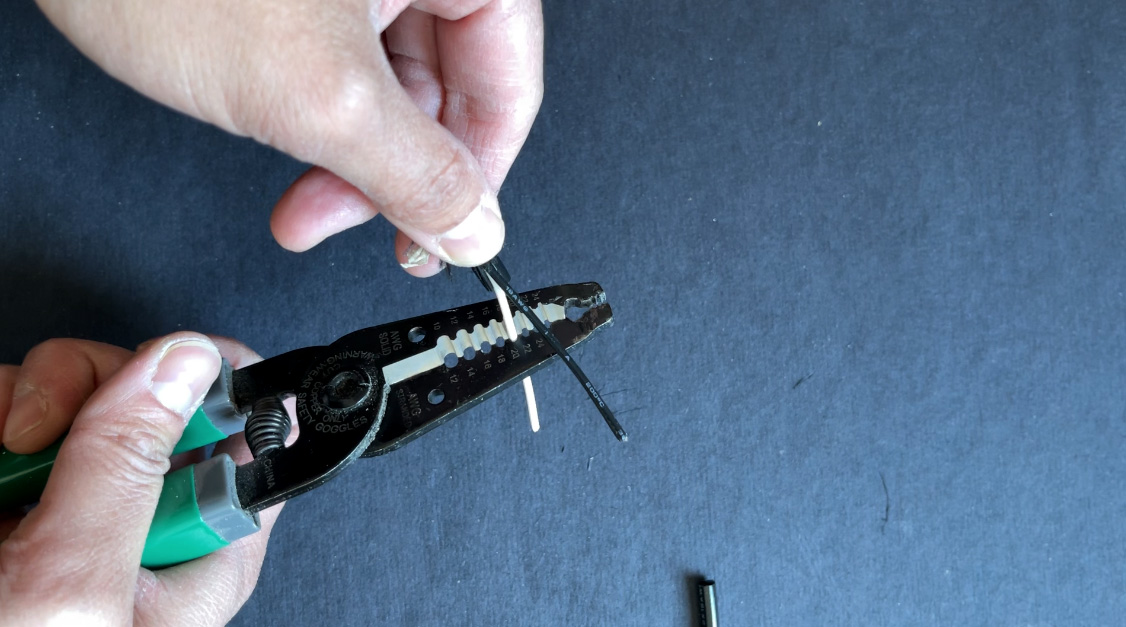
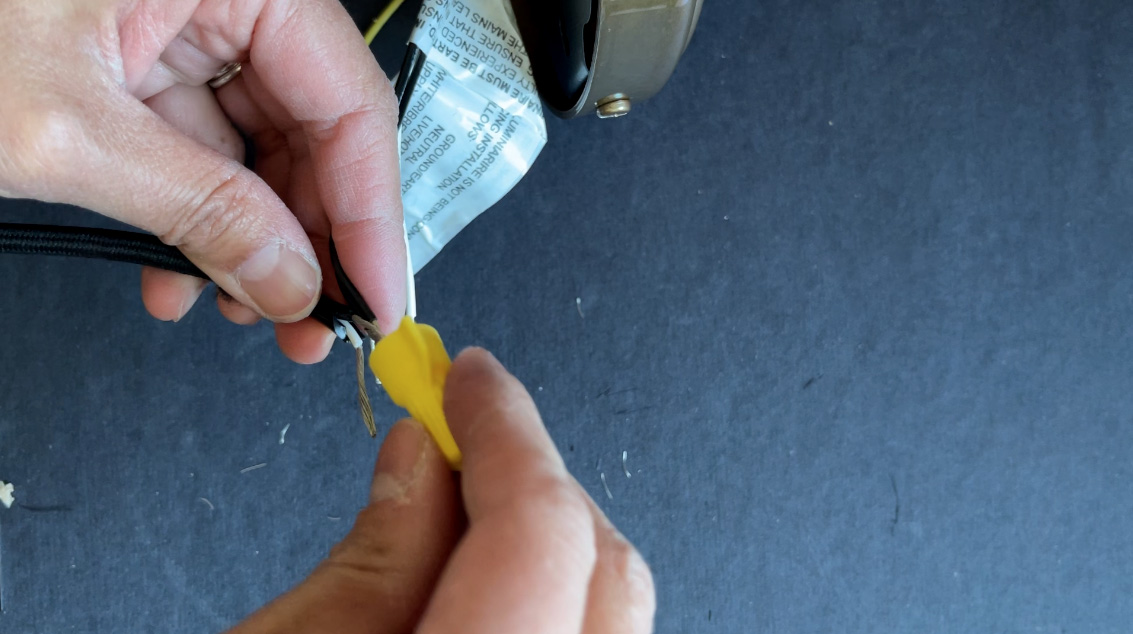
1. Using a utility knife, slice the cord open to find the wires inside (black and white). Use wire strippers to expose about 3/4” to 1” of the wires.
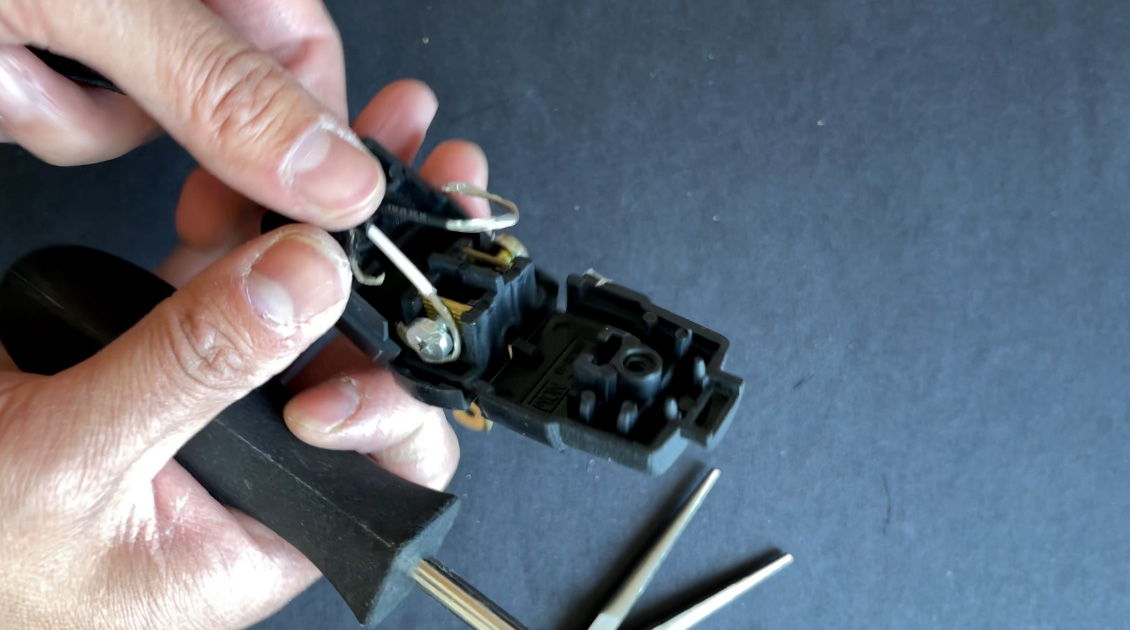
2. Open plug. Using needle nose pliers, curve the wires and secure to each screw inside the plug. Tighten screws (not too tight!), close plug and secure with screw again.
3. On the other side of the cord, expose 3/4” to 1” of the wires. Connect the black wires to the black wires on the back of the light fixture, white wires to white. Twist together, add wire nut, and secure with electrical tape. You can tuck the ground wire in the back of the fixture as you won’t be using it for this project.
4. Pop your light bulbs in and test.
Like I mentioned, I am not an electrician, but this is a fairly simple and straightforward process that will allow you to add beautiful lighting to your spaces without power.
Thank you to Apartment Therapy for hosting the One Room Challenge. To see the progress of other ORC participants, click here.
Catch up on previous posts here:
- Week 1: ORC Reading Nook Plans
- Week 2: Picture Frame Moulding
- Week 3: Convert a Hardwire Light to Plug-in
- Week 4+5: Paint and Picture Lights
Shop this Project:

*Disclosure: This post may contain affiliate links. If you purchase a product, I may earn a small commission at no additional cost to you. Thank you for supporting my blog.
2 Comments
Leave A Comment
Related Posts


Hi, I’m Tiffany!
I’m so glad you’re here. I hope you’ll see this space as a source of inspiration and encouragement to take the first step in making your home a place you want to be, wherever that may be.
You can expect to find approachable DIY projects and tutorials, opinions on home design, and all the fun stuff that comes up in-between.

I want to do this in a spot that has no hard wiring, great job and thanks for posting. .
Glad you found it helpful, Lorraine! Thanks for reading!