
After replacing our tile and carpet on the main level of our house and watching our contractors demo the tile, I knew that wasn’t in the cards for our guest bathroom right now. I’ve been watching power DIYers @angelarosehome, @makingprettyspaces, and @helmick_hacienda (before she moved) transform their bathrooms all by simply painting their tile floors and thought, I can do that! Our guest bathroom was a small enough space that I felt comfortable taking a risk and trying it out.
I teamed up with Cutting Edge Stencils for this project. If you are not familiar with Cutting Edge, they design and manufacture some really great stencils that look just like cement tiles. The stencils are well-made and flexible, which made it easy to do this project and transform our bathroom floors.
Supplies Checklist
- Krud Krutter pre-paint cleaner
- Kilz Premium Primer, 1 quart
- Base paint color, 1 quart, Behr Premium Plus Ultra, matte finish (I used Limousine Leather from Behr)
- Top paint color, 1 sample size, Behr Premium Plus Ultra, matte finish (I used non-tinted White from Behr)
- Varathane water-based polyurethane sealer in matte clear
- 3-4 paint rollers (3/8″ or 1/4″ nap) (I used 6″)
- Wooster angle brush
- Detail paint brush (I used a cheap paint brush from my daughter’s kit)
- Stencil brushes from Cutting Edge Stencils
- Tile stencil (x2) from Cutting Edge Stencils
- Painter’s tape
- Paint stick stirrers
- 220 grit sand paper
Tools
- Sander
- Respirator mask
- Vacuum or broom
- Microfiber cloths
Tile Stencil Tutorial
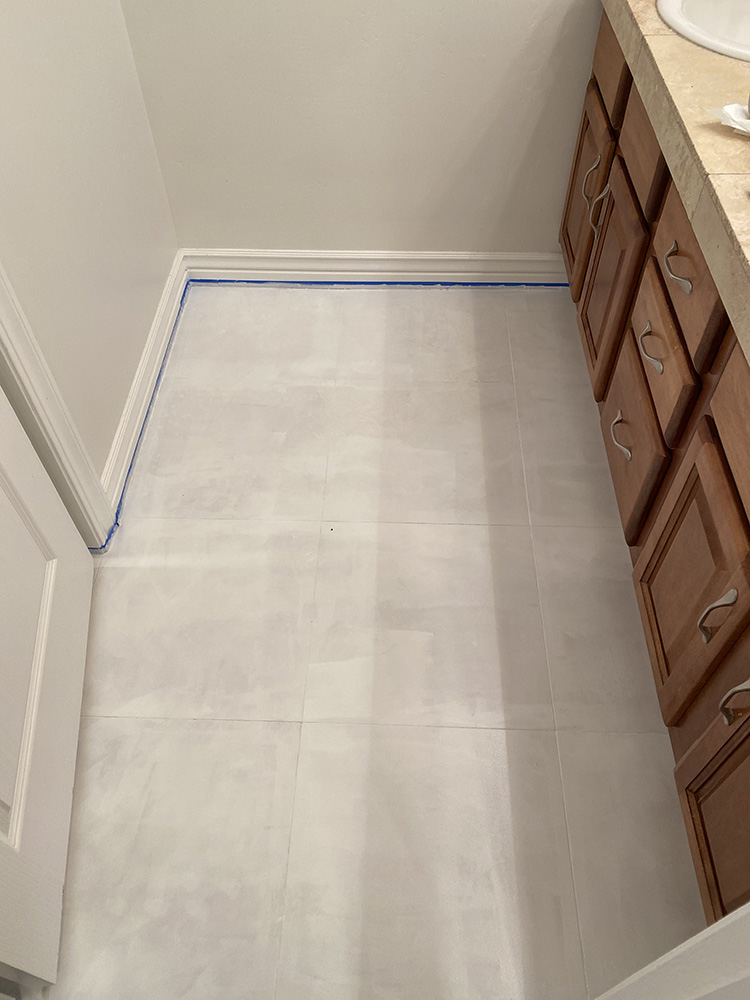
1. Sand and clean the floors, tape, and roll on primer
Prep work is extremely important for this project. Without proper adhesion, your tile paint might chip, so you want to make sure you clean the floors really well.
Before you clean, sand your floors down with 220 grit sandpaper. I used an orbital sander. Be sure to wear a respirator mask during this part. Grab a vacuum and clean up all of the dust before cleaning with the Krud Kutter.
Tape off any areas where you don’t want paint. Then roll on three coats of your primer with at least one hour between coats.
Pro tip: Tie your hair back or put a hair net on (seriously). I’m right around four months postpartum and my hair is falling out like crazy. As I was rolling primer and paint on, I would notice hairs on the floor that I had to scrape up so that it wouldn’t leave a mark or dry into the paint.
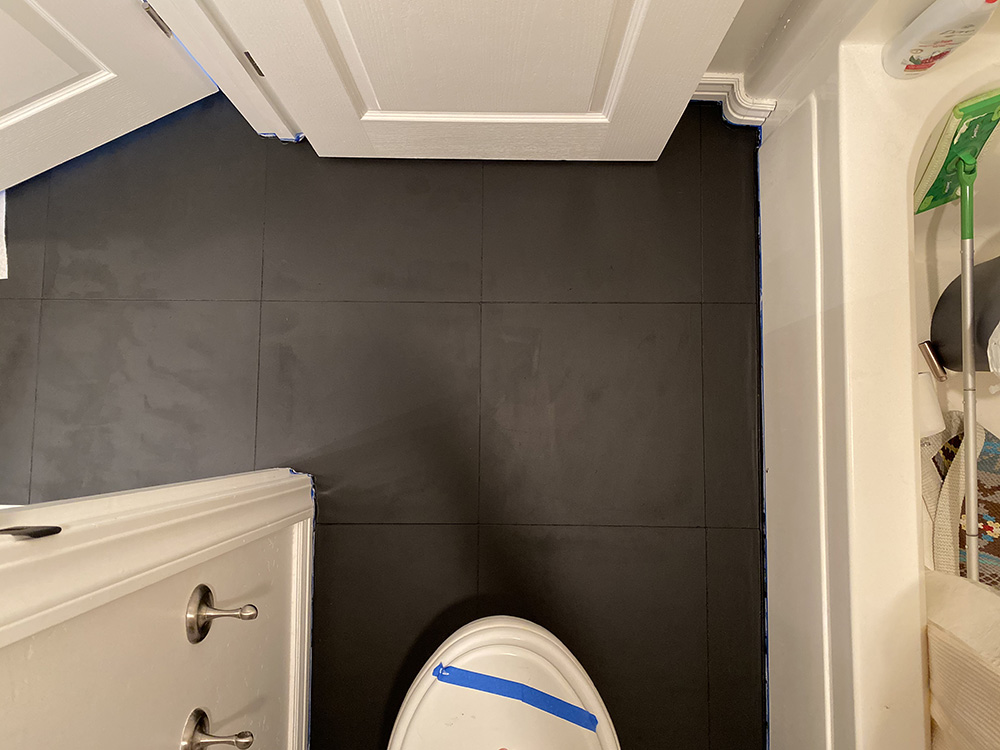
I started from inside behind the toilet and worked my way out.
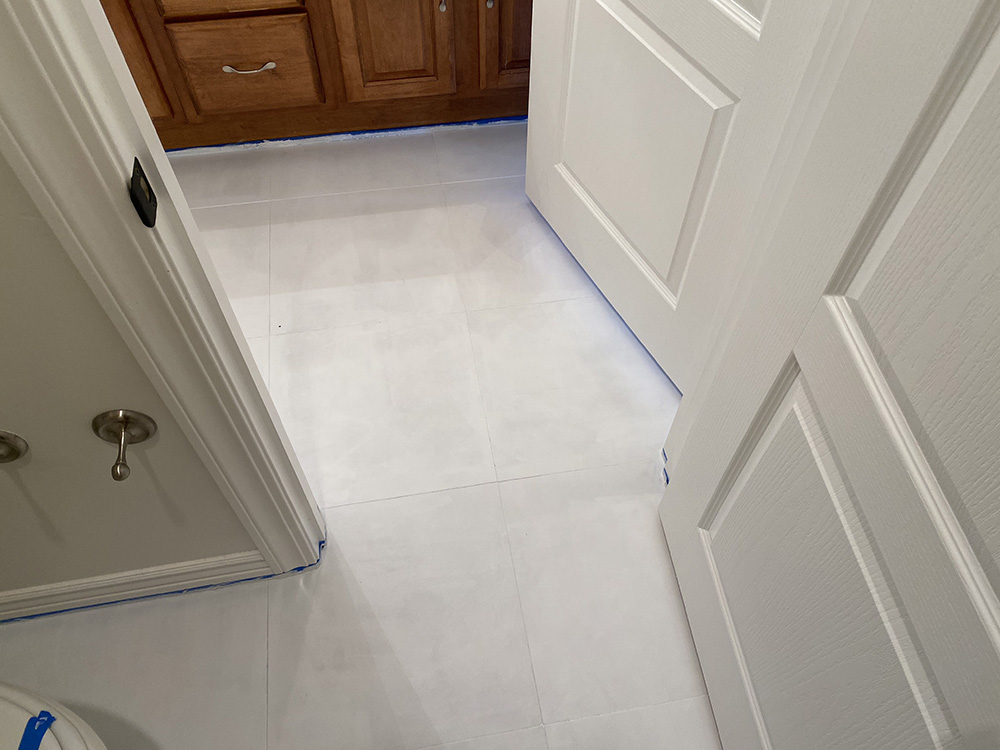
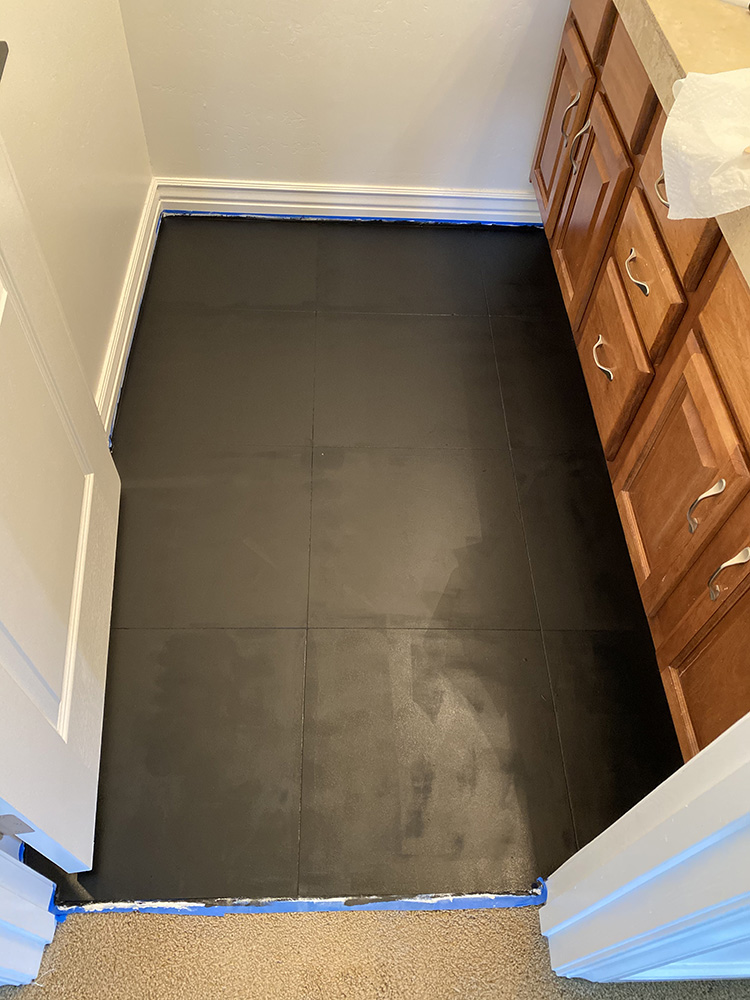
2. Roll on your base paint color
Now it’s time to roll your base paint color on. For this small space in my bathroom, I only purchased a quart of paint and I was able to roll on three coats and have paint leftover for touch ups. I waited about 2-3 hours between coats for the base layer.
3. Time to stencil
Now comes the fun part. Stenciling! This part of the project took the longest. Cutting Edge Stencils sent me two stencils and a pack of their stenciling brushes for this project. I picked the Nola stencil in extra large. My tiles were 18.5″ x 18.5″, but because I painted over the entire thing, it didn’t really matter. My choice to go extra large was because I didn’t want the floor to be too busy at the smaller scale.
Since I wasn’t covering an entire floor for the stenciled portion, I only picked up a sample of paint. This helped keep costs low. I did end up using nearly the entire bottle with stenciling and touch ups.
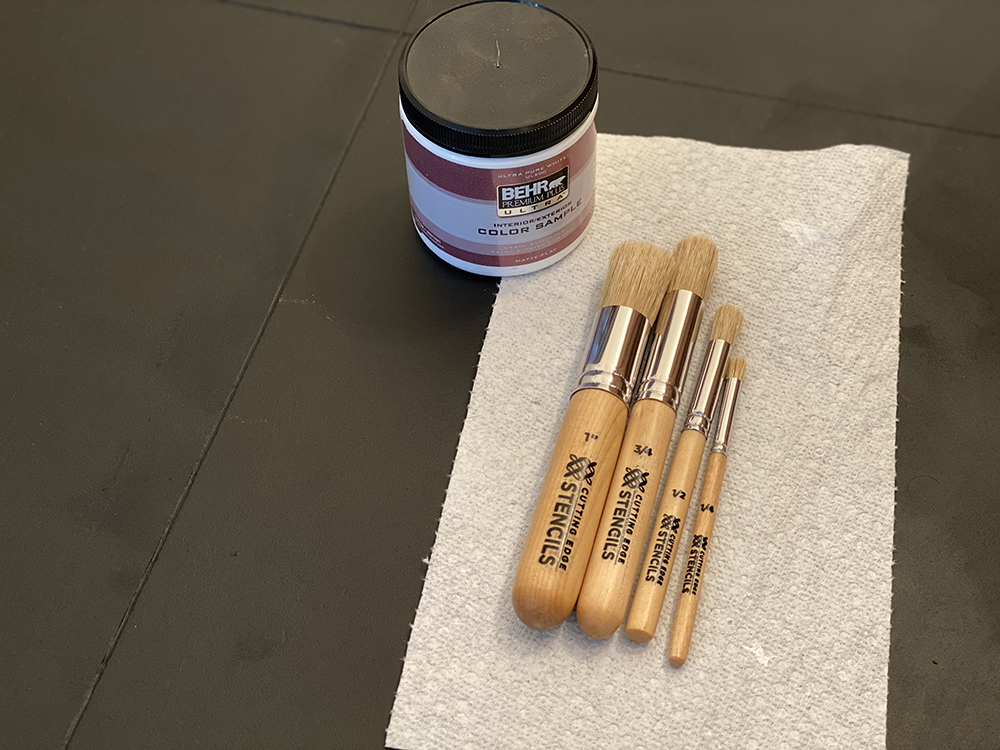
I ended up using two of the four brushes in the pack. I used the large one for dabbing on the stencil and the smallest brush for hand painting some of the lines. The brushes worked well. Keep an eye out for bristles that come loose. You’ll want to make sure you don’t paint them into the floor.
You’ll want to start in an area that you’ll see most often and make sure the entire stencil fits there. I dry fitted the stencils to see how it would look. Then put on a podcast and went to work!
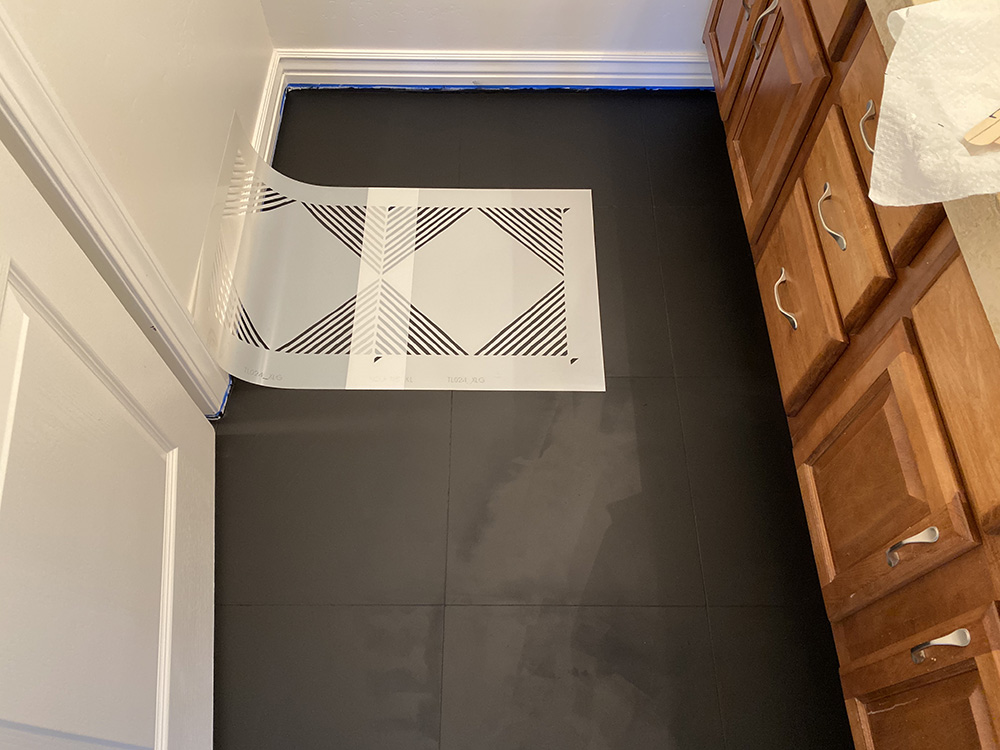
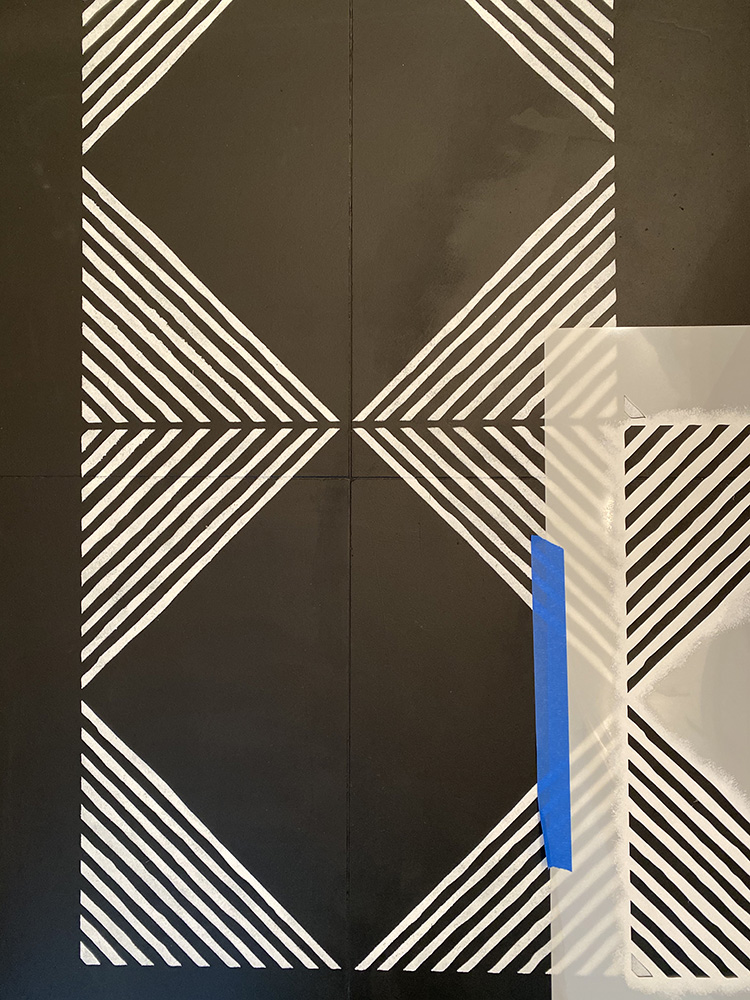
The stencil has registration marks that make repeating the pattern easy. The stencil also comes with a grout line if you wanted to paint those in or touch up the centers of your stencil.
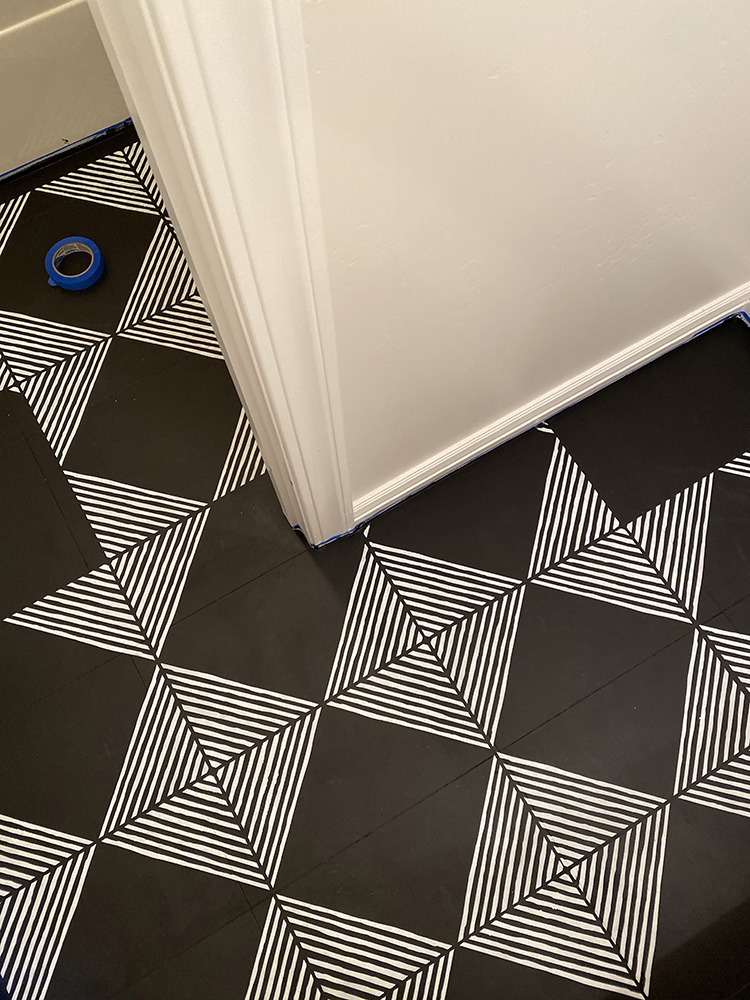
4. Details and Edging
Once you’ve gotten all of the full stencils done, it’s time to tackle the edges. This is where having two stencils comes in handy because you can cut one to fit all of the hard-to-reach places, like behind the toilet. This took the most time and required some hand painting and lots of touching up. But as you can see from this progress pic below, it’s worth it!
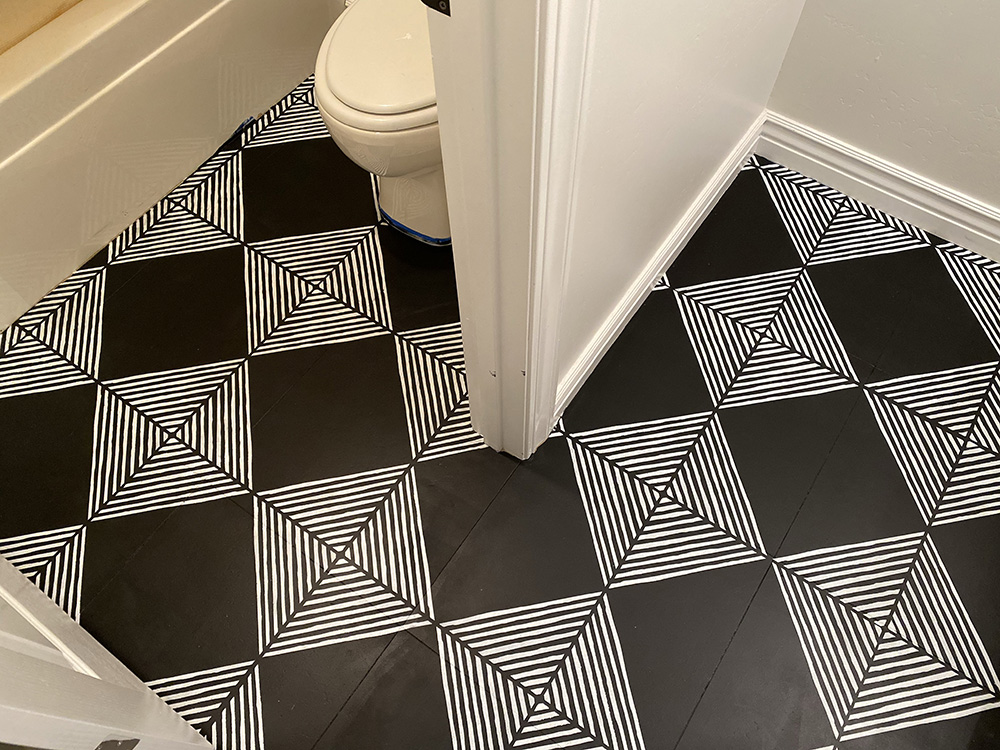
5. Sealing the floor
Once your stenciling is all complete and has had ample time to try, it’s time to clean the floors once more before adding your top coat. I used a broom and lightly swept the floors to get any paint chips, hair, etc. off. Then I rolled on three coats of polyurethane water-based sealer in matte clear, with 2-3 hours between coats. Don’t forget to wear your respirator mask again!
The next day we went on vacation for nine days, allowing the floor plenty of time to cure.
There are still a couple of spots with painter’s tape stuck that I haven’t cleaned up yet. I didn’t paint that much out of the lines 😉
Now that the floors are done, we can move on to the next phase of the project: painting the vanity!
Thank you to Cutting Edge Stencils for partnering with me on this project. I hope this inspires you to tackle a space in your home and transform it into something you love today.
I saved all of the Stories about this tile stencil project as a highlight on my IG account, so go watch the time lapse there 🙂
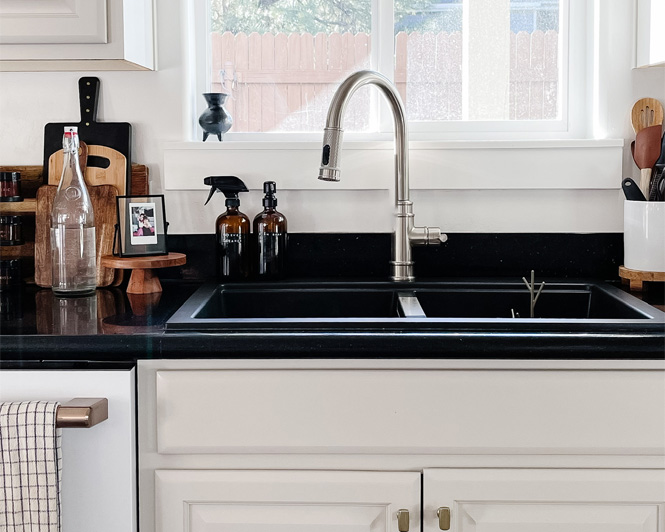
If you’re new here, check out the guest bathroom mood board for more before photos and design plans.
Giveaway with Cutting Edge Stencils (CLOSED)
Cutting Edge kindly offered to do a giveaway for my followers to help you transform something in your home! Up for grabs is $50 towards anything on the Cutting Edge Stencils website. To enter, head to my Instagram account @tiffanytcheng for directions.
Winner must be located in the U.S. or Canada. I will choose a random winner on Sunday, 3/8 and notify them by DM.
Related Posts


Hi, I’m Tiffany!
I’m so glad you’re here. I hope you’ll see this space as a source of inspiration and encouragement to take the first step in making your home a place you want to be, wherever that may be.
You can expect to find approachable DIY projects and tutorials, opinions on home design, and all the fun stuff that comes up in-between.
