
If you’re new here, check out the first post in this series where I lay out our plans for renovating the laundry room using IKEA cabinet frames and Semihandmade door fronts.
While we waited for our IKEA and Semihandmade shipments to arrive, we started to prep the laundry room by removing the existing cabinets, patching up dry wall, and painting.
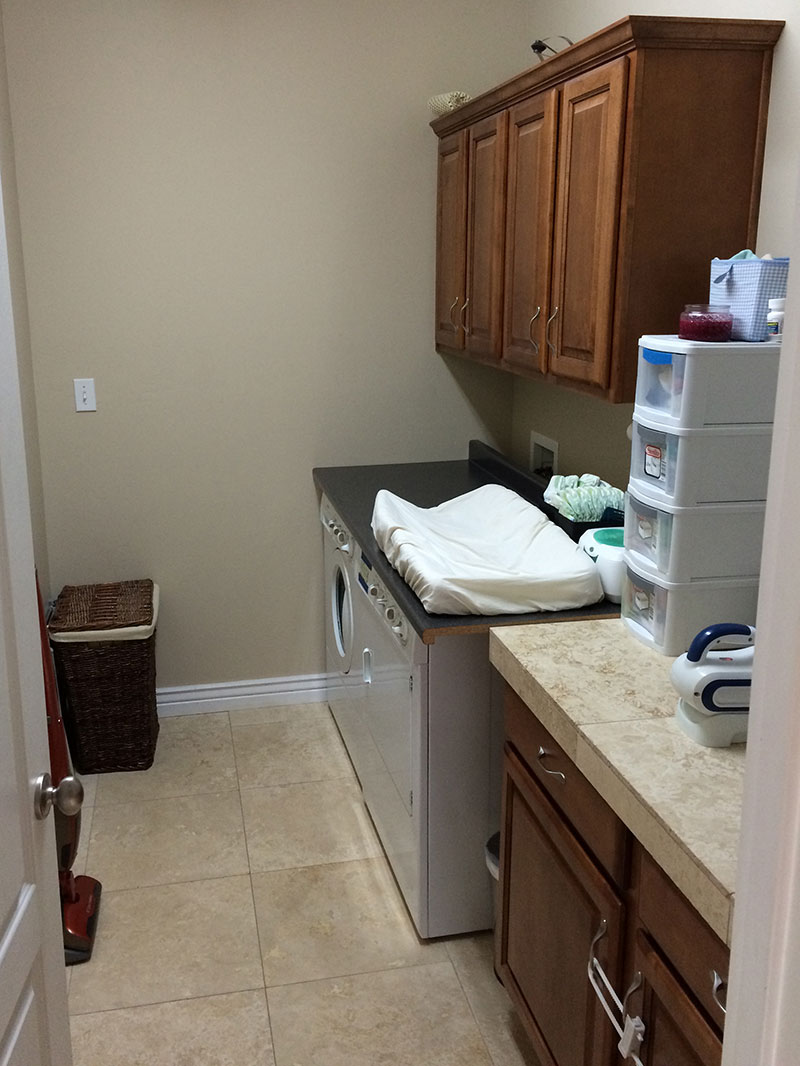
Here’s a look at where we started. The top photo is from when we first looked at the house, before we bought it.
This was as we were taking out the cabinets. We had painted the walls and replaced the tile.
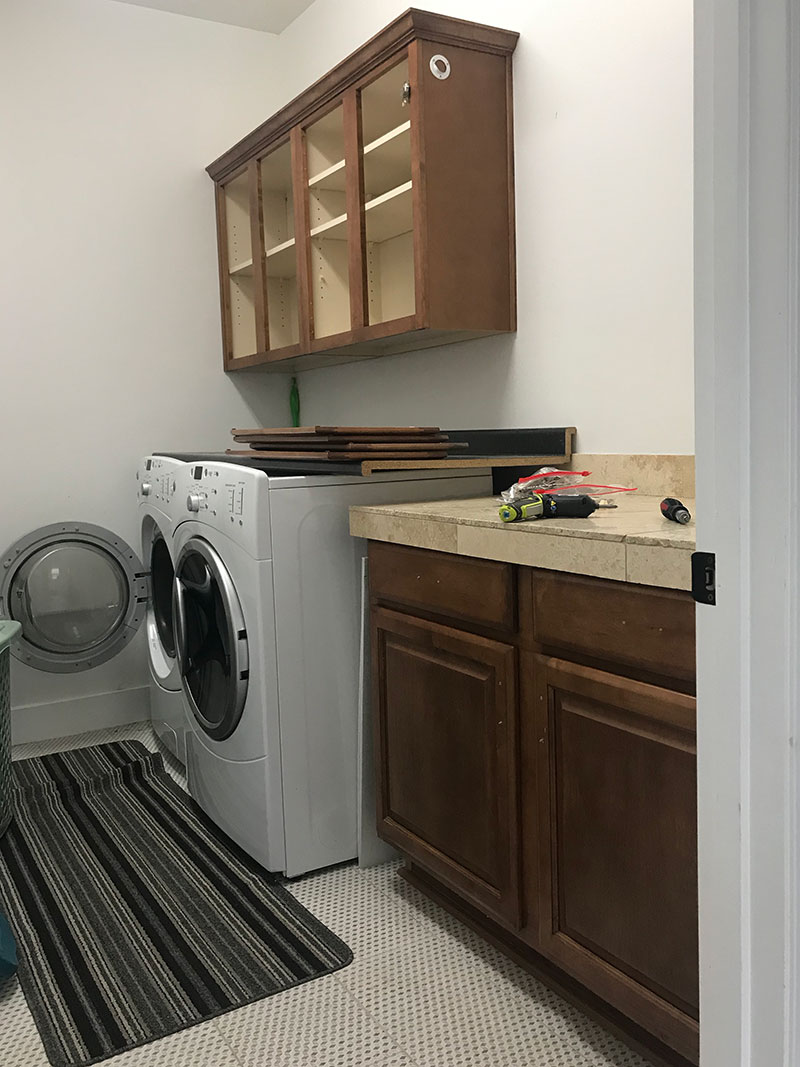
Once the cabinets were out, we had to patch the wall because the tile from the old countertops had been glued to it. Brandon took care of that and we touched up the paint on the walls, even though they were going to be covered again.
Measuring & Calculating for Bead Board and Trim
Now it was time to plan for the bead board. Our laundry room was roughly 116″ x 69″. We had two long walls (116″), one shorter wall (69″), and then the wall with the door (30.5″). We didn’t put the bead board behind the cabinets, so I subtracted about 50″ from the total measurements. So much to think about!
We used this wainscoting paneling from Home Depot, which measures 3/16 in. x 48 in. x 96 in. per panel. I calculated that I needed 288″ wide of paneling to cover the perimeter of the room. We decided to make the bead board 48 in. high (4 ft), plus the 5″ of baseboard. So I needed six panels total at 48 in. wide each. That means I could purchase three of the panels and have them cut them in half so they would end up being 48 in. x 48 in.
For the trim, we went to the store and looked at the different moulding options. We got the primed/finished versions of moulding and got something slightly smaller than our baseboards.
Picking Paint Colors
I knew I wanted something green, but wasn’t sure which direction to go. More grey? More jewel-toned? I didn’t want to get too bold so that it would still match the rest of our house. So I did some research and looked for inspiration photos on Instagram and Pinterest to see what was out there.
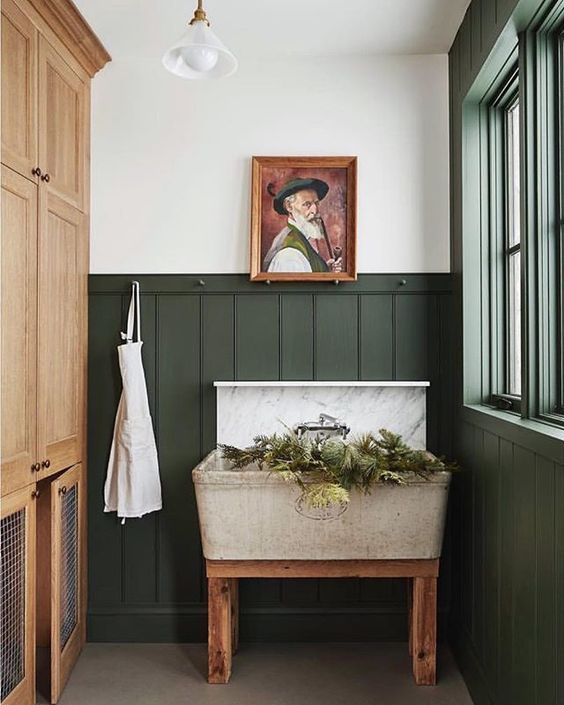
This photo was my main inspiration from Angela at @buildingwalnutfarm.
So much of picking paint colors depends on the lighting in the space, the tones/colors of the other elements (cabinets, wall paint color, hardware, light fixtures, etc.) and if I’ve learned anything from following designers, it’s to always test your paint colors and look at them under different lighting throughout the day.
Our wall paint color is Dunn Edwards Droplets, which is a nice neutral white with grey undertones. That helped narrow down the search some. The Cove cabinets from Semihandmade also are a more cooler tone, so I didn’t want to get too warm. The tile has a small pattern and leaned more dark grey/beige/taupe.
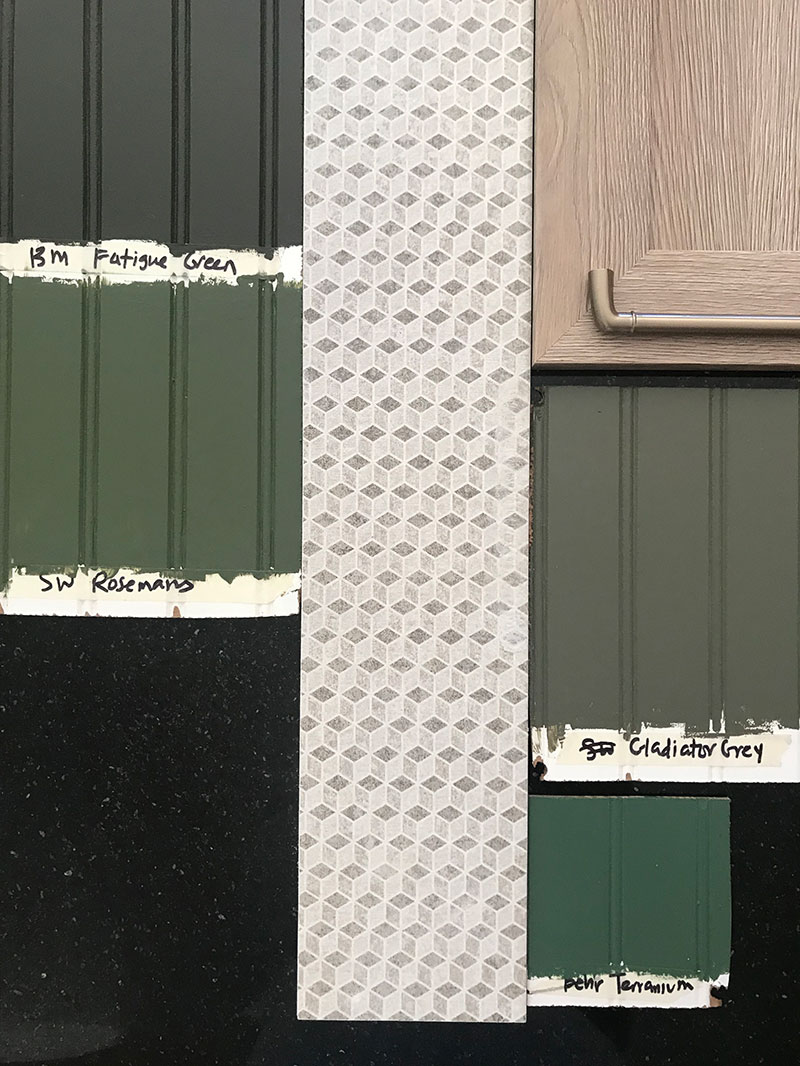
The four colors I picked samples for included:
- Sherwin Williams Gladiator Grey
- Sherwin Williams Rosemary Sprig
- Benjamin More Fatigue Green
- Behr Terrarium
Before I made a decision, I had Brandon take out the fluorescent lighting in the laundry room and replace it with a light fixture I had around the house from Christmas that had never been used. We also changed the light bulb to a 3000k temperature LED, which made all the difference in the world. It went from dingy light to a brighter, warmer light and it completely changed my opinions on the paint samples.
But even before we could paint, we had to get the bead board and trim up, so let’s get back to that!
Installing Bead Board & Trim
This part goes fairly quickly, aside from having to account for plugs/switches. But here’s a trick we learned while cutting the panel to account for the plug inside the cabinet. Grab one of your lipsticks or tinted chapsticks and color the plug with it. Then, put whatever you’re trying to cut the hole into against it and it will make a stamp of the plug exactly where it should be. Then you can trim around it!
For each panel, we used liquid nails adhesive, then used an angled nail finishing gun to secure the panels to the walls. Make sure everything is level, even if there are big gaps, because it’s more than likely that your panels weren’t precision cut to begin with.

After all of your panels and trim pieces are attached, it’s time to wood fill the holes, caulk the gaps, and let everything dry. Then give it all a nice sanding and wipe down.
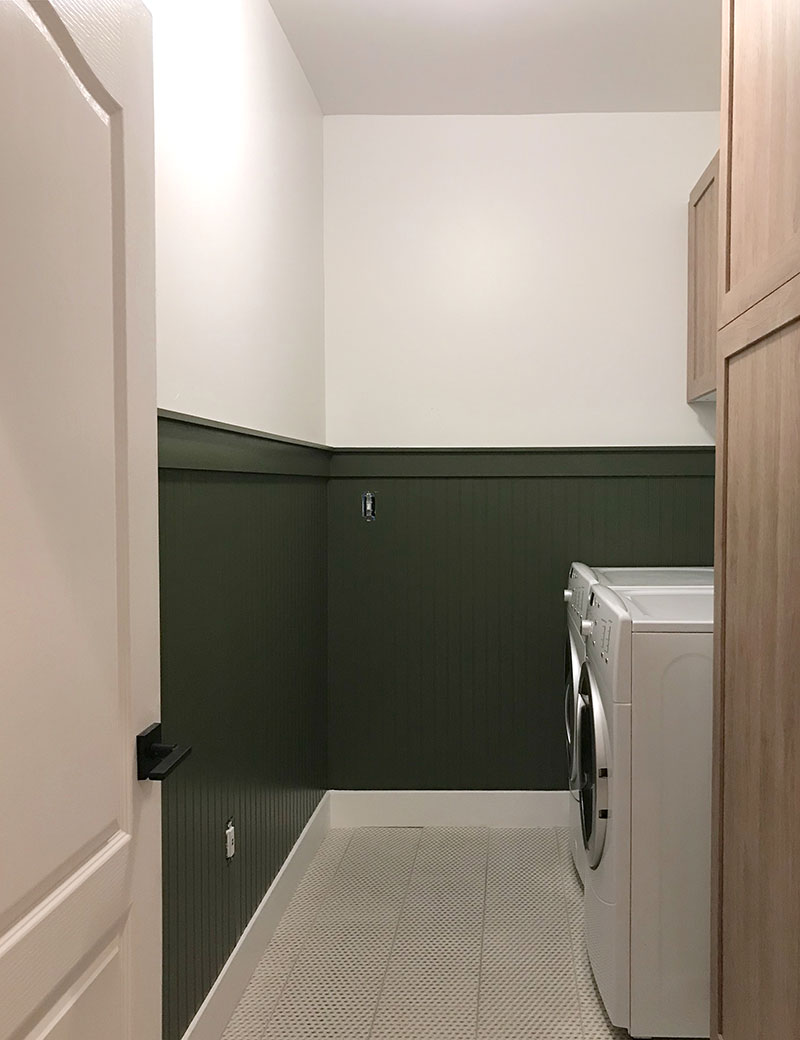
Then it’s painting time!
I ended up choosing Sherwin Williams Rosemary Sprig as the winner.
I taped off the baseboards and trim. Some people have really steady hands and can just cut in while painting. I don’t trust myself, so I end up doing touch ups. However, I have seen a couple of paint tricks to get super straight lines with tape. One way is to paint the tape with the existing paint color, let dry, then paint with the new paint color. The other way is to put a bead of caulk along the paint line, then paint over it. I did not try either of these when I painted because I forgot.
I hand brushed the short side of the wall with the rest of my sample paint. I figured that I should see if I really do like the paint color by painting a larger space that will mostly be covered by the cabinets before committing to purchasing a full gallon of paint. So I did that and then bought a full gallon of paint. Took three coats to get a nice smooth finish.
The other design question was whether we should paint the white baseboards the same color so that it was all the same tone. I’m leaning toward it, but thought I would give it a chance as white first before making the final decision.
I love love love the color.
I’m still looking for wall hooks, hardware for the cabinet doors, and art. I have a few styling pieces already. I can’t wait to see everything come together. Considering we’ll be doing a lot of tiny baby laundry here in a few weeks, I’m so excited to have a happy, organized place to do it.
Related Posts


Hi, I’m Tiffany!
I’m so glad you’re here. I hope you’ll see this space as a source of inspiration and encouragement to take the first step in making your home a place you want to be, wherever that may be.
You can expect to find approachable DIY projects and tutorials, opinions on home design, and all the fun stuff that comes up in-between.
