One question I see over and over again on design accounts is, “How do I incorporate family photos into my home?”. If you’re like me, you love those jaw-dropping, scroll-stopping vignettes from home interior design accounts on Instagram and Pinterest. But you also love your family photos and want those to be on display, too. You invested time and money in a professional photo session and endured the chaos that comes with it, and you want to print and frame those moments and smile every time you walk by them. I hear you.
Enter gallery walls. Gallery walls are such a great way to curate and display your photos and art. If you’re like me, you like clean lines, symmetry, and white space. So whether you’re framing family photos or your kid’s artwork, the frames will help bring everything together into an organized manner. Gallery walls also allow you to switch up the photos anytime you want and refresh the space with ease.
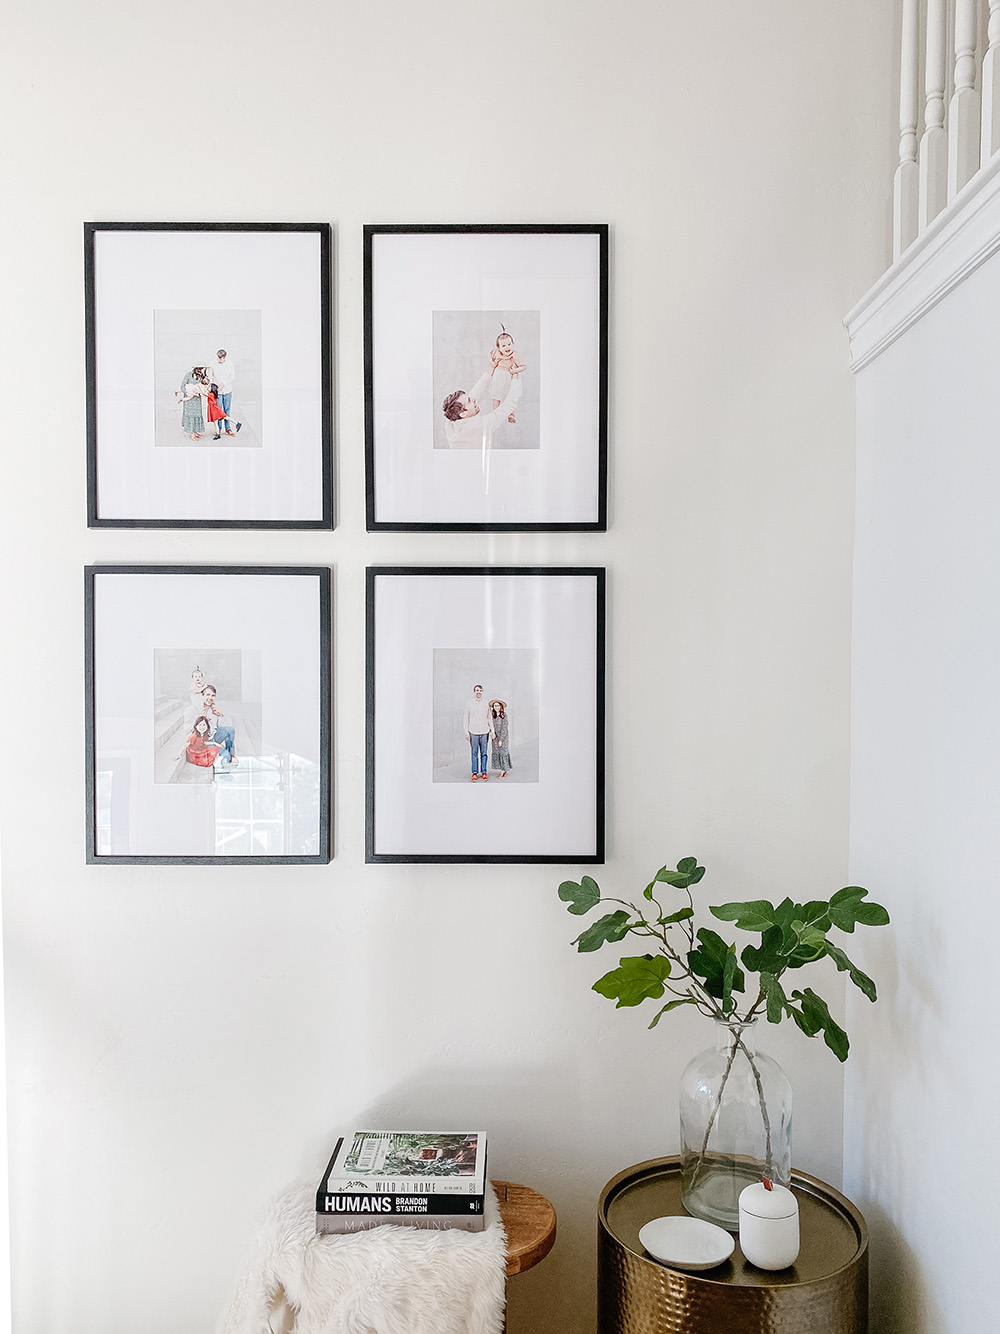
I’m ready to update our gallery wall with photos as a family of four, so I thought this would be a good time to share how we made this gallery wall and give you all of the sources to make your own.
Similar Photos/Art
Before you start, collect the pieces or items that you want to frame. Look online at different gallery walls and figure out how you want your pieces to look. Do you want breathing room (add a photo mat) or do you want the photo to go all the way to the frame (no mat)? Do you want the mat to be even on all sides (i.e., 2″ border all around) or do you want the image to be more towards the top with more white space at the bottom? Find examples of what you like before hunting for frames.
Next up, if you’re framing family photos, try to choose photos that have non-distracting backgrounds and that have consistent lighting. This will help make your gallery wall feel cohesive and intentional. If the photos you want to use are not all taken from the same session or have similar lighting/color palettes, then you could convert the images to black and white for a consistent look.
Thin Black Frames
Now it’s time to find your frames! I originally wanted to do three rows with five frames on each row, but once I hung my samples on the wall, I decided on two rows. But I always have the option of adding a third someday.
These are the frames I used. They’re 11×17 and come in a 3-pack for only $21.99. Buy them with a 40% off coupon and they come out to under $15 for three frames. STEAL. Also available in white.
Once you find your frame size, I recommend using wrapping paper to cut out the “frame” and tape it to the wall so you can see the size, scale, and placement of the gallery wall. This will help you see how much space you want between frames. Then when you’re ready to hang, you can use them to mark the holes on the backs of the frames so you know where to drill on the wall.
Wood Frames
If you aren’t a fan of the thin black frame look, try going the warm route and doing wood frames! Jenny Komenda’s Juniper Home has a great resource list of frames to check out. You can always mix and match, too.
Custom Mats
To make my DIY gallery wall feel a little more custom, I ordered custom mats on Etsy. I took a photo and added the exact dimensions that I wanted the opening size to be before ordering. Communicating with the seller was easy and very fast and I got exactly what I wanted for about $3/mat. You can’t beat that price for custom mats.
We’ve had this gallery wall up for a few years now and I really love it. I’ve swapped out images for my daughter’s 4th birthday party to go with the theme and even put in a friend’s wedding photo to see if they would notice (they didn’t!). Updating the photos in the gallery is giving me an instant refresh without spending any money.
Do you have any gallery walls in your home?
Shop my frames and mats here:

Hi, I’m Tiffany!
I’m so glad you’re here. I hope you’ll see this space as a source of inspiration and encouragement to take the first step in making your home a place you want to be, wherever that may be.
You can expect to find approachable DIY projects and tutorials, opinions on home design, and all the fun stuff that comes up in-between.
