

We’ve lived in our home going into our eighth year now and haven’t done much to our primary bedroom other than paint the walls from a metallic blue to white and swap out the dated fan for a modern fan. I bought some nightstands from Target the first year we moved in because I hadn’t had a nightstand for years. When we brought O home, I moved my nightstand in order to fit her crib next to our bed. Once we moved her crib to the nook space in our room, I never brought the nightstand back and would just put my water bottle on the floor.
Here are some of my inspiration images:
Source
Source
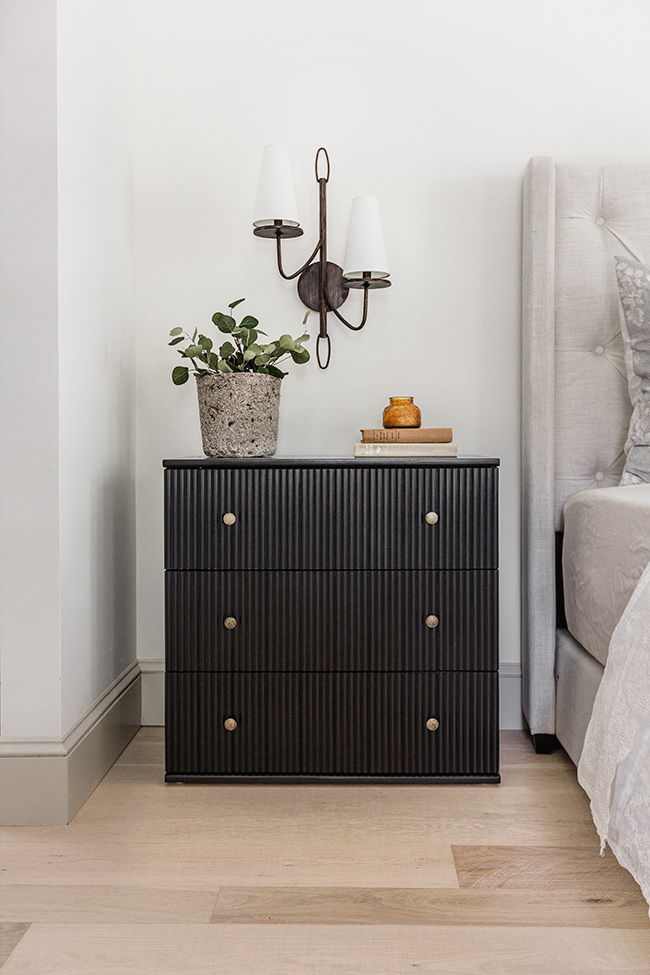
After seeing Danielle @ournestonpowell and Jenna @jennasuedesign hack their nightstands and add beautiful fluted trim, I decided I would try to give my nightstands a makeover and save myself $1,100+ on the nightstands I really wanted.
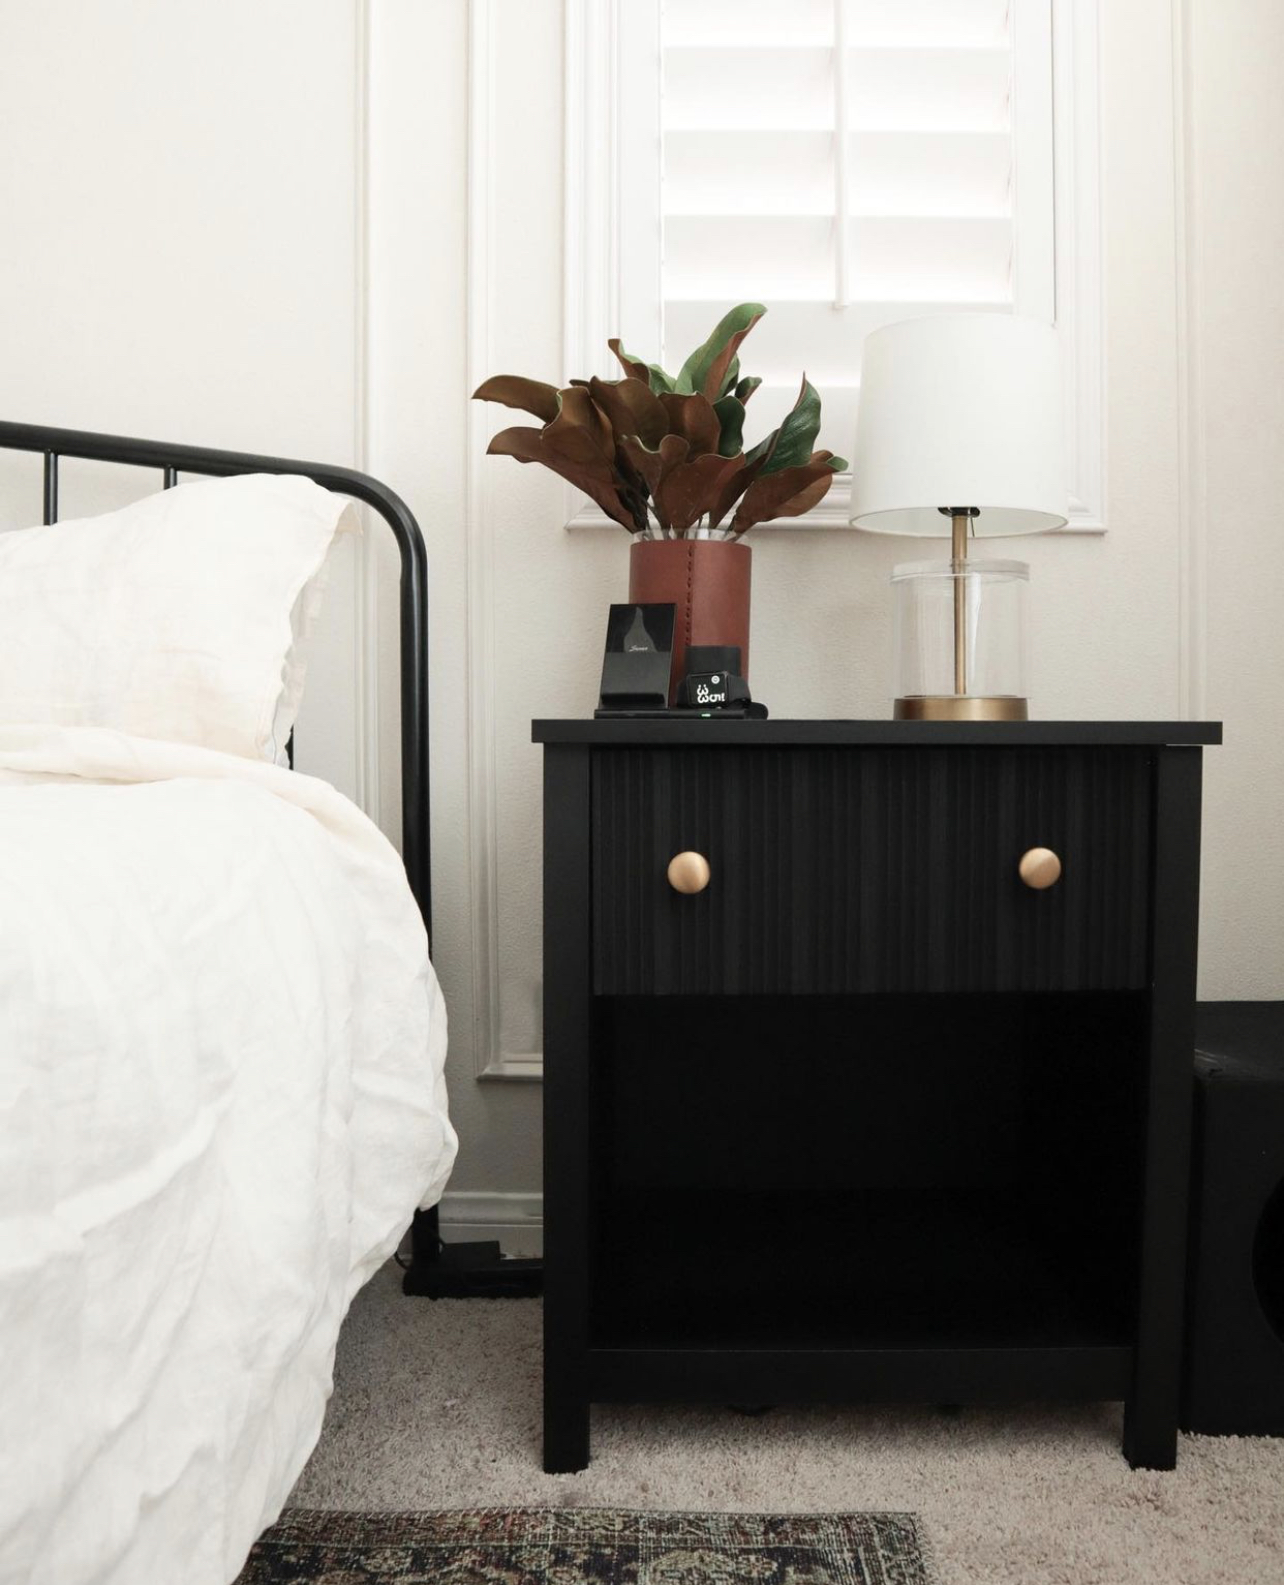
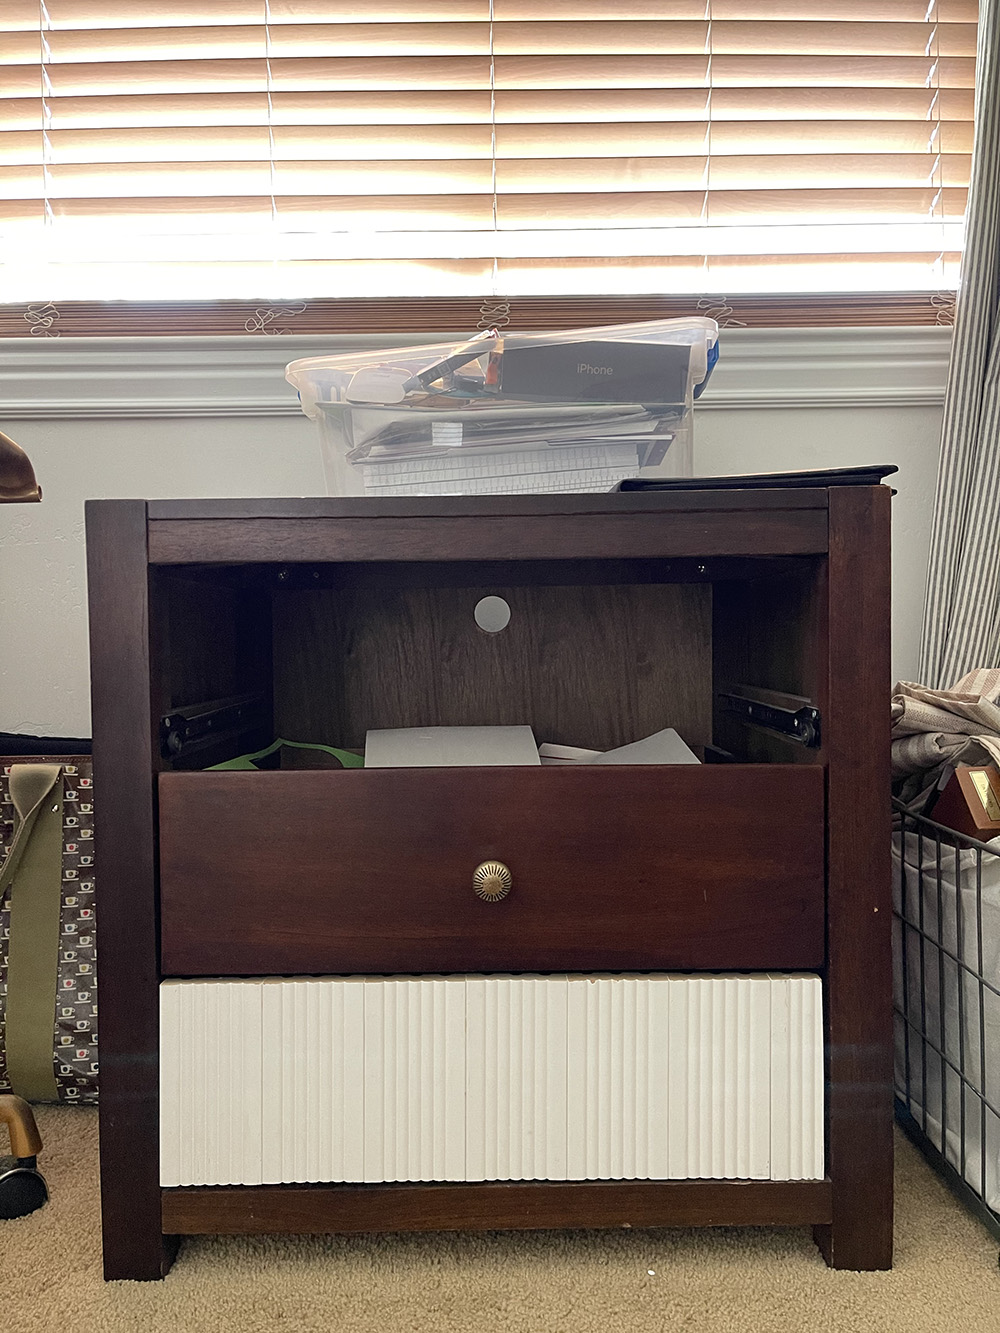
Here’s what my nightstands looked like before:
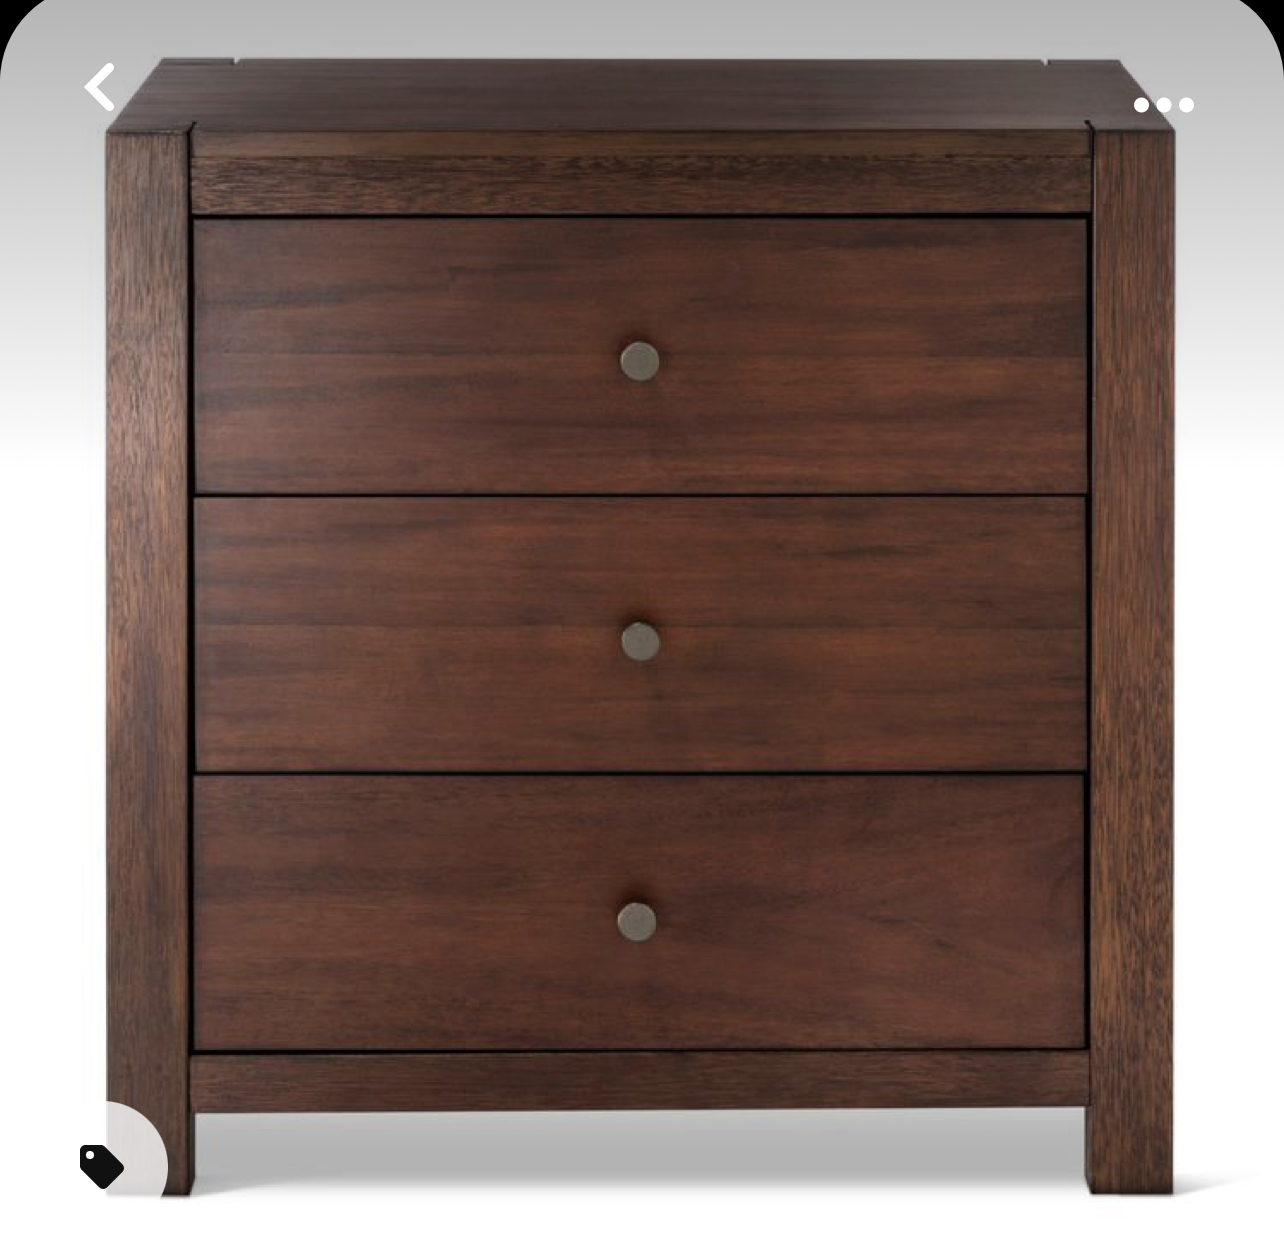
Threshold Parsons Nightstand
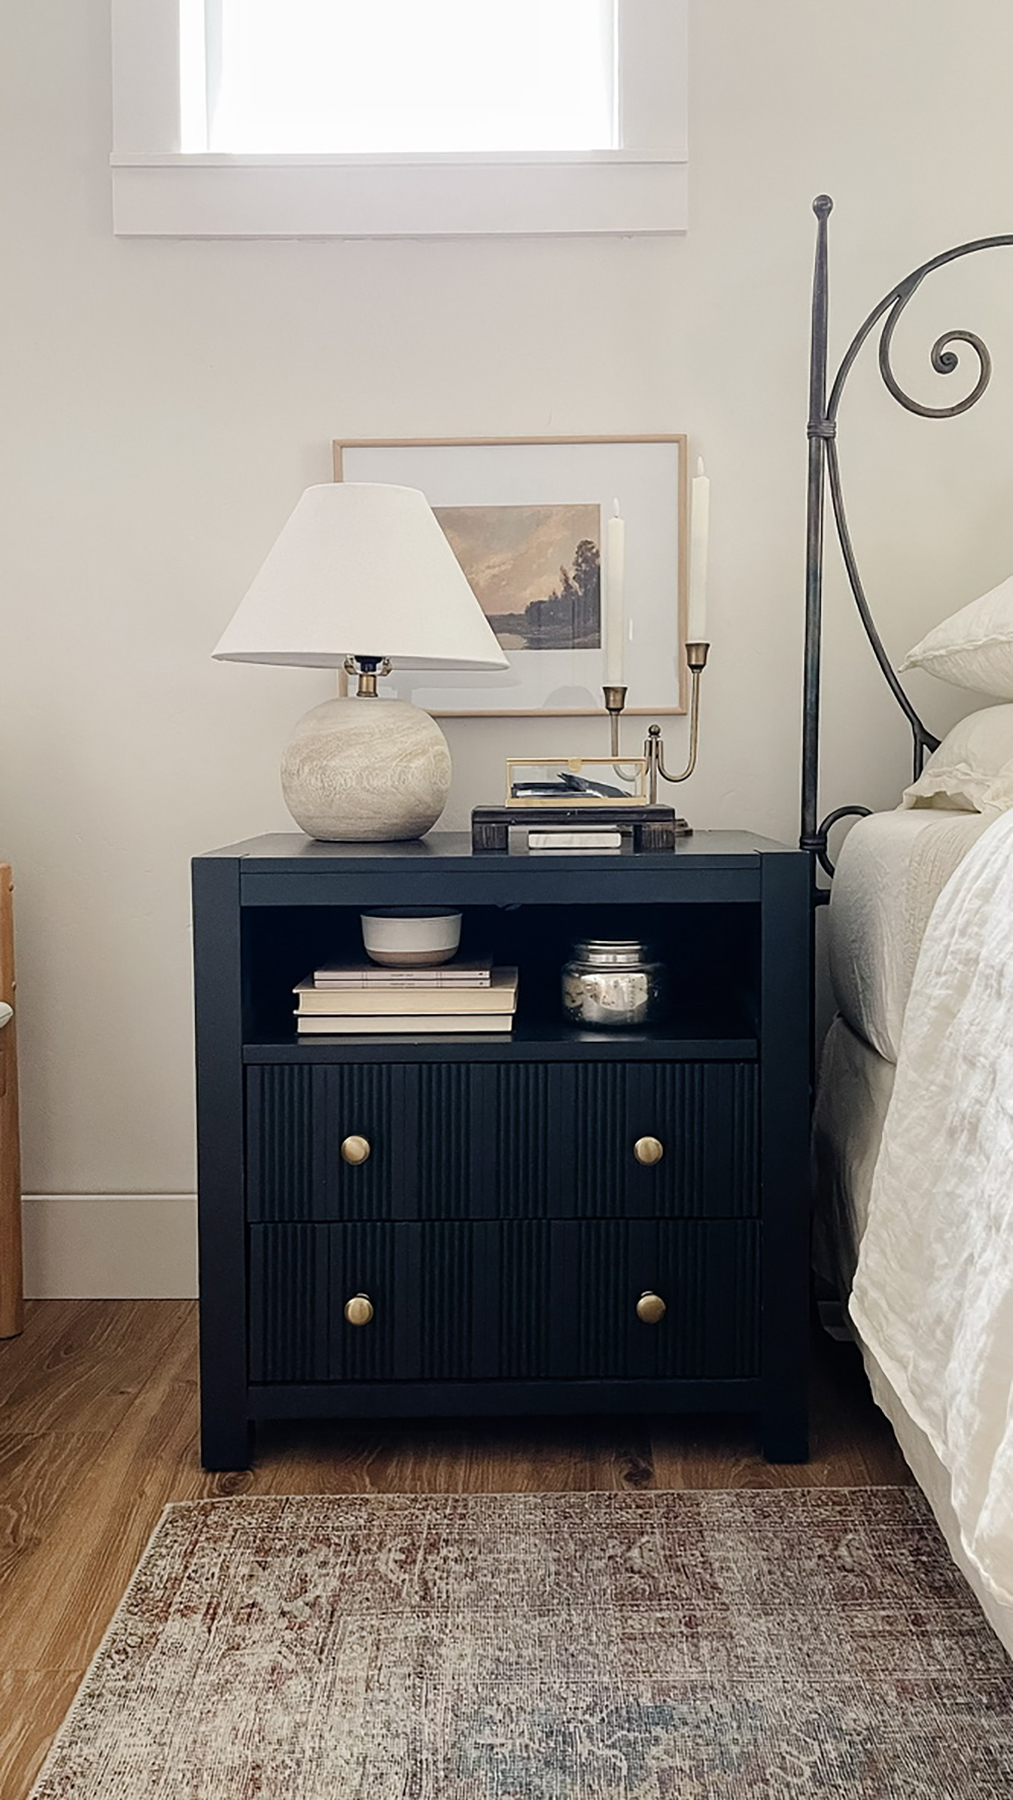
And here’s the after:
Here are the steps I took. I did this project 100% on my own and I’m pretty damn proud of it.
Materials:
- Fluted trim
- Liquid nails
- Chalk spray paint (Behr, Noir)
- Polyurethane top coat in matte
- Orbital sander, sand paper (220 grit), sanding blocks
- Caulk
- Nail gun
- Tack cloth
- Measuring tape
- Shellac-based interior primer
- Level
- Clamps
- Knobs (8)
- 3/4″ MDF boards for shelves (used scrap)
Most of the materials I had at home already. The only things I purchased for this project were the fluted pieces of trim (3), chalk spray paint (8 cans), hardware (8 knobs), and a tube of liquid nails.
Steps:
First, I removed the drawer front of my nightstand and took measurements to determine how many pieces of trim I would need to cover the fronts. I only needed to cover two of the three drawers. Each drawer used roughly 7 pieces total. I made repeat cuts to length using my mitre saw.
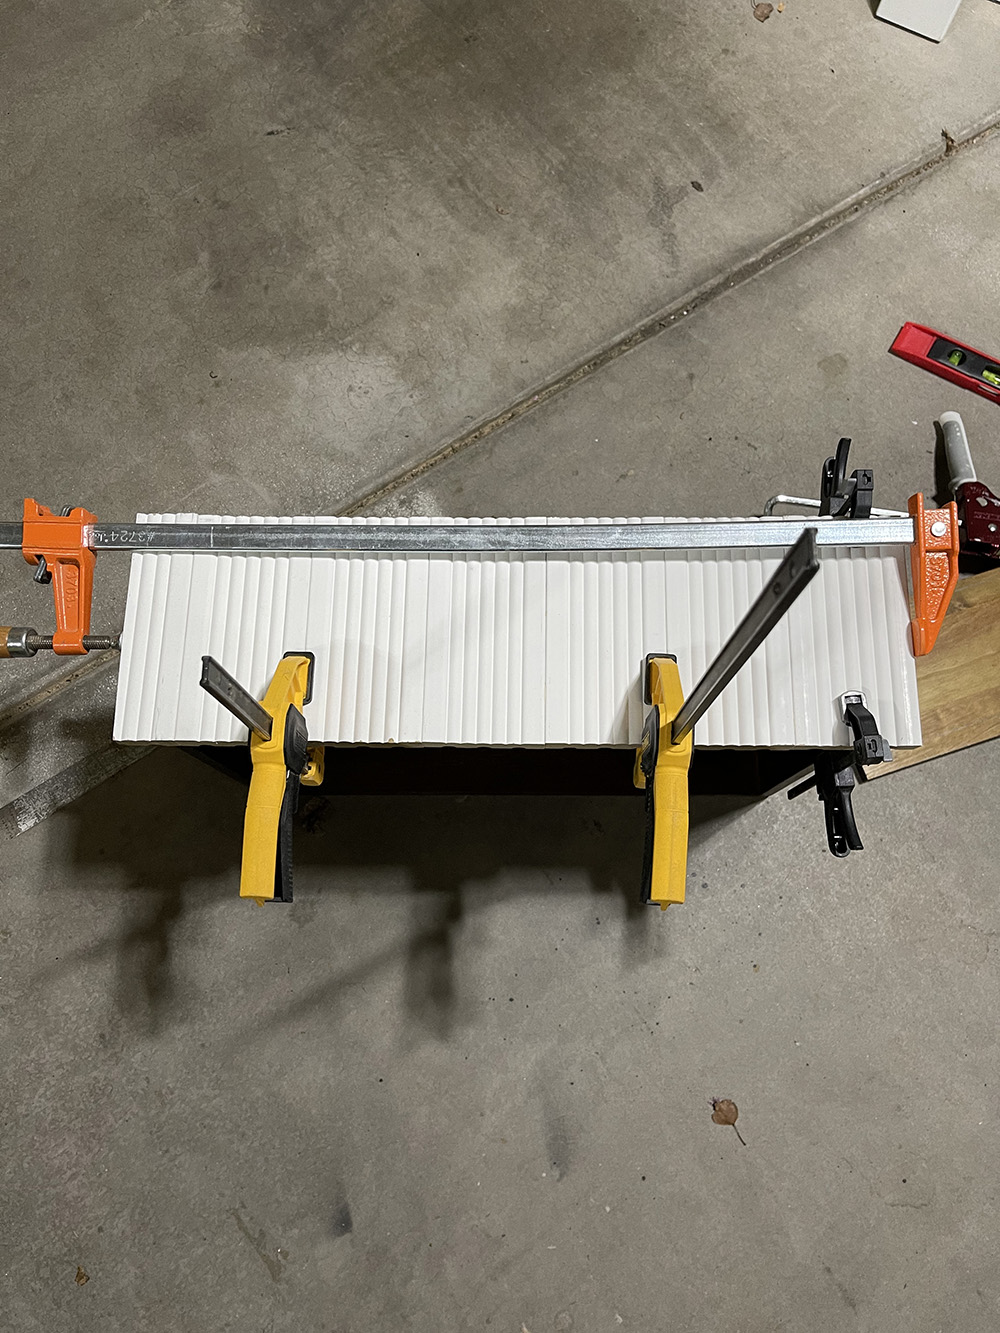
Taking one piece, I clamped it to the drawer and dry fit the drawer back into the nightstand to determine spacing and where to glue. Once I got it in the right position, I marked it and glued it down using liquid nails. Then I glued the remaining pieces and ripped the final piece to fit. Then I took the original drawer front and put it on top and clamped it down to dry. This helps distribute even pressure. Repeat process for all drawers.
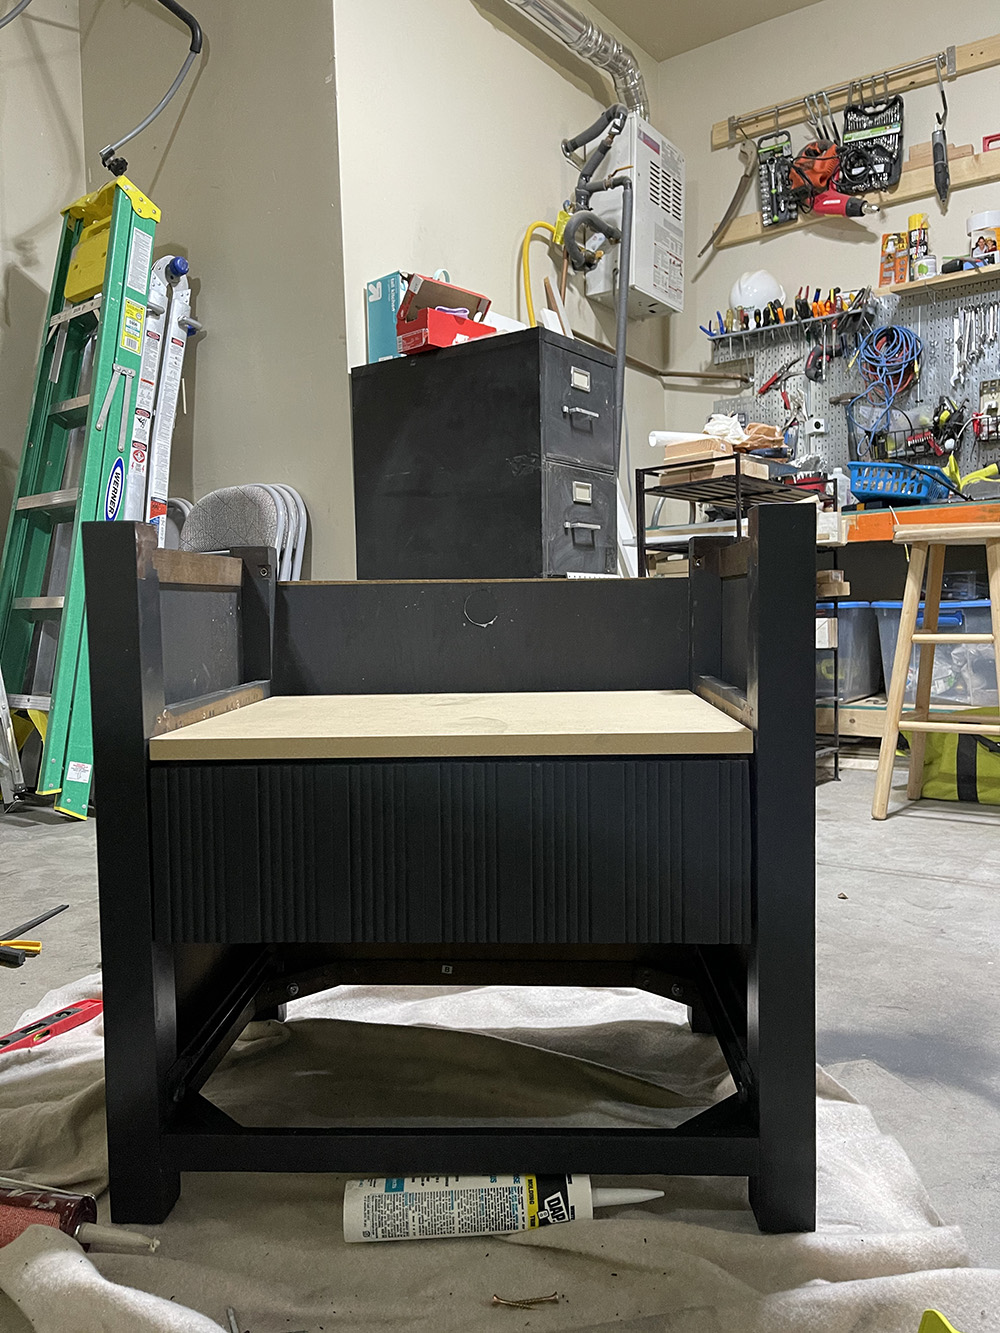
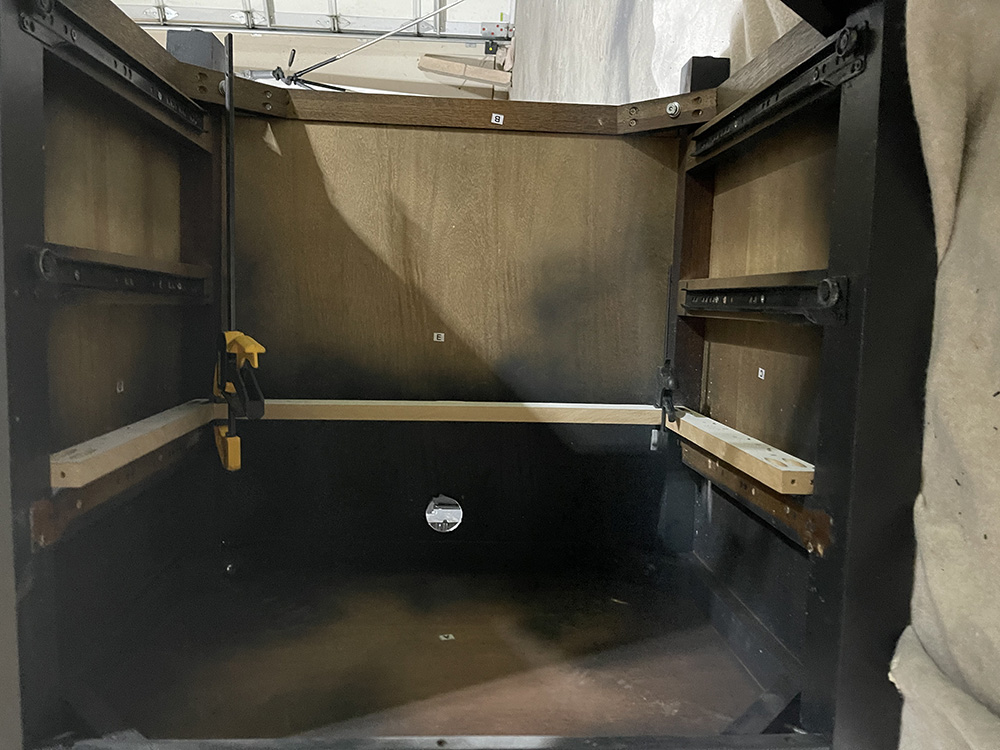
While that is drying, I started to figure out how to convert the top drawer into a shelf, a la my inspiration from the Crate & Barrel nightstands. I miraculously had some scrap 3/4 in. MDF boards leftover from another project that happened to fit nearly perfectly in the top, but needed some braces to rest on. Using random scraps I had in the garage, I added three pieces (one on each side and one along the back) to the cabinet using liquid nails and a nail gun. I added clamps to those to secure and let dry.
Next, I did a quick rough sand on the nightstand with my orbital sander using 220 grit paper. This helps the primer and paint adhere to the furniture better since it’s a veneer finish. After sanding, I used a blower to blow out all of the dust, a shop vac to vacuum, and then a tack cloth to make sure we got every last piece.
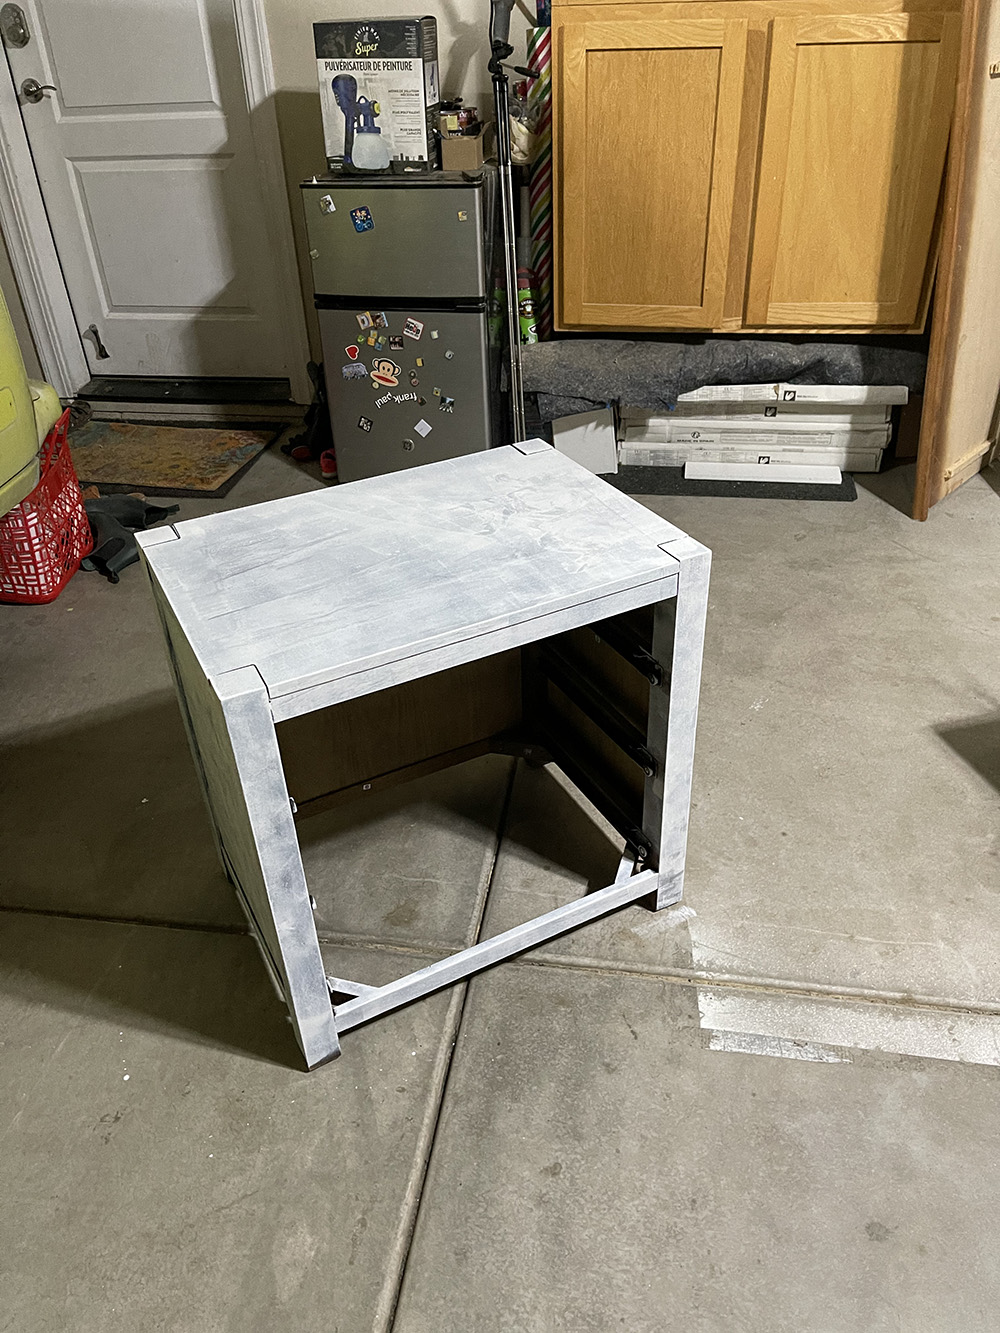
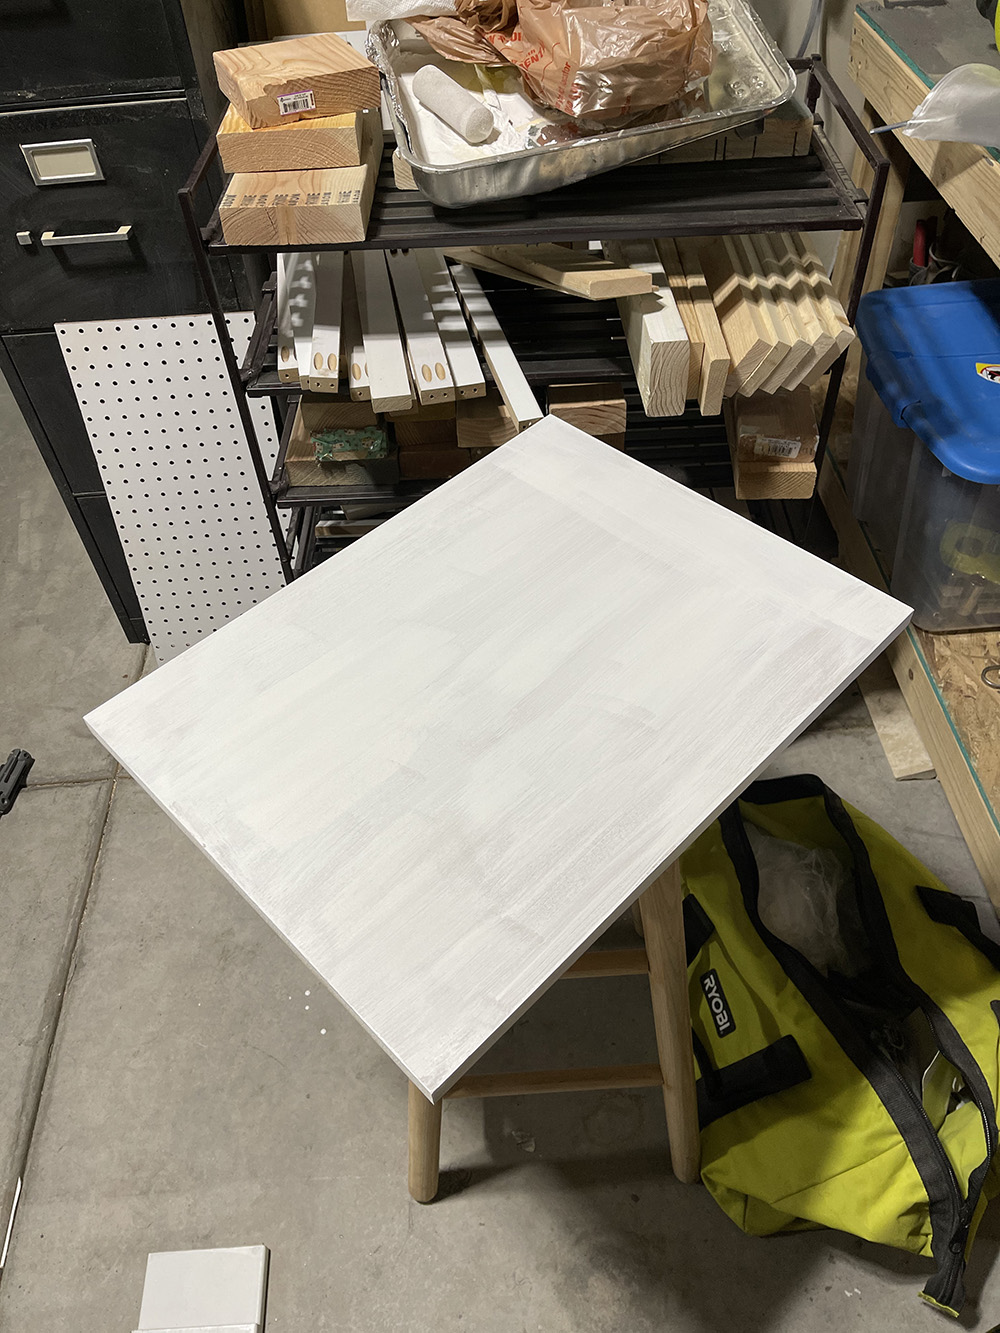
Using shellac-based interior primer, I gave the nightstand a coat of primer and let dry overnight.
The next day, I started with the drawers by adding a thin line of caulk between each piece of trim on the drawers. Tip: use a baby wipe to smooth out!
Then using a sanding block, give the nightstand a quick sand down and repeat the steps to remove dust. Once those steps are down, prepare your area for paint.
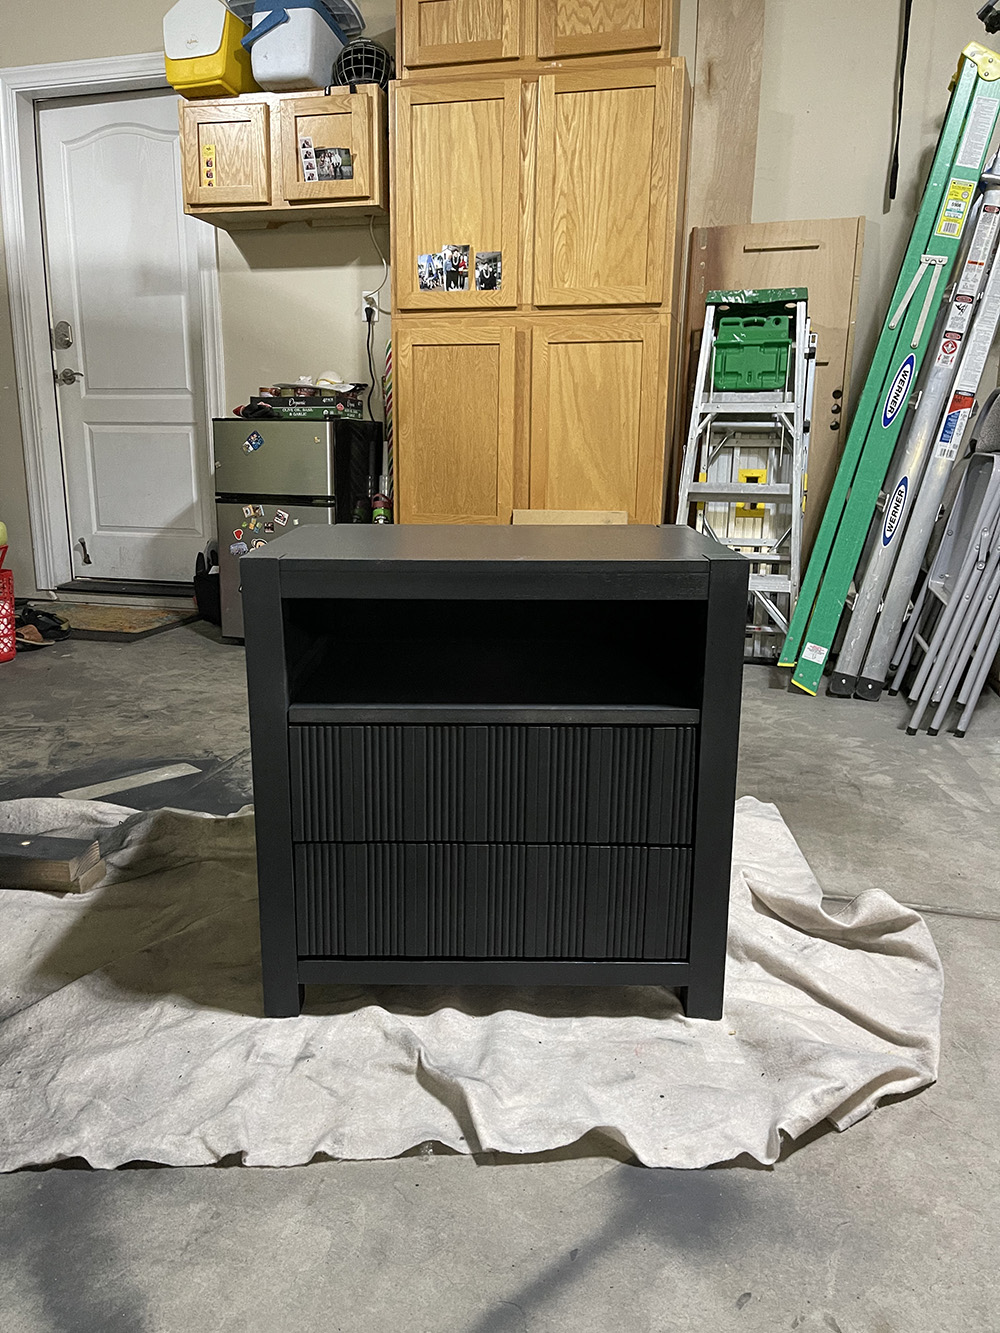
I decided on a chalk paint because I read that it’s good for furniture. I’ve also used the Sherwin Williams Emerald Urethane Trim Enamel paint line on my kitchen cabinets, so that could be an option as well. I did three coats of spray paint on all pieces (nightstand, shelf, drawers) with light coats to avoid drips (although I had a couple that I did need to sand out between coats). Once everything was dry, I added three coats of polyurethane to the top for protection.
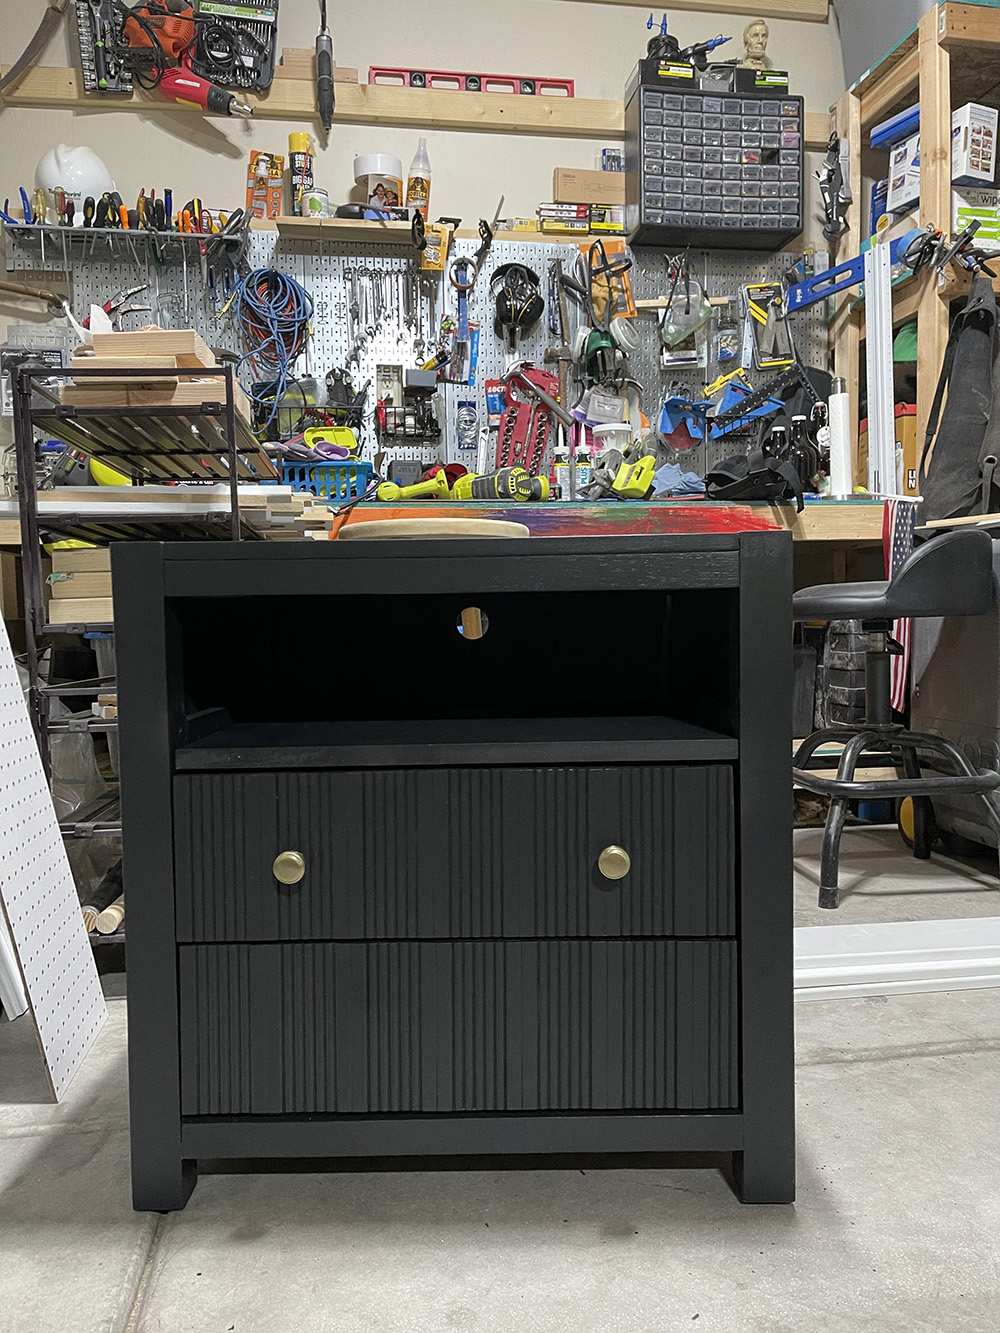
The final step was to add the gold hardware. I used the same knobs I have in my kitchen. I was going to go for the brass but didn’t think it’d work well in the overall scheme of the space. Once I figured out the placement of the knobs, I added a piece of painter’s tape (this helps so you don’t chip all of your paint when drilling) and used a drill to create pilot holes for the knobs. Once issue I ran into was that my knob screws weren’t long enough to accommodate the drawer + trim front, so I had to look for longer screws. So be sure to check that measurement when ordering and be prepared.
I let the nightstand sit overnight again before bringing up to the room. It was night and day and I’m SO glad that I went for it!
Total Cost: $165
- Fluted trim: $33
- Spray paint: $56
- Knobs: $76
Shop the Post:

*Disclosure: This post may contain affiliate links. If you purchase a product, I may earn a small commission at no additional cost to you. Thank you for supporting my blog.
Related Posts


Hi, I’m Tiffany!
I’m so glad you’re here. I hope you’ll see this space as a source of inspiration and encouragement to take the first step in making your home a place you want to be, wherever that may be.
You can expect to find approachable DIY projects and tutorials, opinions on home design, and all the fun stuff that comes up in-between.
