
With Tilly’s birthday being so close to the holidays, Brandon and I had decided early on that birthday parties would alternate each year, with the in-between years being an intimate celebration with immediate family only. This year was an in-between year; however, my sister reminded me that it would be her golden birthday, in which she would turn four on the 4th.
This one was a fun one to plan because it was a Harry Potter birthday party. We’ve been reading the books together since late summer and just started the Order of the Phoenix. She’s super into it, can talk circles around you about the books and characters, and knows a ton of spells. I’m loving it.
I had started ordering supplies in mid November, but didn’t really start crafting or putting anything together until after Christmas. I was party prepping all day, every day. Last minute Amazon boxes were showing up with supplies. And on the day of the party, I had my little house elves helping me “install” everything.
That said, here’s my pro tip: START EARLIER!
I would start at least a couple months in advance, if not sooner. Make a list of all of the DIYs you want to do and create a plan to do 1-2 projects each weekend. It will help you feel less stressed come party day. All of these DIYs I found by searching online or on Pinterest, but I’ll add my own experience and tips to hopefully save you time below.
Floating Candles
This project took, by far, the most time. I started it first and ended it last. The DIY I found called for toilet paper and paper towel rolls; however, I didn’t start collecting those far enough in advance so I didn’t have nearly enough to make an impact. Half of the rolls are paper towels/toilet paper rolls and the other half is white card stock. Skip the toilet paper rolls completely and just go with the card stock. Why? Because the LED tea lights don’t quite fit snuggly in the rolls, thus the fishing line holds it in place.
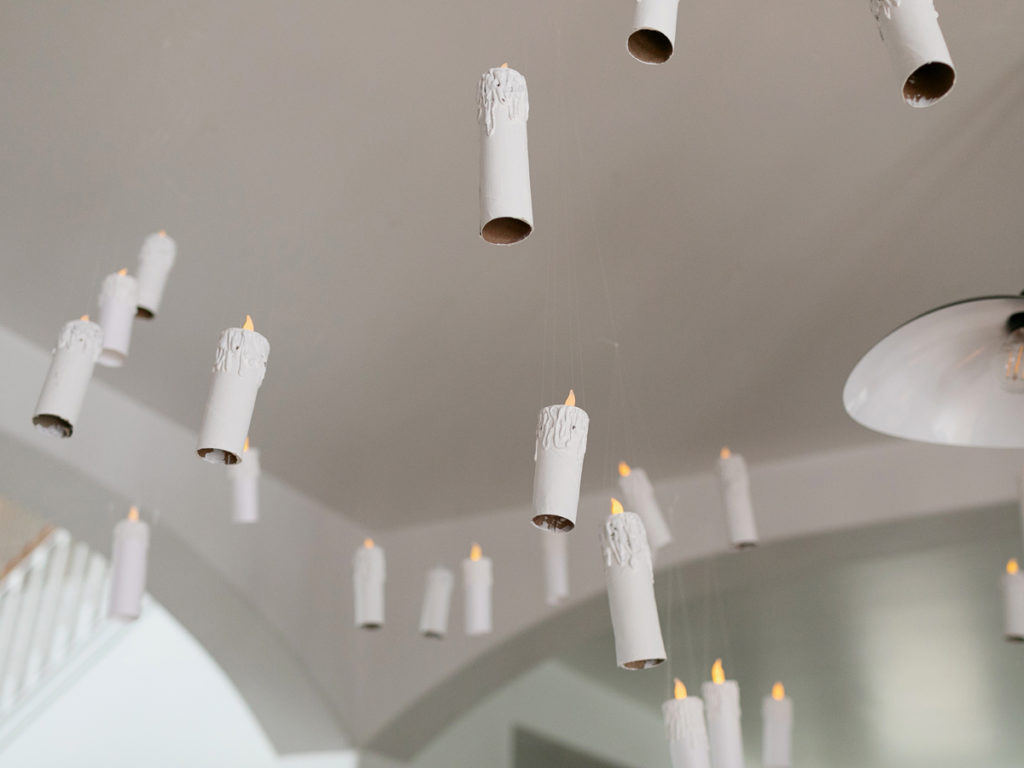
With the card stock, I was able to roll around the tea light so that it fit nice and snug. I ended up cutting the paper towel rolls down vertically and re-gluing them to fit around the tea light, which took extra time. The second reason why you should use white card stock? LESS PAINTING! I only had to paint the “wax drips” on the card stock rolls, whereas on the toilet paper rolls, I had to paint the entire thing with two coats.
In this photo you can see the bottoms of the rolls. I had purchased white cupcake liners to go in the bottoms, but when I needed them I forgot where I had put them.
Finally, the DIY calls for hanging the candles using thumbtacks into the ceiling. I didn’t want a million tiny holes so I opted for using command hooks and stringing the candles up on lines. It’s not as random, but still had a neat effect.
Recap:
- Use white card stock for bases, trim to different sizes
- Purchase the LED tea lights (Amazon) that last 100,000 hours. I bought two different sets and one only lasted 100 hours.
- Try using command hooks when stringing the lights to avoid holes in your ceiling. Or just patch up the holes.
Moving Picture Frame
We had bigger plans to have more moving photos throughout the house, but when it came down to it, our older iPods and iPads were so outdated that we couldn’t even bring up browsers/apps on them.
We had Tilly dress up and filmed a few different scenes against a green screen in my photography studio. For the quidditch video, we had a hair dryer that blew her hair as if she was flying, and had her reach out as if she had caught the snitch.
For the levitating feather video, we had her pretend to do the wingardium leviosa spell with her wand and dropped a feather down. In post production, we reversed the sequence so that it looked like she was floating the feather. So fun! I printed out an 8×10 newspaper print from the Daily Prophet and cut the center to look like a mat, then popped it into a Michael’s frame. Many of our guests didn’t realize the photo was moving for quite some time!
Recap:
- Film short video against green screen and edit with black and white filters
- Print Daily Prophet print and cut to mat size
- Loop video on iPad and duct tape to back of frame (make sure our charger is plugged in, too!)
The Owl Post Service
This was a last-minute addition, but an easy and fun one. Since the holidays just passed, we had a ton of boxes and packing supplies that we were going to recycle, so we repurposed them for the party. I bought a couple extra rolls of Kraft paper to wrap gifts, which was awesome because Tilly had no idea. She thought they were all “fake” and empty.
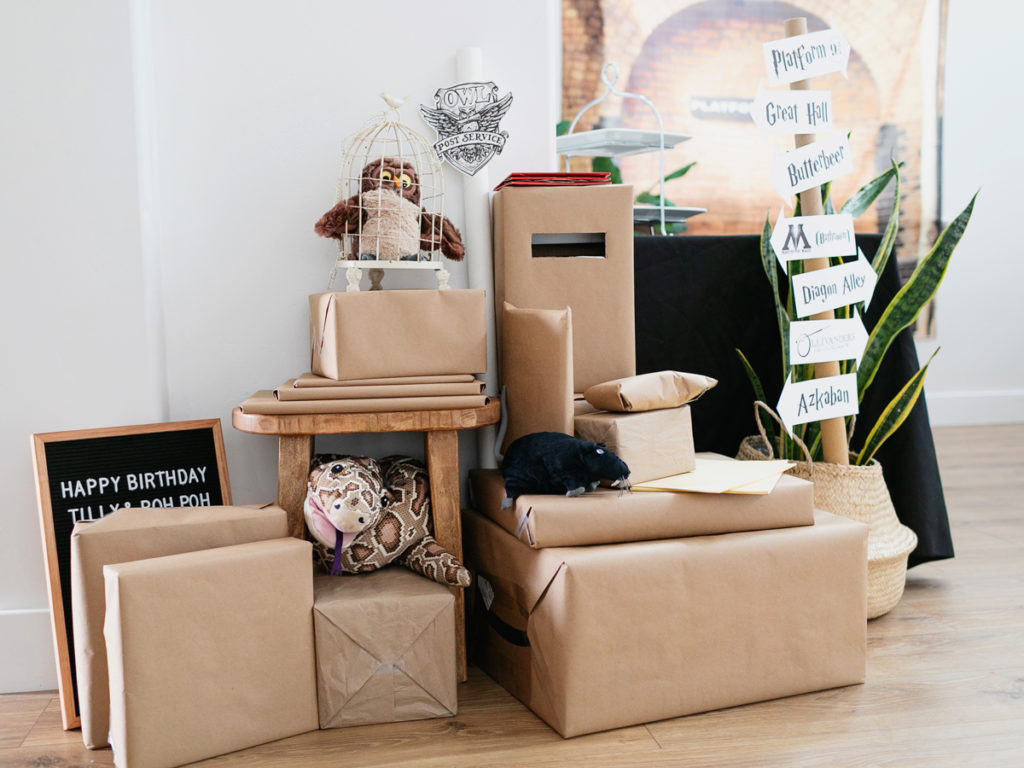
My original plan was to have our guests write letters on “parchment” to Tilly at 11-years-old, her first year at Hogwarts, and drop them in the mailbox. At her first birthday party, we asked guests to write letters to her that we would save and gift to her on her 18th birthday, so I thought this would be fun to do again. Well, I completely forgot to do it during the party. Good job, me.
The “Nagini”, “Errol”, and “Scabbers” came from IKEA.
Ollivanders Wand Shop
I had found some DIYs about making wands for party favors. It was super easy, use chopsticks, hot glue, and paint. But then I found a store on Etsy that made them for $1.60 a piece and I decided that my time was not worth it. I quickly purchased 20 and was on my way.
The wand boxes are Kraft necklace jewelry boxes that I found on Amazon for $1 each. Cut out the Ollivanders logo and glued it on top. Boom, wands are done! And for under $3/each.
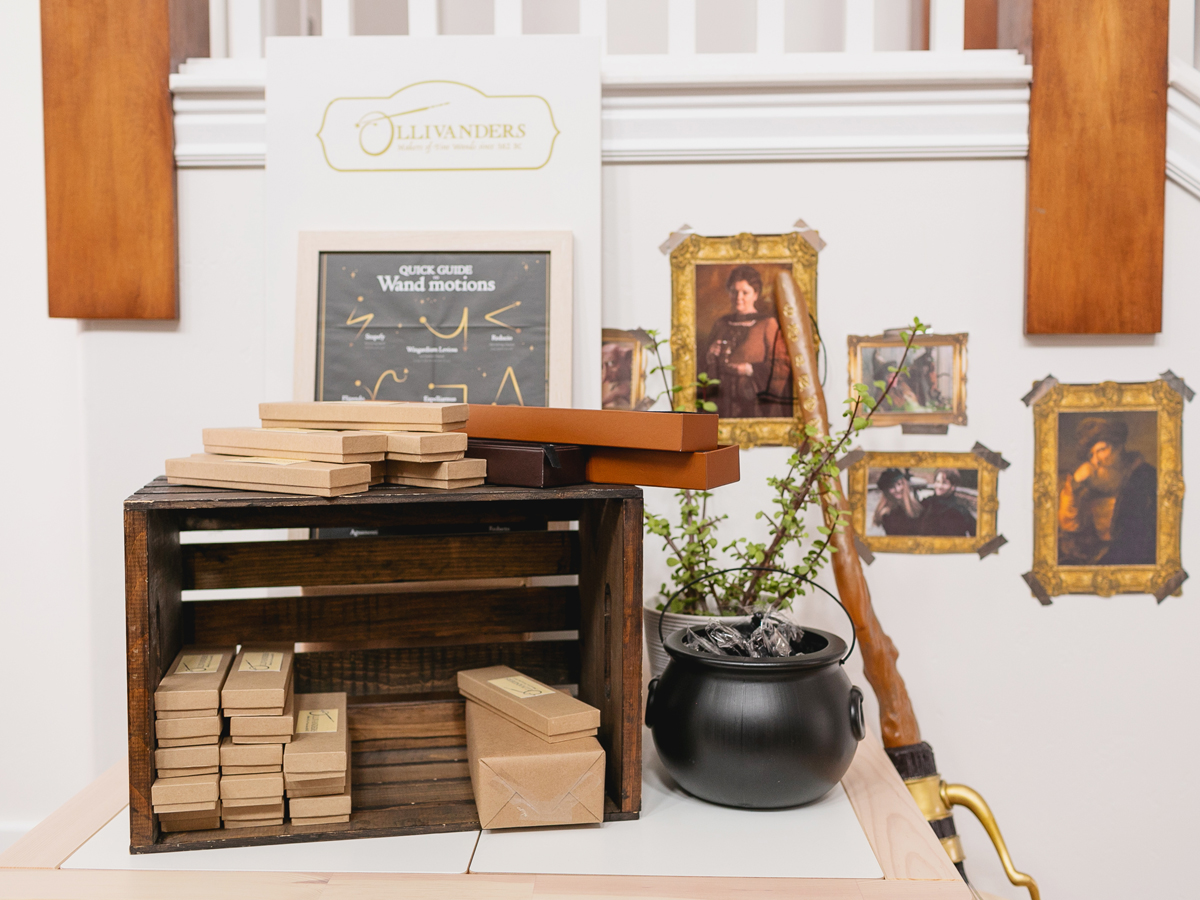
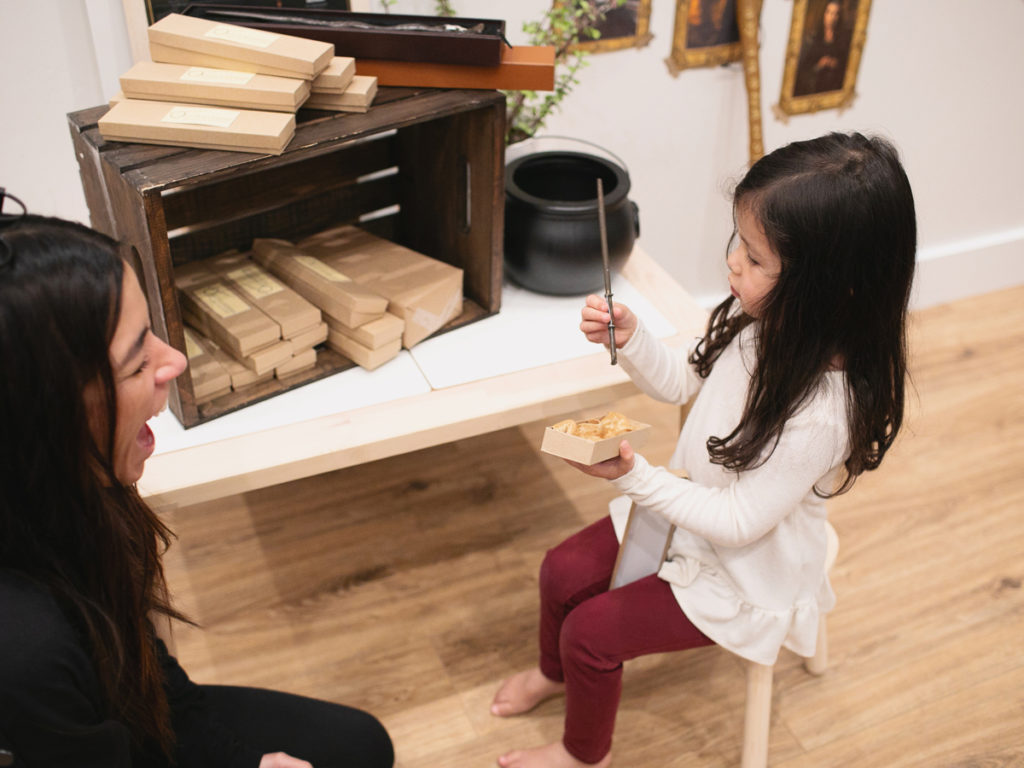
The best best best part about the Ollivanders wand shop was that Tilly played the part of Mr. Ollivander. But she called herself Mrs. Ollivander. She brought each guest over to the shop, picked out a wand and examined it to see if the wand suited the witch or wizard. She would say things like, “Hmm… this one is 8 inches long and made of somemadeupword…” and the guests loved it.
I borrowed the crate from a friend and she also helped me make the amazing Ollivanders gold sign using her cricut machine. Man, that thing is cool. We printed out some random old portraits and movie scenes, put them into frames and washi-taped them to the wall.
Recap:
- Buy pre-made wands (Etsy)
- Purchase “wand boxes” (Amazon)
- Print Ollivanders sign
- I also bought a cheap piece of gold velvet from JoAnn’s to put inside the wand boxes instead of the white thing that comes inside
- Practice wand show!
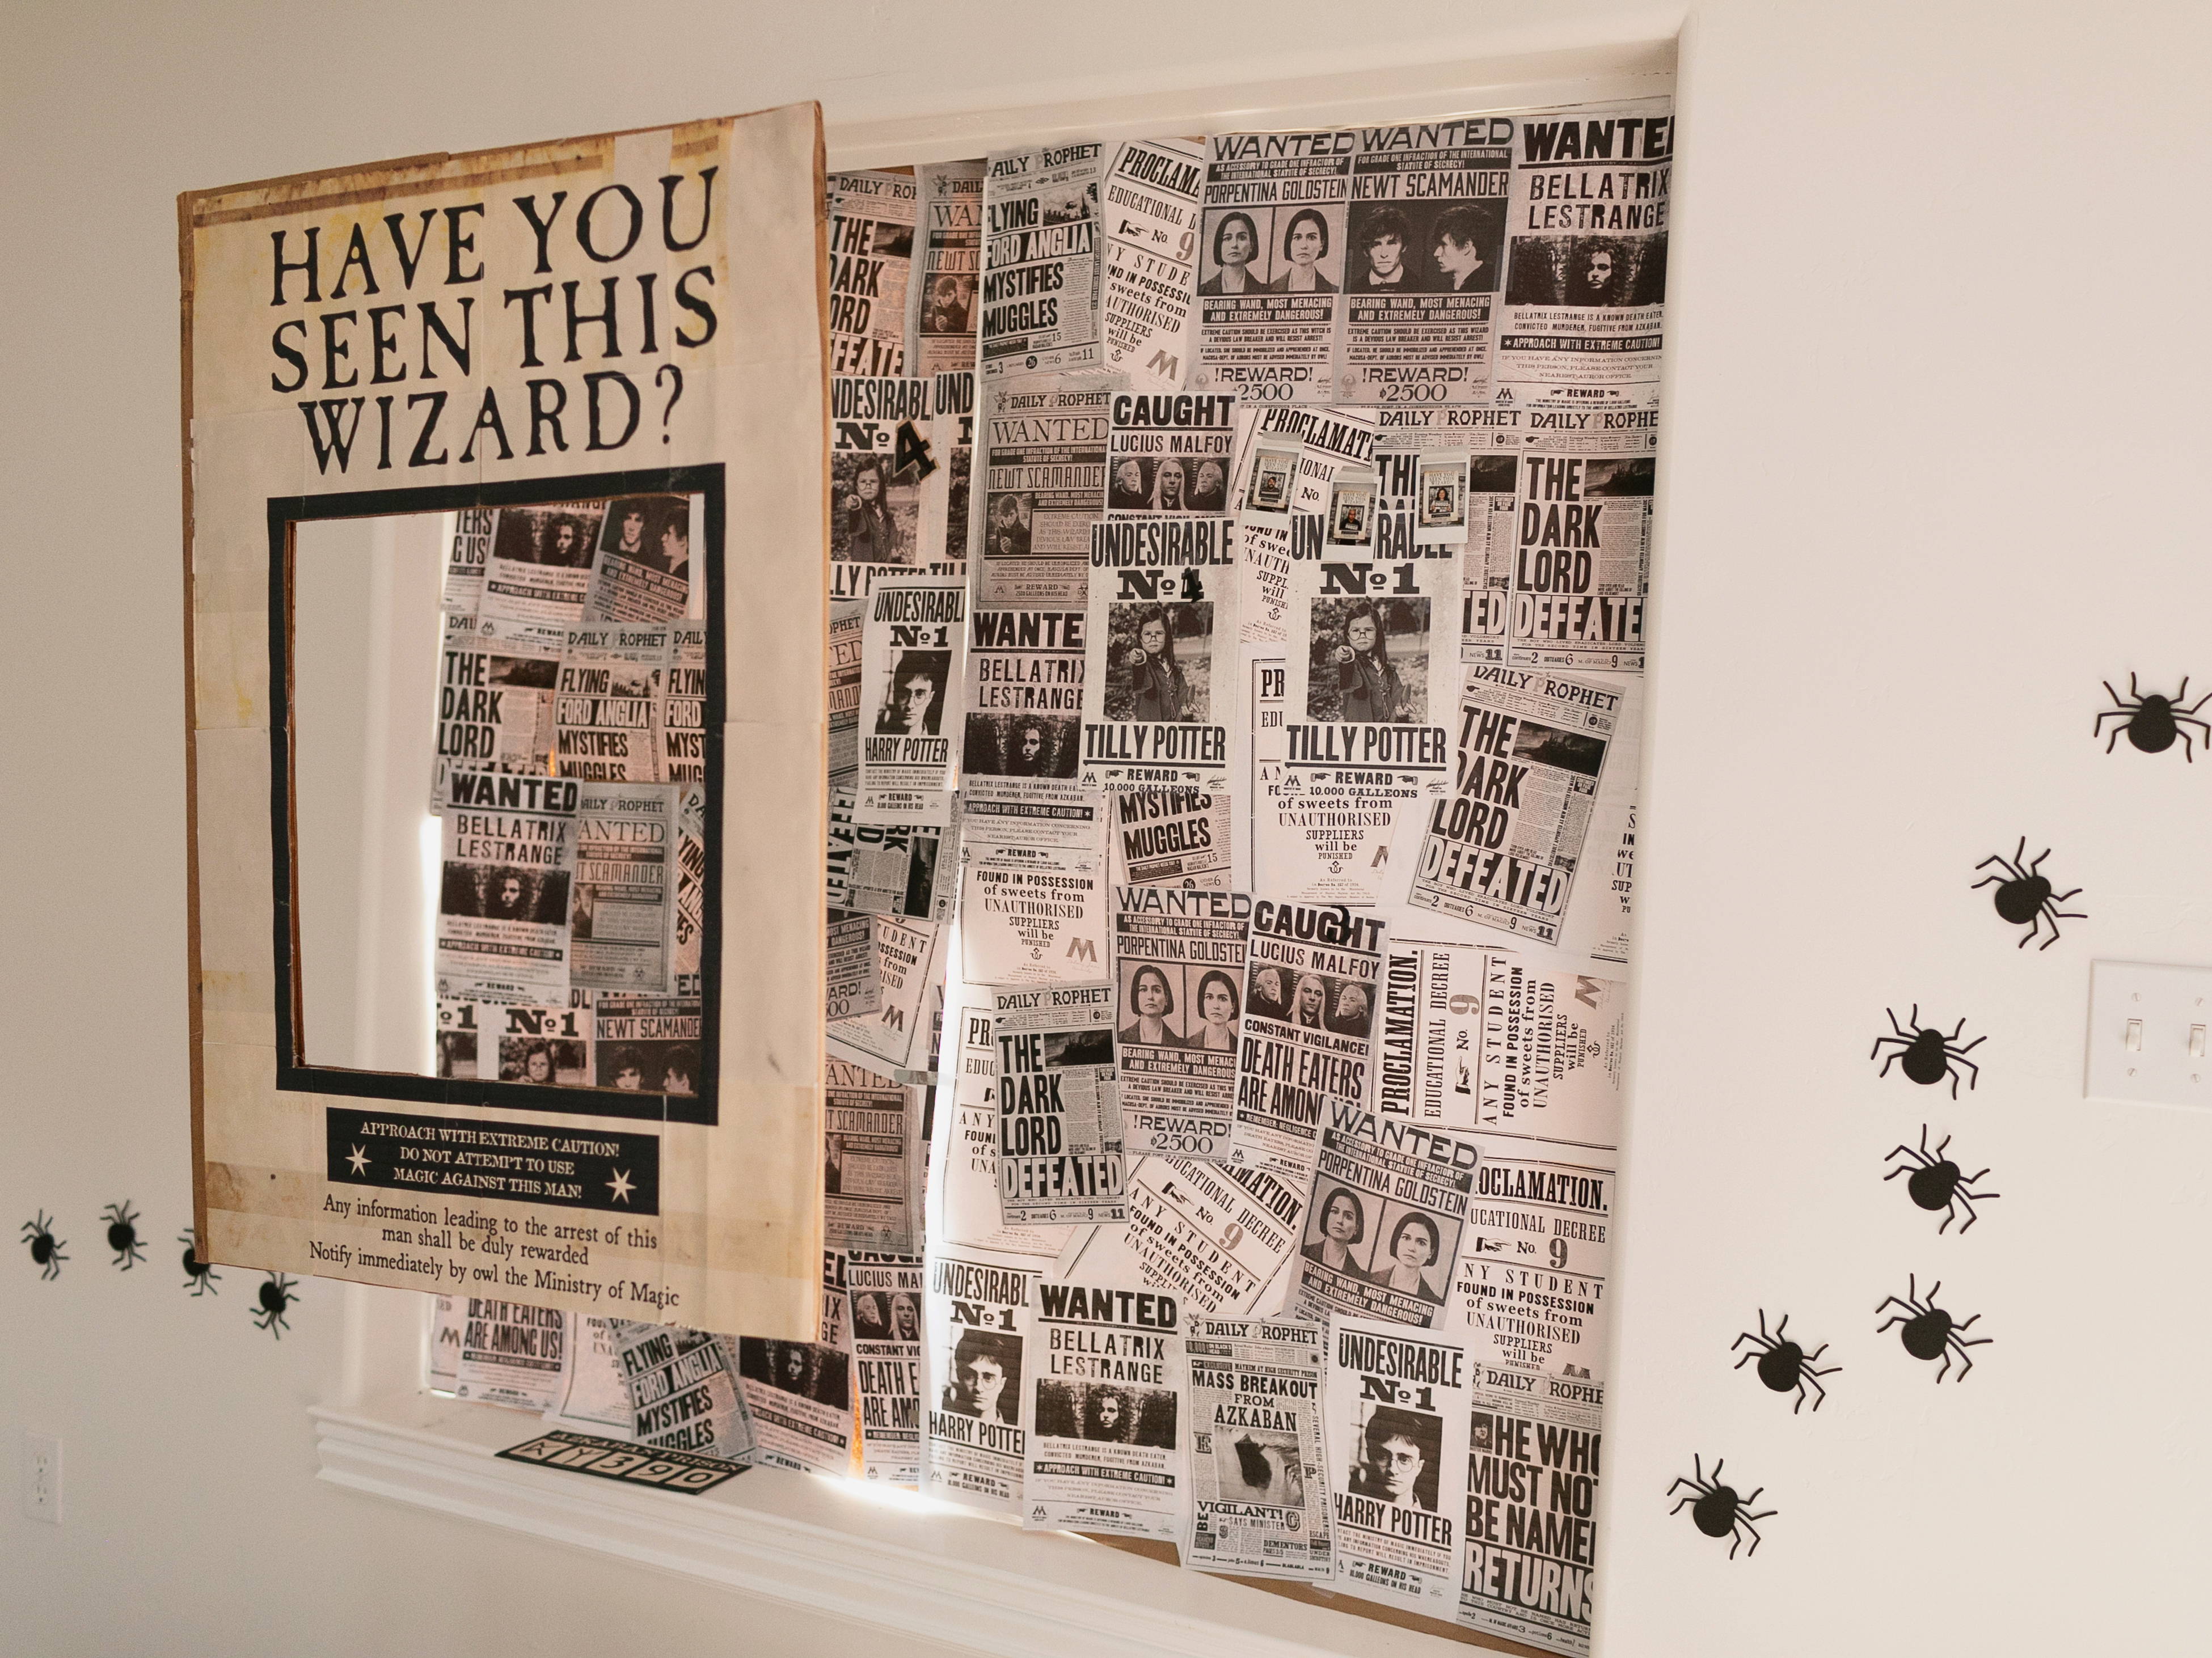
Azkaban Wizard Photo Booth Sign & Backdrop
This backdrop was comprised of black and white Daily Prophet covers, plus one that I customized using Tilly’s halloween photo.
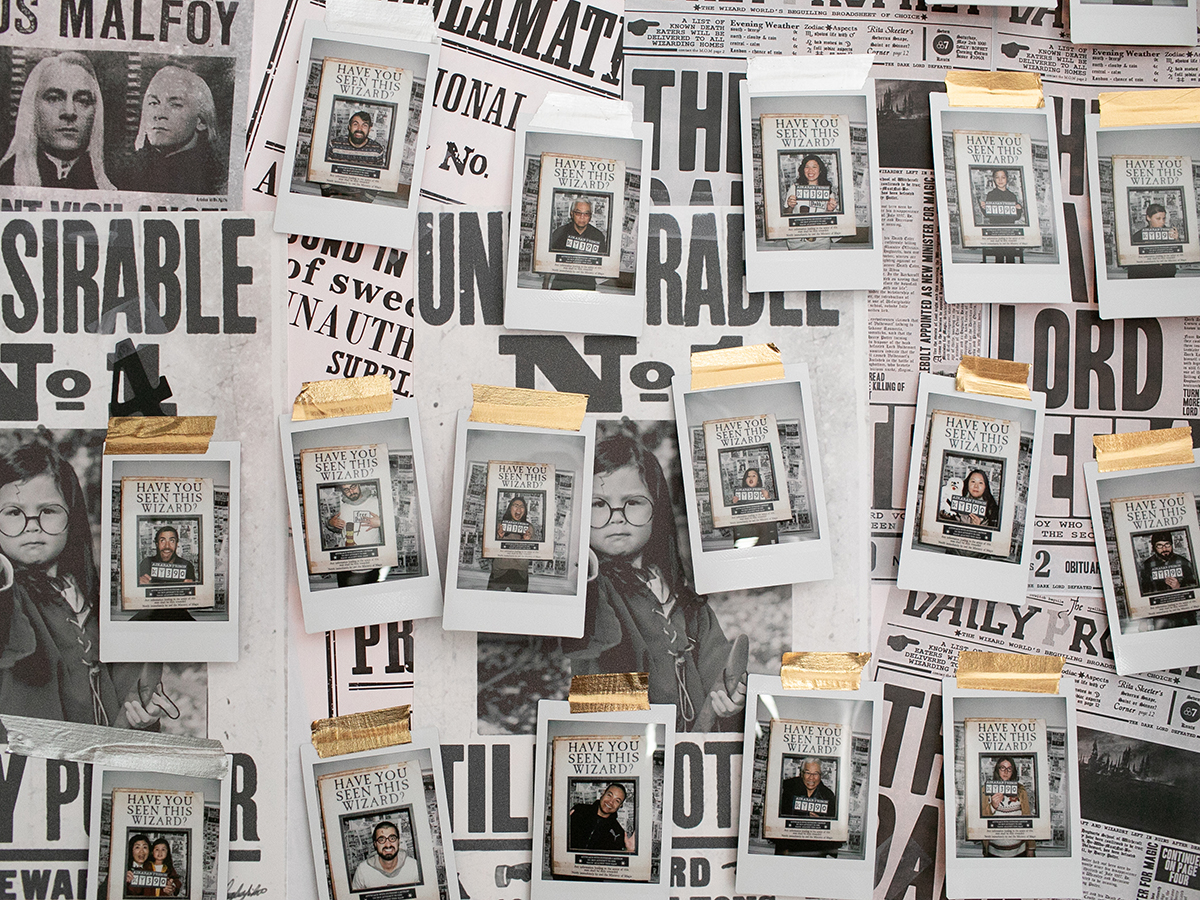
The photo booth part of it was a 17-page printable PDF that I cut and glued to a large piece of cardboard. We hung it from the ceiling with command hooks and fishing line. Then we took photos of all of the guests with my Instax camera and taped them to the backdrop.
Recap:
- Google Daily Prophet printables and find a laser printer to save on ink
- Save a large piece of cardboard (the print out was bigger than a foam poster board)
Banner
This is pretty simple. Find Harry Potter font and print out letters. Or, if you have an awesome friend with one of those cricut machines, ask them to help you print it out and save your precious letter fingers. String with twine and hang. I wish I wouldn’t have used silver washi tape but I ran out of time.
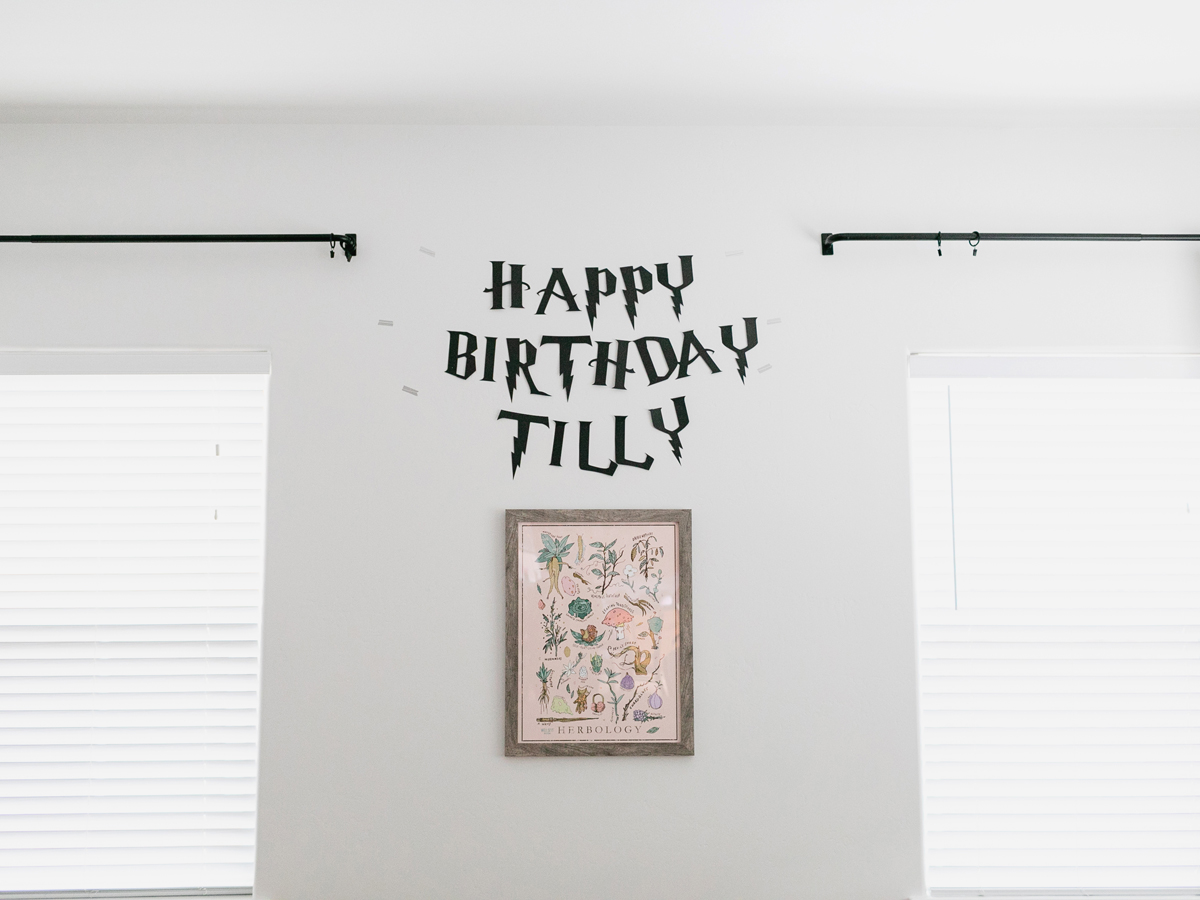
The herbology print is awesome. I actually purchased it as a gift for my sister’s home, but it ended up being delivered very late, so gave it to her at my house during the party and then used it as decoration. If you’re wondering why I have empty curtain rings on the rod, it’s because I originally had the Platform 9 3/4 backdrop hanging in this spot but moved it because I didn’t like it.
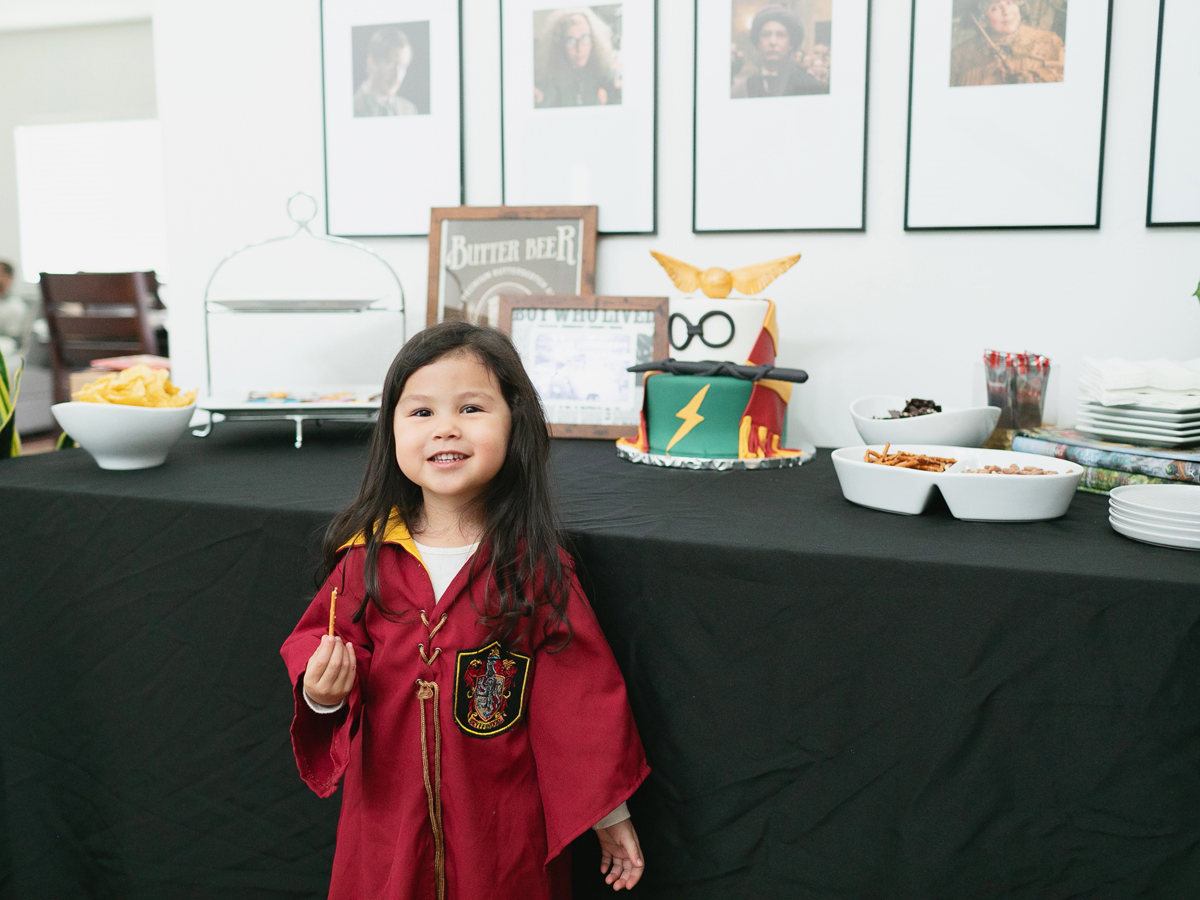
Professor Gallery Wall
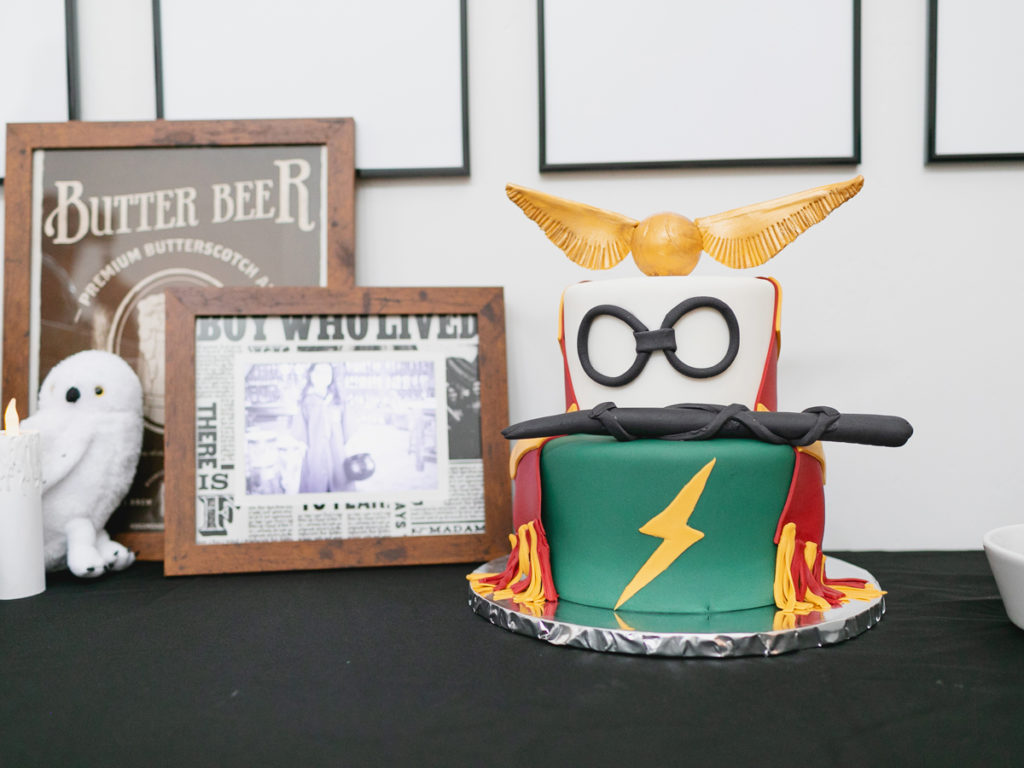
I swapped out the photos in our gallery wall with photos of Hogwarts professors. I also found random art that was sized to the frames I already had around our home (see Butter Beer print) and replaced them throughout.
Here’s a wider shot of the table setting.
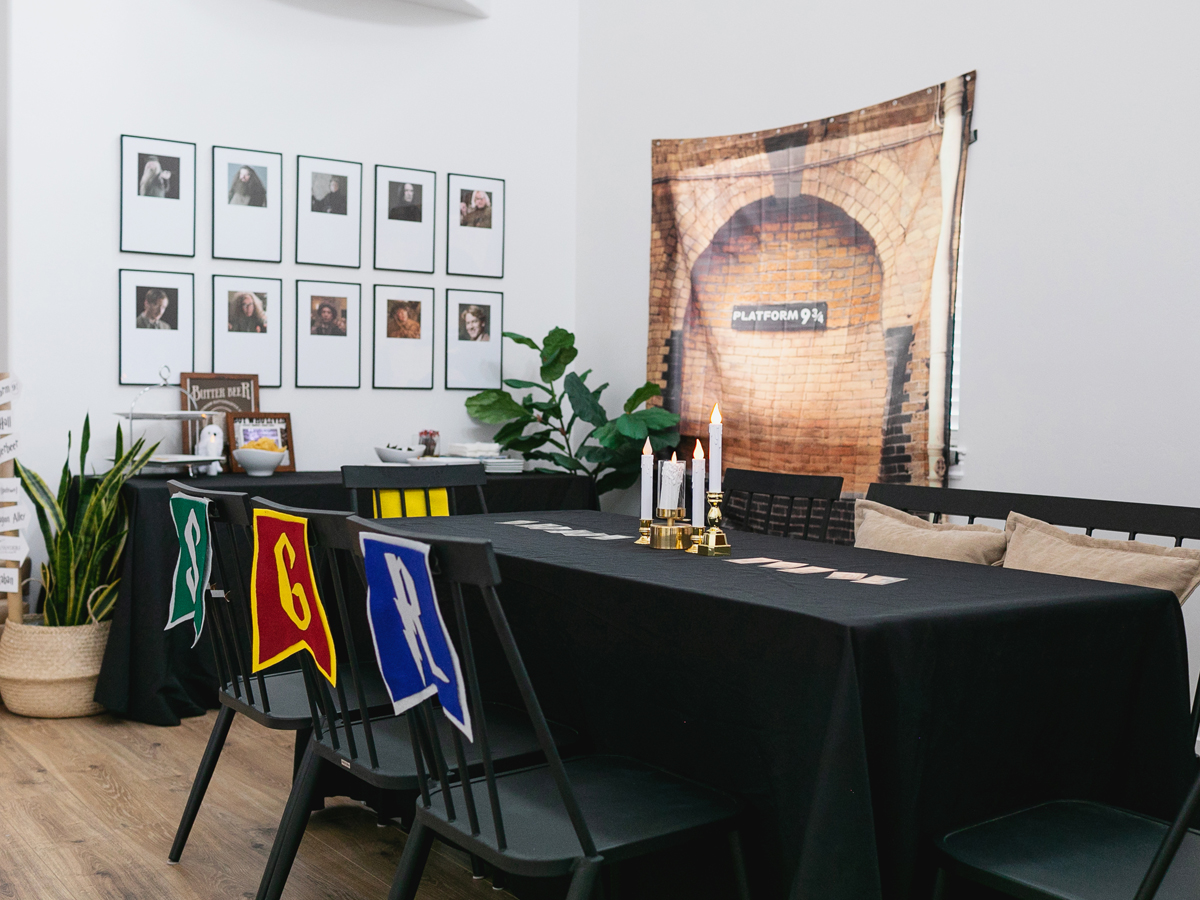
Recap:
- Platform 9 3/4 shower curtain (Amazon)
- Black rectangular tablecloths (Amazon)
- Gold candle holders (IKEA)
- Chairs (Target)
Winged Keys (Flying Keys) & Hogwarts Letters
For the flying keys, I ordered these vintage keys on Amazon and then printed the wings on vellum paper to make them look a little more authentic. We stringed them with fishing line and command hooks on the ceiling.
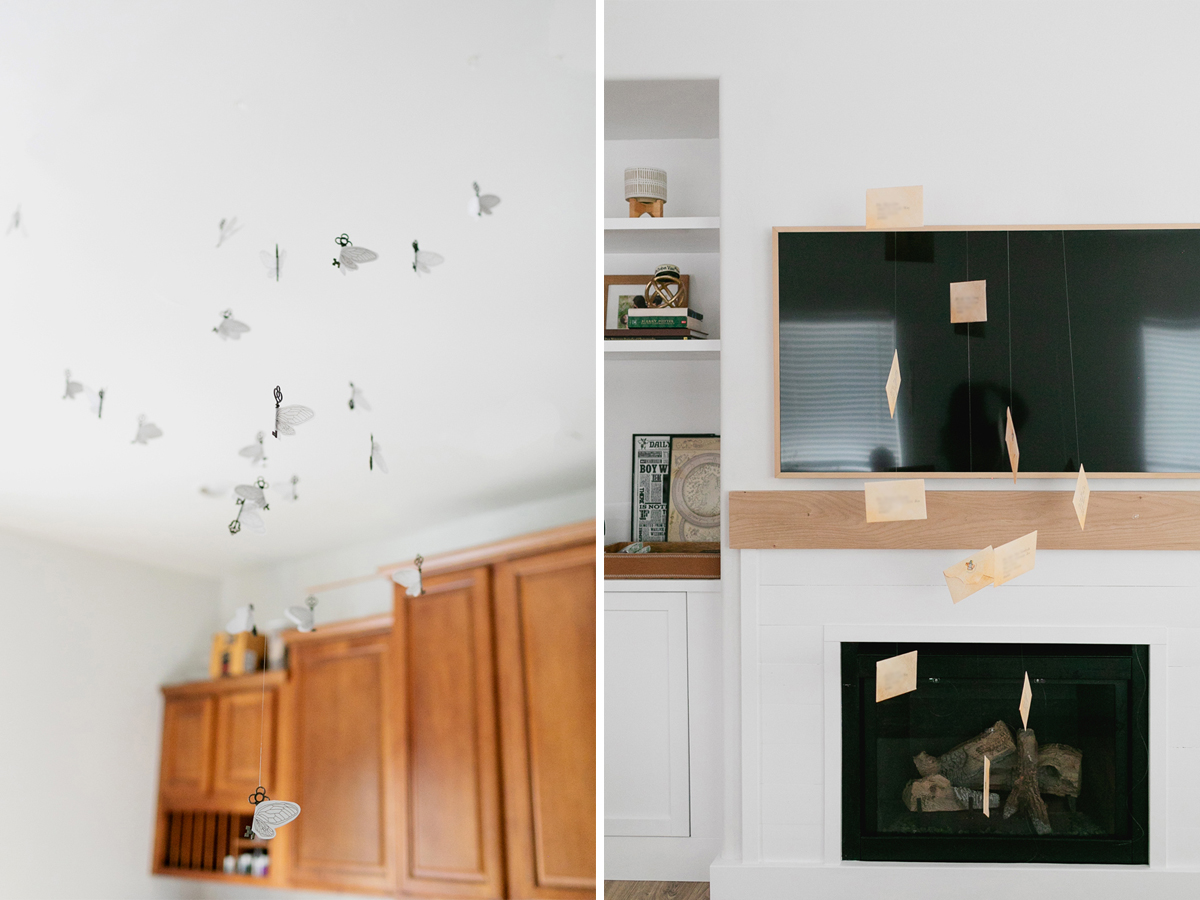
For the Hogwarts letters, I had actually printed all of these with the intention that they would be the party invitations, but I didn’t like how they turned out. So, I ended up using them for the letters coming out of the fireplace. Tilly told me, “Mom, you forgot the red seal.” Yes, yes I did.
Recap:
- Vintage Keys (Amazon)
- Print wings on vellum paper
- Command hooks and fishing line to hang
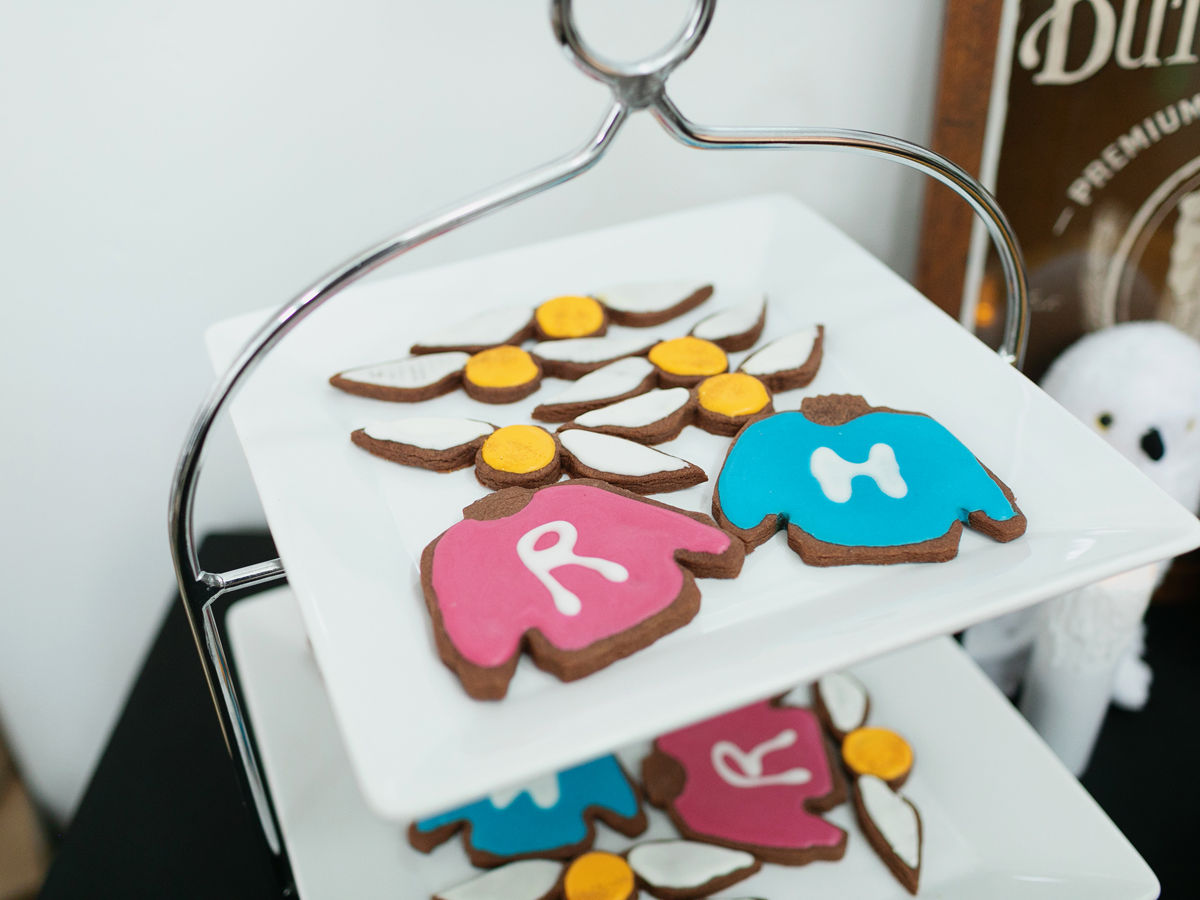
Chocolate Sugar Cookies
I ordered a golden snitch cookie cutter on Etsy and tried my hand at making some themed cookies for the party using the best chocolate sugar cookie recipe ever. I also found the sweater cookie cutter from Michael’s on clearance. Those sweaters definitely didn’t turn out that well since I got lazy with the lettering. Tilly asked me if my “H” was an “E”…
Recap:
- Chocolate Sugar Cookie recipe (LilaLoa)
- Golden Snitch cookie cutter (Etsy)
Other details I forgot to photograph
There was a lot of forgetting on the day of the party.
- I forgot to photograph the awesome chocolate frog trading cards that I printed of each of the guests! I laminated them and we thought it would be a good idea to use them as coasters so we could identify people’s drinks.
- We also made custom etched beer mugs for butter beer consumption with the number 4 on it in Harry Potter font. This was Brandon’s idea. We got the mugs for $1.99 from IKEA, the etching cream from Michael’s (don’t forget to use the 50% off coupon for it), and our friend helped us print the stencils. They turned out great and each family got to take one home.
- I printed Platform 9 3/4 tickets from King’s Cross and also had them laminated so Tilly could play with them after the party. I sprinkled them in the centers of the tables.
- I ordered these footprint decals for the floor to look like the Marauder’s Map.
- In the bathroom, I printed a photo of Moaning Myrtle on vellum paper and taped her just above the toilet. I couldn’t find my red lipstick to mark the opening of the Chamber of Secrets on the mirror.
- On our built-in shelves, I swapped out all of our books for the Harry Potter books, and wrapped others in paper bags so they looked old. I also framed Tilly’s Hogsmeade/Diagon Alley map from her wand and a poster of wand motions from her Harry Potter Kano Coding Kit she got for Christmas.
- For dinner, we ordered food pastys from our local Cornish Pasty and served chicken pot pies, bangers & mash, and a veggie tikka masala. Super yum and it fit well with our theme.
- And finally, all of our guests got a pair of HP glasses.
Thank you
It was a fun night with our closest friends and family. Including Tilly, there were 3 kids total, and the others were 8 and 12. And it was perfect. After gatherings like this, I am always reminded of how much we are loved.
Many thanks to my family members that helped me prep and clean for the party, as well as host. I couldn’t have done it without you.
2 Comments
Leave A Comment
Related Posts

Hi, I’m Tiffany!
I’m so glad you’re here. I hope you’ll see this space as a source of inspiration and encouragement to take the first step in making your home a place you want to be, wherever that may be.
You can expect to find approachable DIY projects and tutorials, opinions on home design, and all the fun stuff that comes up in-between.

OMG, you are the coolest mom ever! I love all the details you put into this HP party!
Hi, love everything you did! Do you remember where you found the printable photo booth?